Intel Laptop Graphics Driver Upgrade Pros Cons

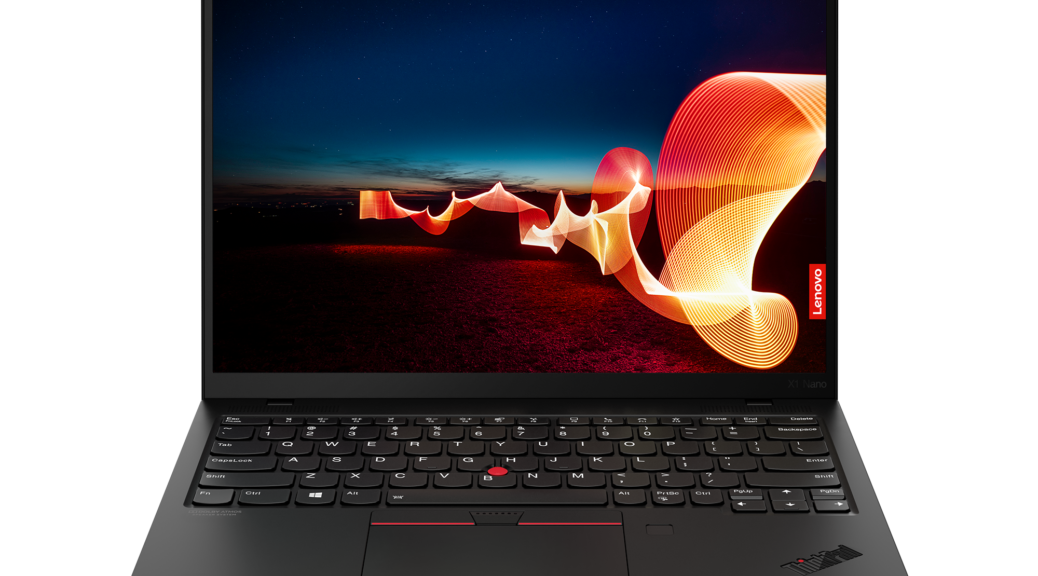
Here’s an interesting topic for Windows 10 power users and admins. As stated in this post’s title, there are plusses and minuses regarding Intel’s new — and frequently updated — DCH drivers. Intel graphics drivers show up on laptops with Intel CPUs. That’s simply because a graphics component is built into most such processors, particularly mobile ones. Indeed, some laptops have additional external (usually PCIe-attached) GPUs. But any of those with Intel CPUs can switch back and forth between the on-chip GPU and that external GPU . Thus it’s important to ponder Intel laptop graphics driver upgrade pros cons — particularly when choosing and upgrading drivers.

Understanding DCH Helps Unravel Intel Laptop Graphics Driver Upgrade Pros Cons

DCH stands for Declarative Componentized Hardware supported apps. This is the new, forward-looking architecture for Windows Drivers. It’s explained in a Microsoft Docs article entitled DCH Design Principles and Best Practices. There we find an explanation for each of the acronym’s letters (I quote this material verbatim):

  • Declarative (D): Install the driver by using only declarative INF directives. Don’t include co-installers or RegisterDll functions.
  • Componentized (C): Edition-specific, OEM-specific, and optional customizations to the driver are separate from the base driver package. As a result, the base driver, which provides only core device functionality, can be targeted, flighted, and serviced independently from the customizations.
  • Hardware Support App (H): Any user interface (UI) component associated with a Windows Driver must be packaged as a Hardware Support App (HSA) or preinstalled on the OEM device. An HSA is an optional device-specific app that’s paired with a driver. The application can be a Universal Windows Platform (UWP) or Desktop Bridge app. You must distribute and update an HSA through the Microsoft Store. For details, see Hardware Support App (HSA): Steps for driver developers and Hardware Support App (HSA): Steps for app developers.

Componentization is Good!

To me, the componentized piece makes the DCH driver both interesting and relevant to laptop owners. Basically, it means base driver packages from the device maker are OK — Intel, in this case. That’s because customizations from an OEM or laptop maker can slipstream onto the base level driver. And it won’t affect the behavior or reliability of the graphics circuitry. Especially for those who use their laptops for gaming (where drivers matter quite a lot, and change pretty frequently) this is good news.

Case in Point: Intel’s November 6 igfx_win10_100.8935.exe Driver Release

Late last week, Intel dropped the afore-mentioned new DCH drivers release. The release package is available at Intel Graphics – Windows 10 DCH Drivers web page. This new release covers Windows 10 versions 1709 through 20H2. It also comes in both ZIP (direct access to driver files and components) and .exe (self-installing formats). Those who use the Intel Driver & Support Assistant are already familiar with the .exe versions of the company’s drivers, because those are this tool’s default versions. If you look at the Release Notes for this …8935 version you’ll see that all of the key issues fixed call out computer games (Crysis Remastered, PGA Tour 2K21, Doom Eternal, World of Warcraft, Shadowlands, Red Redemption 2, and so forth). Hence, my earlier point about gamers as primary beneficiaries for such updates.

Other admins or owners with Intel GPU circuitry on their laptops can relax about updating laptop drivers on major-branch laptops (Dell, Lenovo, HP, and so forth). Why? Because the DCH architecture means that Intel’s base level driver is more or less guaranteed to “play nice” with any such customizations as the OEM/mfgr may add for its own laptops. In the past, I’d relied on the various vendor update services (e.g. Dell SupportAssist, Lenovo Vantage, HP Support Assistant, and so forth) as the sole source for laptop graphics drivers.

I’ve been experimenting with using Intel DHC drivers plus the occasional OEM/mfgr graphic driver on four Lenovo PCs for the past six months now. My experience has been almost completely positive, with only one install issue on a Lenovo X380 Yoga last month, easily remedied by a manual install after downloading the driver file from the Lenovo Support pages.

DCH Graphics Drivers: Worth Trying Out

Looks like DCH Intel graphics drivers are pretty safe, and ready for day-to-day laptop use. Don’t take my word for it, though. Conduct your own experiments on test machines (as I did) and see how things go. I’m reasonably certain of positive results. If not, I hope you’ll tell me all about it (comment on this post). Cheers!

Facebooklinkedin
Facebooklinkedin

Terrible Trials of Web Security

I run another Web site with a friend and colleague at Win10.Guru. Right now, the site is (mostly) inaccessible because we’ve fallen foul of Google’s Safe Site tools. Over the past couple months we’ve been hammered, dealing with terrible trials of web security. If you visit our site right now, you’ll get this dire warning:

Terrible Trials of Web Security

This is NOT an inviting entry into the website. It is calculated to scare people away.
[Click on image for full-sized view.]

If you click on the Details button, a link reads “visit this unsafe site.” Again, this is intended to discourage visitors. But because of Google’s security assessment, it’s the only way into our site right now using Chrome. Edge returns a 503 Service Unavailable Error, and Firefox times out. For the nonce, Win10.Guru is off the air. My partner and I are freaking out, trying to get this fixed. But this is only the latest installment in a litany of horrors we’ve endured lately.

What Makes for Terrible Trials of Web Security?

To start with, we faced multiple daily page injection attacks. Hackers were redirecting visitors to our website to third-party clickbait sites. (Presumably, because they could get paid for such clicks.) Some illicit redirect links also included malware, phishing scams, and other unsavory stuff. Thing is: hackers were also able to access and change the master permissions file for the site itself. This is, of course, the very special file named .htaccess that controls permissions and configuration of the file structure for the site. According to our hosting service, this is supposedly  impossible. Yet we demonstrated that our file structure changed over time because malicious actors were at work.

Once we’d shown them what was what, the provider granted us their high-end security software as a wrapper around our site. Presto! Our problems went away. But the trial period is over now, and it costs over US$300 a year for that added security on the site. My partner refuses the outlay for perfectly valid financial reasons. That said, I’m of the opinion that such a sum is better spent than having the site mostly inaccessible. Not to mention the days and weeks he’s spent trying to keep things cleaned up.

The Devil Really Is in the Details…

The Details button also lets users “report a detection problem.” My partner and I have been doing that multiple times daily. We’ve been asking our network to do likewise, hoping that a chorus might be more convincing than a couple of lone voices in the wilderness. If it’s not too much to ask, please click the preceding link and attest to the lack of ill will or intent on our part for https://win10.guru. It might make a difference.

But according to what I’m learning it takes 7-10 days for Google to review and change such rankings. I’m also trying to purchase additional security coverage on my own recognizance for the site, and keep getting an error message when I try to make payment. Gosh! It’s been one of those days, I’m afraid. Here’s hoping we’ll get this fixed soon. All I can say right now is “Ouch!”

[Note Added July 18, 2020] Crisis Averted!

Yesterday, July 17, working with the security team at GoDaddy subsidiary Sucuri.net (with whom we’ve obtained a subscription to their website security scannning and protection services) we finally got all the obstacles cleared away and a clean bill of health for the site. You can check its status any time through this URL: https://sitecheck.sucuri.net/results/win10.guru. One of their third-level tech support folks was finally able to convince Google Safe Browsing that our site was neither “deceptive” nor were we foisting any phishing exploits. I guess that means it helps to have a trusted third party vouch for your site, or something. At any rate, all the dire warn-offs are gone and the site is behaving normally. Thank goodness!

Facebooklinkedin
Facebooklinkedin

{WED} Certain Legit Tools Generate Windows Defender False Positives

The other day, I had Windows Defender scan all of my disk drives. This action artificially provoked a performance alert on one of my Lenovo laptops. While it was running it reported 8 malware items on my D: (Data) drive. Please note: all of these are categorized as “HackTool” items. MS correlates them with specific malware items and known exploits.  After overcoming my initial alarm, I looked where those items were found. All resided under parent directory D:\NirLauncher. Immediately, certain things became clear. Every one of the suspect elements is a password sniffing and capture tool in Nir Sofer’s collection of Windows Utilities. In fact, he’s got a category within that collection of 200-plus tools called “Password Recovery Utilities,” which comprises 20 items (see below). All of them popped up here. Aha!

Certain Legit Tools Generate Windows Defender False Positives .NirSoftPwdUtils

Once it found these items, Defender forced me to have it ignore these threats to retain access to them.
[Click image for Full-Sized View.]

If Certain Legit Tools Generate Windows Defender False Positives, Then What?

Once Defender finds something suspect, you must remove that item from its clutches before you can use it again. That meant I had to open Windows Security → Virus & threat protection, then click on each item it found. Next, I clicked “See details,” and then explicitly told it to ignore each threat one at a time.

As you might expect, there’s a better way to deal with this kind of thing if you prepare in advance. If you click “Manage settings” inside the Virus & Threat protection pane, you’ll find an Exclusions setting right below Controlled folder access. Click “Add or remove exclusions” and you can instruct Defender to bypass specific files or folders. I simply added an exclusion for the D:\NirLauncher folder and it will now be ignored in future complete system scans (the Quick Scan option only accesses the Windows C: drive anyway).

Pre-emption Beats Reaction Whenever Possible

Currently, I use several utilities that Defender flags as threats. In addition to NirSoft’s password utilities (which NirLauncher includes amidst its collection of tools), I’ve had to exclude Gabe Topala’s System Information for Windows (siw.exe). In days of yore, before I started using Superfly’s ShowKeyPlus, I used a tool called Magic Jelly Bean Finder that likewise got flagged. I excluded it, too.

The moral of the story is this: if you’re planning to install (or copy standalone) tools that find passwords or keys, chances are pretty good that Defender will flag them as Hacktools. If you take steps to exclude them in advance, you can avoid having to “Ignore” them later on. But please: make sure you run any such software through VirusTotal to be doubly darn sure it’s safe before allowing it to take up residence on your PC. Such tools can indeed be used for malefic purposes, as well as legitimate ones. Be safe out there!

Facebooklinkedin
Facebooklinkedin

{WED} Old MDiskClean.exe Throws System.InvalidOperationException Error

You know, there are more benefits to keeping software up-to-date than just avoiding security vulnerabilities. They even go beyond the pleasures of good housekeeping. When I couldn’t run Albacore’s excellent Disk Cleanup reaplacement (mdiskclean.exe) on my Lenovo X220 Tablet this morning, I started troubleshooting. Along the way, I found it ran just fine on my X380 Yoga (my other Fast Ring test machine). “Hmmm,” I said to myself, “let me compare the file dates.” And sure enough, I was running an April 2019 version of the project. However, the X380 was running a newer, May 2019 version. A quick online check confirmed that May 2019 is the latest and greatest version. Thus, I concluded that old MDiskClean.exe throws System.InvalidOperationException error. Those details appear in the lead-in graphic above.

If Old MDiskClean.exe Throws System.InvalidOperationException Error Then Update!

Indeed, my next move was to grab a copy of the current version. I replaced the old, outdated April 2019 version with the current May 2019 version. Then I ran the program again. This time, it worked like a charm. There was nary a trace in the Reliability Monitor of its passing, either. Sometimes, the easy fix is also the right fix. I’m glad to report that this is one of those times. The problem is solved.

Old MDiskClean.exe Throws System.InvalidOperationException Error.working

With the current (05.2019) version running and working, mdiskclean.exe looks exactly like Disk Cleanup, except it lets you show all available selections at the same time.

Disk Cleanup limits the display area to 5 items, so you have to scroll like mad to get through a big list.

If you should run into application level errors in Reliability Monitor, it’s smart to check the application itself first before taking troubleshooting further. In this case, that was as far as I needed to go. Had that not helped, my next move would have been to run the system file checker (sfc /scannow) and to perform a DISM componentstore health check (dism /online /cleanup-image /checkhealth). Normally, that would be as far as one would need to go at the application level. Beyond that, though, comes an in-place upgrade repair install (TenForums Tutorial) and finally a clean (re)install (TenForums tutorial). Glad I didn’t have to break out any of that heavy artillery. Cheers!

Facebooklinkedin
Facebooklinkedin

{WED} SP3 Dock USB Weirdness Well-Documented

I’ve still got a Surface Pro 3 kicking around. It includes an i7-4650U CPU, which the Intel Ark tells me was introduced in Q3’2013. When I bought that machine, I also bought the Surface Pro Dock, which granted me a hardwired Ethernet port, 2 each USB 2.0 and 3.0 ports, and a charging cradle. But it hasn’t been problem free. In fact, it’s kinda flaky. I keep a USB 3 drive plugged into the dock for backups and extra storage. But sometimes, the drive “goes away.” It simply drops off the PC. If I unplug the device, then plug it back in, or cycle the power, sometimes the device will reappear, and sometimes it won’t. This works on my external 2TB HDD, but not on my mSATA drives in their Sabrent enclosure. Researching things just now, I see SP3 Dock USB weirdness well-documented at Microsoft Answers and elsewhere. Sigh.

SP3 Dock USB Weirdness Well-Documented
Surface Pro 3 dock

The SP3 Dock has GbE, 2x USB3.0 & USB2.0 ports, plus Mini DisplayPort & audio in/out minijacks.

If SP3 Dock USB Weirdness Well-Documented, Then What?

Alas, when you’ve got known problems with hardware that’s this old there’s not much you can do about it. Checked to make sure I’ve got all the latest/current drivers and firmware (I do). Looked to third-party sources to see if any might address such issues (can’t find anything). Worked through the Dock Troubleshooting advice from MS Support, and there’s no relief there, either. Sigh again.

Now, I have to decide if I want to live with this or get rid of the device. I’m torn. I’d like to fix it, but I’m unable to work my way to a solution. I’ve been thinking about buying a Surface Book 3 when they come out, later this year (or perhaps next year). So there’s no need to be hasty. But it really bugs me when things don’t work like they should.

I’m open to suggestions. Anybody got any? If so, please comment here, or send me an email at ed at edtittel dot com (be sure to put Surface Pro 3 Dock in your subject line too, please).

Facebooklinkedin
Facebooklinkedin

{WED} Little Gotchas from Tales of Two RelMons

I’m a big fan of Reliability Monitor. This is actually a strange and useful offshoot from Performance Monitor (aka perfmon or perfmon.exe). As I will explain, little gotchas from tales of two Relmons actually shed more light on system health than a straight-line perfect 10 rating across the board.

That’s what makes the tale of the second relmon (the first appears at the head of this story) more informative, in fact. Interestingly, type perfmon /rel into the search or run boxes for a quick launch method. Reliability Monitor (RelMon) does a good job of tracking and reporting on errors that occur in day-to-day Windows operation.

Over the years, I’ve learned to rely on RelMon (a) to check on the general health of my systems, and (b) as a place to look when noticeable errors or crashes occur. Those red Xs provide a strong visual clue when something isn’t right. Also the details RelMon delivers to back things up are helpful. They often provide important clues in deciding if a problem needs addressing, and if so, how one might start down that path. Here’s the second of the two RelMon outputs I’d like to present today:

Little Gotchas from Tales of Two RelMons.x380

This report from my production X380 Yoga, shows minor niggling errors. Most come straight from Windows 10 components or apps, in fact.
[Click image for full-sized view.]

Little Gotchas from Tales of Two RelMons Show Perfection Is Over-Rated

My first instinct when looking at “red X” detail in RelMon is to see what kind of software or other system component threw the error. Most of them, as with the preceding screencap, appear in the “Application failures” line. That means they report some kind of application or app error.

In general, I’m a lot less worried about those than I am about Windows failures (line 2) or Miscellaneous failures (line 3). That said, let’s look at what caused a nearly 3 point dip on March 27. Two errors are reported. One is a Lenovo software component (probably associated with Lenovo Vantage, which I use for driver and BIOS updates). The other is the Settings application itself. The Lenovo item shows up as an Explorer shell extension: the problem event name BEX64 is quite familiar. In the other error, the Settings app stopped communicating with Windows and was closed. In other word, Settings hung for one reason or another. No big deal: happens sometimes, but not often. An explorer restart fixed this: read all about it at Win10.Guru.

When RelMon Spurs Me to Act

In contrast, let me recite a recent list of items from RelMon that have spurred action and repair maneuvers:

  • A repeated driver crash on iahStorA.sys (part of Intel’s Rapid Storage Technology) helped me decide to uninstall RST on that PC. It’s required for RAID, which I don’t use.
  • When CCleaner started throwing errors on a couple of PCs, it too got uninstalled. The makers have changed to a “more friendly” UI, and I don’t like it much anymore.
  • A long series of MoAppCrash errros from Outlook led me to the Microsoft Support and Recovery Assistant. It fixed my problem and is a valuable addition to my Windows toolkit.
  • When the Skype UWP app started crashing every two-three days, I used PowerShell to remove it. Never used it, either (plenty of laptops with microphones and webcams for online action).

Most of the time, when a RelMon error calls for action, you’ll be able to figure that out quickly. Sometimes, if it’s an essential Microsoft component, all you can do is report the error via Feedback Hub, and hope for a speedy patch or fix. But with time and experience, these things will sort themselves out. If something you don’t need, use, or perhaps even want causes a problem, it may just be best to uninstall or remove it.

Facebooklinkedin
Facebooklinkedin

{WED} KB4554364 Illustrates MS Catalog Update Install

One week ago today (March 30), MS released an optional update KB4554364 through the Microsoft Update Catalog. This update is discretionary (though it will probably get rolled up into the next Update Tuesday on April 14). The update was released specifically to address reported issues with certain VPNs and with Internet connectivity problems for certain applications. If one has no such problems, it’s not necessary to install KB4554364. I just went ahead and did it anyway on one of my PCs. Why? Because the process of installing KB455364 illustrates MS Catalog Update install actions and behavior. That’s the subject for today’s blog post, in fact.

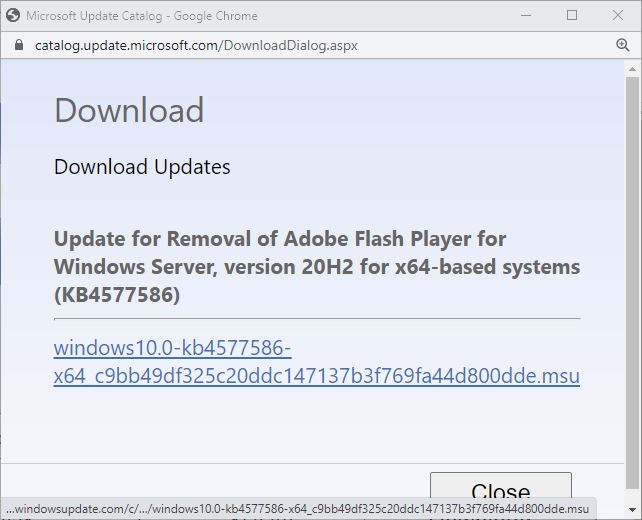
To begin the process, one must download the update from the MS Update Catalog. The entry for the 64-bit 1909 version of this item provides the lead-in illustration for this story. If you click the download link at the far right, you’ll be prompted to confirm that download in a pop-up window. Note: this download is named windows10.0-kb4554364-x64_0037f0861430f0d9a5cea807b46735c697a82d0c.msu. The file extension at the end of the file name — .msu — indicates it will call the Windows Update Standalone Installer to install itself. Careful inspection of the filename shows it identifies numerous aspects of the update involved:

  • windows10.0 identifies the operating system target as Windows 10
  • kb4554364 identifies the governing knowledge base article that describes this particular update
  • x64 identifies that the update is for 64-bit OSes
  • the long string of digits is a globally unique identifier (GUID) for this particular self-installing update file
  • the .msu file extension, as already mentioned, indicates that this file calls on the Windows Update Standalone Installer to apply the update(s) it contains. Some updates come in the form of cabinet (.cab) files. I’ll explain how to install those in the concluding section of this blog post

Step 2: KB4554364 Illustrates MS Catalog Update Install with Installer Start-up

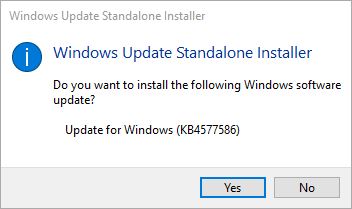
To launch the self-installing update file, double-click it in File Explorer, or right-click and select “Open” from the pop-up menu. This launches the Windows Update Standalone Installer, depicted in the following screencap:

When the Windows Update Standalone Installer starts up, it asks you to confirm installation of the targeted update (KB4554364, in this case). Click “Yes” to fire off the update process.

Step 3: KB4554364 Illustrates MS Catalog Update Install with Update Installation

First, a status window appears that indicates the Windows Update Standalone Installer has begun its work. As you can see it report that is is “Initializing installation…”

Once the intialization phase is complete, the Standalone Installer reports that it is installing the specified update (KB4554364)

This takes some time to complete, but eventually you’ll see a report that the update installation has completed

At this point, the update won’t take effect until the host PC is restarted. Thus, you have the option of forcing an immediate restart (click the “Restart now” button). OTOH, if you have unsaved or unfinished work on that system, or aren’t yet ready to restart, click the “Close” button and keep on computing. You can manually restart later at a more convenient time, or the PC will automatically restart when the next eligible restart time window comes around.

Installing Cabinet Files from the Windows Update Catalog

You can use the DISM command to install .cab files downloaded from the catalog. I find it easiest to shift right-click the download entry in File Explorer, then use the “Copy as path” option from the pop-up menu. As an example, I just did so with the .cab file named "C:\ProgramData\Package Cache\{CE83D0BD-418A-F3D1-D6CE-687E96D1EBD0}v10.1.17763.132\Installers\ff8dd5a961e46b5d05906ac4b7a5ba37.cab" purely for illustration. The proper DISM syntax is:

dism /online /add-package /packagepath:path-spec

Thus, for the preceding path specification, this becomes:

dism /online /add-package /packagepath:C:\ProgramData\Package Cache\{CE83D0BD-418A-F3D1-D6CE-687E96D1EBD0}v10.1.17763.132\Installers\ff8dd5a961e46b5d05906ac4b7a5ba37.cab

If the path specification includes any spaces, leave the quotation marks around that string. Otherwise, as you see above, it’s OK to remove them. This will apply an update-package in .cab format to your current, running Windows image.

Cheers!

Facebooklinkedin
Facebooklinkedin

{WED} Watch SSD TRIM Work Using Optimize-Volume PowerShell Cmdlet

I can’t help it. I *LOVE* this kind of stuff. I just learned that with the right syntax, you can watch SSD TRIM work using Optimize-Volume PowerShell cmdlet. The TRIM operation on an SSD erases data blocks that are no longer in use. Then, it returns them to the pool of available blocks for re-use.

According to SearchStorage.TechTarget “The use of TRIM can improve the performance of wriitng data to SSDs and contribute to longer SSD life.” I just counted. Of the 10 drives I have installed on my production PC, 4 of them contain SSDs. That said, one of them uses a dual RAID controller for 2xSamsung EVO 250 SSDs. I just learned it doesn’t support the TRIM operation (which is good to know, all by itself). All three of the others TRIM works just fine. (These are: my boot drive, my work data drive F: OCZ3-120 and my scratch drive G: ScratchSSD.) When I tried to TRIM the L: DualSam2 drive, here’s what the cmdlet told me:

Watch SSD TRIM Work Using Optimize-Volume PowerShell Cmdlet.notrim

Because the L: drive uses a Syba Dual mSATA to SATA RAID controller, it doesn’t support the TRIM operation. Sigh.
[Click image for full-sized view.]

How-to: Watch SSD TRIM Work Using Optimize-Volume PowerShell Cmdlet

The syntax for the cmdlet is pretty straightforward, but the good stuff appears in the output it produces in verbose mode. I’ll show an illustration first, then spell that syntax out in detail.

Watch SSD TRIM Work Using Optimize-Volume PowerShell Cmdlet.ReTrim

Unless you enable verbose mode, Optimize-Volume runs silently. The space trimmed value is usually within 1-2 GB of the free space value.
[Click image for full-sized view.]

The command syntax is
Optimize-Volume -DriveLetter X -ReTrim -Verbose

Substitute the actual drive letter you wish to optimize for the italic X in the syntax example, as I did for drive F in the preceding screencapture (e.g.Optimize-Volume -DriveLetter F -ReTrim -Verbose). It will also do a nice little progress bar animation while the operation is underway, too.

How-to: Use the -Analyze option to See if a Drive Needs Optimization

One more thing. If you replace the -ReTrim option with the -Analyze option for the Optimize-Volume cmdlet, you’ll get another set of verbose output that shows analysis activity and then reports on what it finds. Here’s what this command said for my unTRIMmable L: DualSam2 drive, just for grins:

Watch SSD TRIM Work Using Optimize-Volume PowerShell Cmdlet.Analyze

Unless you enable verbose mode, Optimize-Volume runs silently. The space trimmed value is usually within 1-2 GB of the free space value.
[Click image for full-sized view.]

The regularly scheduled drive optimization task occurs on Windows 10 machines weekly, so I didn’t expect to see anything out of the ordinary. That said, this is one of those cases where it’s more fun to watch the tool work than it is to know it’s working silently in the background. Enjoy!

Here’s a link to the MS DOCs documentation for the Optimize-Volume cmdlet. It has more info, examples, and covers other cmdlet capabilities I didn’t mention here.

Facebooklinkedin
Facebooklinkedin

{WED} Windows 10 Feature Experience Pack Returns

In the wake of the latest Fast Ring Insider Preview release — namely 19592.1001 — I noticed the return of some interesting language. If you click Settings → System → About, you can see it for yourself. In fact, it shows up under the “Windows Specifications” heading. (See the lead-in graphic.) Notice the bottom line is labeled “Experience.” And sure enough, that’s exactly where Windows 10 Feature Experience Pack returns, with a release numbered 120.7001.0.0. There’s no such line in the About info for the current 1909 release (nor for earlier 180x and 190x releases, either).

What’s Up When Windows 10 Feature Experience Pack Returns?

I did some fairly serious digging before I found this nomenclature. It lives in the Microsoft Hardware Dev Center. It’s covered in the “Available Features on Demand,” aka FOD, document. If you browse through the “Preinstalled FODs” items list, you’ll eventually discover this item. That’s because the list is long-ish and alphabetized. Thus, Windows Feature Experience Pack appears near its end. Here’s that entry’s text, verbatim:

Windows Feature Experience Pack

This Feature on Demand package includes features critical to Windows functionality. Do not remove this package.

Feature: Windows Feature Experience Pack

Capability Name: Windows.Client.ShellComponents~~~~0.0.1.0

Sample package name: Microsoft-Windows-UserExperience-Desktop-Package~31bf3856ad364e35~amd64~~.cab

Install size: 44.15MB

Satellites: No

Availability: Windows 10, version 2004 and later

As far as I can tell, this is mandatory in every Windows image. Thus, I’m not sure why MS has decided to call this out with its own line in the About/Windows Specifications info. But there it is, in black and white. Perhaps Microsoft will tell us more about this when another Feature Update is released. Notice the release info is version 2004 (aka 20H1). Maybe when the next Feature Update becomes generally available, we’ll learn more. In the meantime, it’s something new and relatively mysterious. Just the kind of thing that keeps life interesting, here in Windows World.

Facebooklinkedin
Facebooklinkedin

{WED} Check Out MS News Bar Beta

MS has released a new news app through the Microsoft Store. Those interested in a new look for the MS newsfeed will want to check out MS News Bar Beta release. It strikes me as an improvement over the default MSN news pages that come up in Edge. There’s also considerably more control over how (and where) this News Bar appears on your desktop, too. And it can be dismissed instantly with a click on its minimization control when you want to get it out of the way. My opinion: the News Bar is worth downloading and playing around with. It’s a useful tool during this current news-hungry pandemic WFH situation we now live in. Here’s a look at its Appearance pane, from the app’s Settings controls:

Check Out MS News Bar Beta.appearance

The News Bar’s Settings are simple and straightforward. Took me a couple of minutes to work through them, and decide what I liked.
[Click image for full-sized view.]

Download from Store to Check Out MS News Bar Beta

The app is readily available as a free download from the Microsoft Store. Or visit the Store, and search on “News Bar Beta.” It will pop right up. The download is just over 75 MB in size, and takes only a short while to download and install. As the preceding screen cap illlustrates, its controls are both simple and intuitive. After messing about a little while, I chose to position the News Bar at the top of my Primary (#1) Display in Image format. Here’s what a snippet of that looks like, from the left-hand-side of the screen. (It’s about 1/3 of the total display width, but I didn’t want to shrink the thumbnails down TOO much for reproduction here):

---------    ---------    ---------    ---------
| TN 1 |    | TN 2 |    | TN 3 |    | TN 4 | . . .
---------    ---------    ---------    ---------

You can switch between text and images views for newsfeed stories to see a representative photo (image) or a brief description (text).
[Click image for full-sized view.]

[Note added March 15, 2024] Upon receipt of a demand letter from a Canadian firm named PicRights International for US$1,334 for use of two of the five images previously shown above, I replaced those purely illustrative and news reporting images with boxes showing symbolic thumbnails, e.g. TN1, TN2, and so forth. That’s all I meant to convey anyway. IMO such inclusion falls squarely under “fair use” doctrine because I was reporting and showing something about a new Microsoft app by way of explaining what it was and what it showed.

[Note:] Thanks to Nayan at WinCentral for bringing this new (beta) app to my attention in his post “Microsoft bringing ‘Windows News Bar’ to Windows 10 as the on-desktop news source.”

Facebooklinkedin
Facebooklinkedin

Author, Editor, Expert Witness