OK, I admit it. I’ve been sitting on this machine for a couple of weeks, buried in a mountain of other work. Ordinarily, I write my first look piece a day or two after a review unit shows up. Thus, my X1 Yoga Gen6 first look really includes a second and third look as well. And I must say, Lenovo has succeeded in injecting new oomph and vitality into a series of PCs that I’ve owned from them as far back as 2012. To be more specific, I’m talking about the latest iteration in the series: the ThinkPad X1 Yoga Gen 6.
Taking the X1 Yoga Gen6 First Look
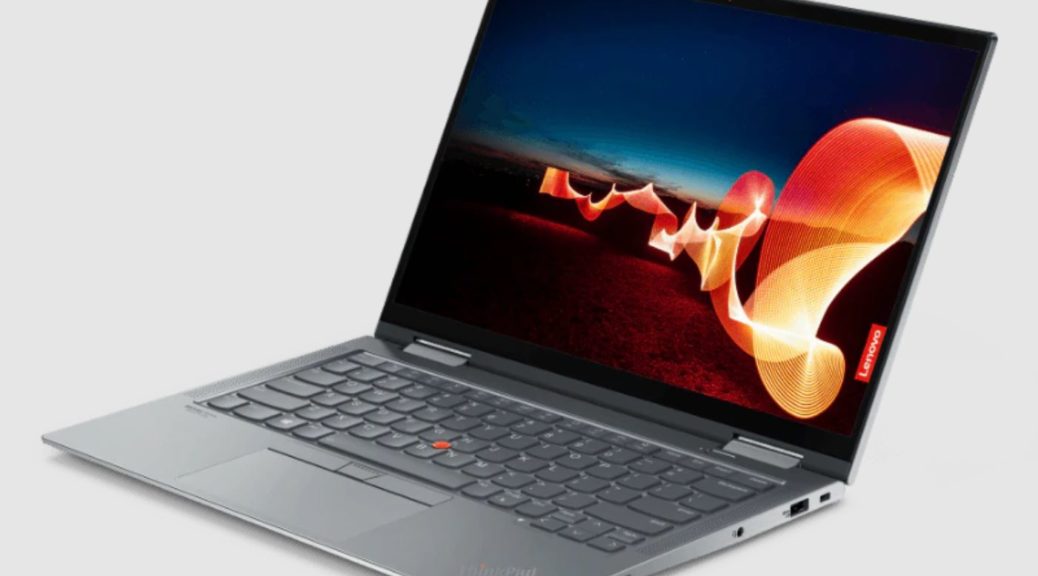
Once I’d finished reviewing the ThinkPad X12 detachable tablet, I contacted the reviews team at Lenovo to request a loaner of this splendid little laptop. What they sent in response far exceeded my expectations. Here’s what this “Storm Grey” brushed aluminum laptop includes:
- CPU: 11th Generation i7-1185G7 (4 cores/8 threads) 3.0 GHz
- RAM: 16 GB LPDDR4X 4266 MHz RAM (soldered)
- Graphics: Intel Xe Graphics Rev2
- Storage: Hynix PCIe x4 NVMe SSD 512GB
- Monitor: 3840×2400 Flex View Display (touch-enabled)
- Ports: 2xThunderbolt 4 USB-C, 2xUSB-A 3.2 Gen 1, HDMI 2.0, Garaged Pen/Stylus, Headphone/mic mini-RCA jack, Kensington lock slot
- Dimensions (HxWxD): 14.9mm x 313mm x 223mm x / 0.59″ x 12.32″ x 8.77″
- Weight: Starts at 1.35kg (3 lbs: mine weighs 3 lbs 2 oz/1415g)
To my amazement, the current price for this unit as configured is ~US$3,800 (in round numbers, not including applicable sales or VAT taxes). This is a beast of a laptop, with an equally monstrous price.
What US$4K Buys You: Quite a Lot, Actually
The brushed aluminum deck and exterior are much more fingerprint resistant than my older X380 and X390 models in their standard Lenovo matte black finish. The construction is rigid and strong, with no real flex in either the keyboard or monitor decks of this 2-in-1 device. I found it easy and fun to use as a tablet with keyboard deck folded back behind. I found the keyboard just as usable and capable as most other modern Lenovo keyboards. For somebody who types for a living, that means a lot.
The speed of the RAM and NVMe SSD are pretty great, and the top-of-the-line i7 mobile CPU (1186G7) is likewise both powerful and capable. Right now, in fact, this laptop is the fastest PC at Chez Tittel and its 3840×2400 UHD panel the highest resolution display as well. In fact, I was amazed that the default scaling factor was 300%. That’s a good thing because I can’t see the text when it’s scaled 1:1 (100%). Touch is responsive, and the colors are vibrant and intense (500 nits, 90% DCI P3 color gamut).
The Thunderbolt ports come in really handy. In fact, they’re among the few Thunderbolt 4 capable input ports here at Chez Tittel. I’ve got several Thunderbolt 3 docks, which which the PC works splendidly, but so far I haven’t been able to stress test the high end of Thunderbolt/USB-C capabilities.

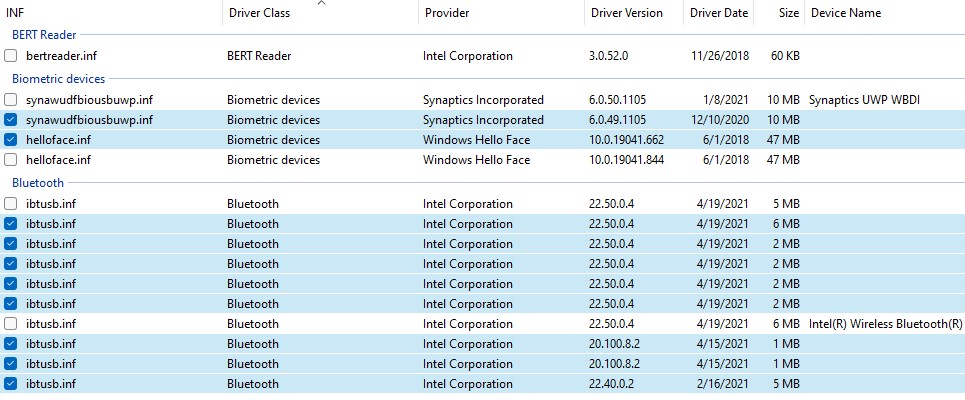
USB-C to the left with a Samsung 960 NVMe; Internal PCIe x4 Hynix NVMe to the right.
[Click image for full-sized view.]
So far, the internal NVMe CrystalDiskMark results (right-hand side of preceding graphic) are among the fastest I’ve seen here at Chez Tittel. The external NVMe is a Samsung 960 1 TB unit in a Sabrent USB-C SSD enclosure. Those results are also quite good. In fact, Macrium Reflect accomplished a complete C: image backup from the internal to the external drive in 2:46 with observed data rates of 1.7 to 2.0 GBps. On-disk size of the Macrium Reflect Image file (.mrimg) for that task is 22,821 KB (22.28 GB). That’s fast!
I Can See This Laptop as a Daily Driver
The target audience for this PC is business users. And in fact, I can see this device as a “daily driver.” If connected to one or two external monitors, keyboard and mouse, plus extra storage through a Thunderbolt dock, I could use it as my everyday computing platform myself. The beauty of this approach is that one’s primary desktop turns into a traveling machine simply by disconnecting from the dock and heading out the door. I’d probably take my 1 TB USB-C attached external drive along, too for backup and recovery stuff on the road.
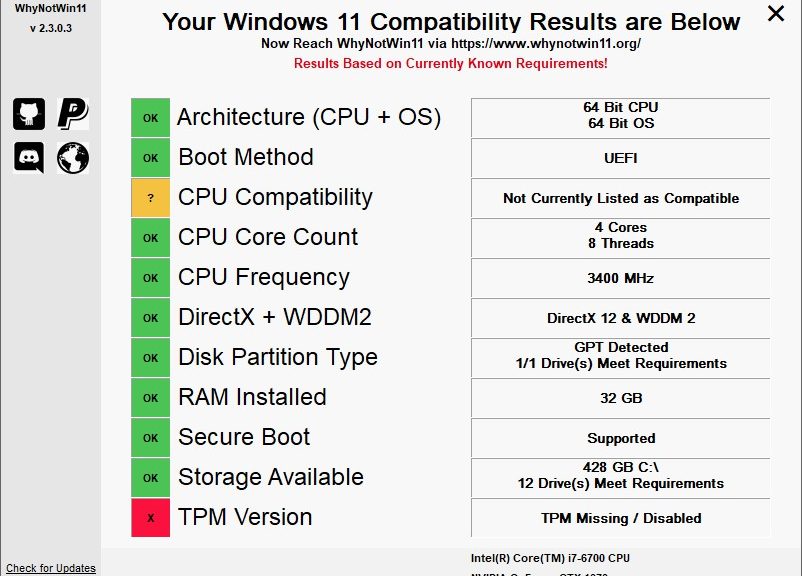
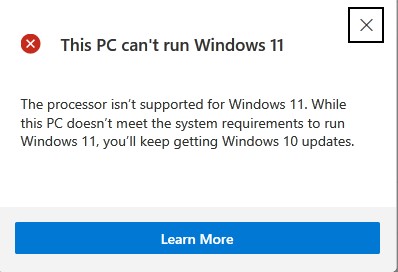
If you’re in the market for a high-end do-it-all machine, the X1 Yoga could be what you need. If you’re willing to plunk down the nearly US$4K it costs it can do the job. Then, if you’re willing to spend another US$1,500-2,000 to outfit it with additional accoutrement for in-office use it can serve as a primary computing platform. I’m thinking 2 27″ monitors (Dell UltraSharp 27 4K), decent keyboard and mouse (I like Microsoft’s offerings), and 2x5TB or larger external HDs attached via USB-C or USB A 3.1 or 3.2 would do it. And of course, this recently built PC meets all Windows 11 hardware requirements, so upgrading should be a breeze.
Highly recommended, for those who can afford it. My 2019 vintage X390 delivers about 75% of the performance for less than 35% of the price, though…
Check Your Prices, Dude!
After feedback from Lenovo arrived to the effect that “list prices aren’t best prices” — a sentiment I wholeheartedly endorse — I did some shopping around online and found a Full HD version with touchscreen (all other components the same) for US$2409.07. The lower resolution screen also extends battery life, so may be a better choice anyway. In fact, Newegg has the same configuration for a mere US$1,689 (FHD touchscreen but all else the same). Perhaps my concerns for price are overstated? You bet! Should I have shopped around a bit before posting this story? Too right! Somewhat abashed, I strongly recommend the FHD version of this laptop as a “killer deal.” Sigh.