Tag Archives: featured

Patch My PC Updater Is Worth Checking Out

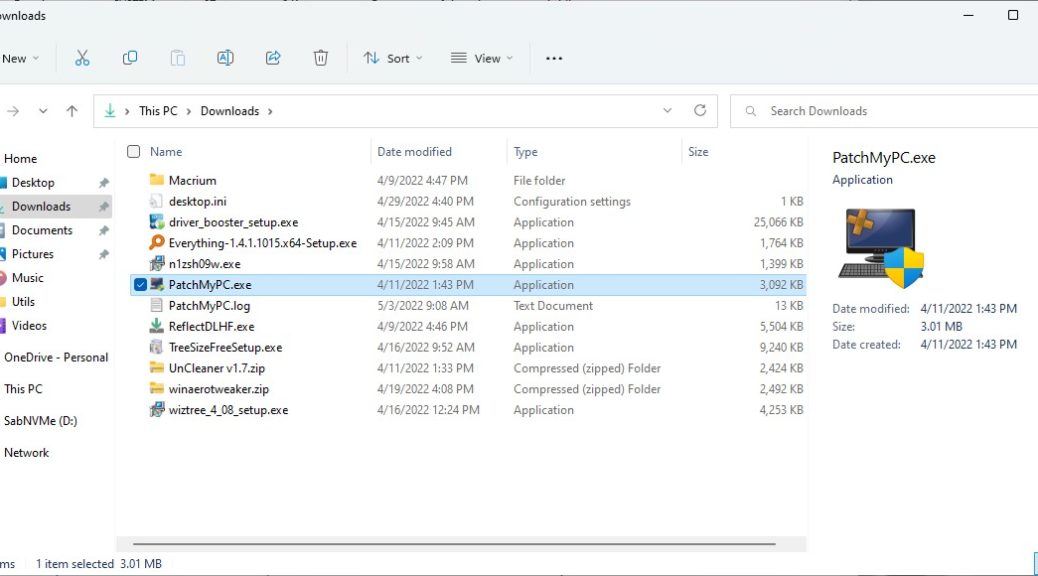
Thanks to Tim Fisher at LifeWire, I’ve found a reasonable facsimile for the late lamented Secunia Personal Software Inspector (PSI). It’s called Patch My PC Updater and it does pretty much everything you’d want such a tool to do: scans your PC, inventories installed applications, identifies those that are out of date, and goes off on its own to update them for you. Like Secunia PSI, it’s also free. The lead-in graphic for this story shows all 9 out-of-date programs on a test PC. It also illustrates nicely why Patch My PC Updater is worth checking out.

Grab It to See If Patch My PC Updater Is Worth Checking Out

You’ll find a download link at https://patchmypc.com/home-updater. Commercial versions that plug into SCCM and InTune are also available for IT-level use. The program works from a USB drive — that is, the executable is portable and need not be installed on target PCs.

Before learning about Patch My PC Updater, I had been using a version of KC Software’s SuMO for application updates. But although that program is good at scanning PCs it is less than stellar at handling the update part. Its automation is negligible too. That’s because it requires users to follow update links and handle updates manually for at least some of the out-of-date programs it finds.

All in all, Patch My PC Updater is fast, accurate and covers nearly everything I’ve got installed. Hence, my recommendation that you check it out. If you don’t like it, you can return to Tim Fisher’s LifeWire story and check out 8 more other similar packages he recommends (it also mentions SuMO but puts it in last place).

Updating Applications Goes Better with Expert Help

Whichever tool you choose to keep up with Windows applications, it’s useful to run one at least monthly. That way, you can be sure that you’re getting new features and functions as they get added. Perhaps more importantly, you’ll also be keeping up with security patches and fixes, if other sources of intelligence aren’t already tracking your software more closely for you.

Facebooklinkedin
Facebooklinkedin

Dev Channel Doubles Releases 20277 and 21277

For the first time ever, MS dropped not one but two releases into the Dev Channel yesterday. By default WU offers Dev Channel Insiders Build 20277, which continues ongoing release from the Iron build familly (FE_RELEASE). Those who take the time to check optional updates will also find access to 21277 (RS_RELEASE) as well. Certainly, when Dev Channel doubles Releases 20277 and 21277, life is bound to get more interesting!

Here’s a repeat of the lead-in graphic. Alas, the page header output clips the most important info from the bottom there. Methinks that’s owing to header image handling in my site’s WordPress theme. I can’t figure out how to hack that quickly. Thus, here it is again with the important stuff showing at the very bottom:

Dev Channel Doubles Releases 20277 and 21277; image shows 21277 optional update offer.

When Dev Channel Doubles Releases 20277 and 21277, Which One?

This looks like a sneaky way to reintroduce two different levels of advance testing, with 20277 targeting closer-in features, and 21277 further out. Fortunately, I’ve got two test machines so my response in this case is “One of each.”

Unfortunately, my test PCs are configured to install automatically. By the time I was aware of the option, those PCs were already at the initial restart phase, having downloaded 20277, and gotten through the GUI install phase. That said, when I targeted 21277 on the Lenovo X220T and rebooted again, it happily started downloading that release despite having gotten halfway through the other install.

Working Through Doubled Installation

At present, both machines are working through their respective OS installs. So far, things are proceeding as normal. The X380 Yoga just finished with the post-GUI install for 20277. After a first login, it’s now working through the initial OOBE (“We getting a few things ready . . .”). The whole process took less than 5 minutes following the first reboot, and it’s now on the Windows 10 desktop.

Because the X220 Tablet is on Wi-Fi, it’s just about finished downloading the 21277 version, but still has the entire installation to work through. I don’t expect anything interesting or unusual to happen. I’m willing to let the process chunk through to completion and see how it turns out. If anything out of the ordinary pops up, I’ll write a follow-up note in this blog post. Furthermore, it should be interesting to see how the two releases compare and if there are any readily visible UI or observable behavior changes between them.

Stay tuned: I’ll keep you posted

Facebooklinkedin
Facebooklinkedin

Unresponsive Start Menu Gets Easy Fix

First, an admission: I’m a long time user of Stardock Software’s Start10 program. In fact, when I first started using this tool, it was called Start8, in keeping with the version of Windows then in vogue. I think my problem may be related to an unwanted interaction between Start10 and the default Windows 10 Start Menu. Nevertheless, I’m happy to report that an unresponsive Start Menu gets easy fix. Let me elaborate…

Unresponsive Start Menu Gets Easy Fix Explained

I don’t have this problem on unaltered Windows 10 installations where Start10 is absent. That’s what make me think it results from some kind of unwanted or unplanned interaction. I’ve checked the Start10 forums and can’t find any other reports of the same kind, but that’s neither here nor there.

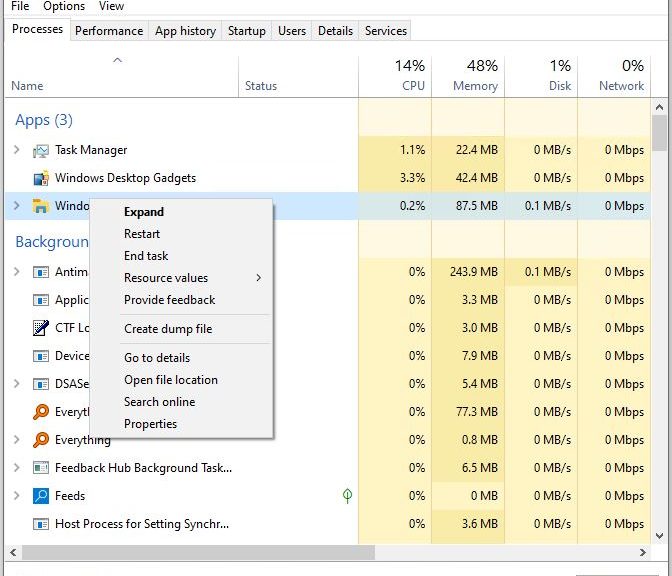
On machines running Start10, when this happens I simply launch Task Manager. Then I right click the Windows Explorer entry beneath the Processes tab. When the resulting pop-up menu appears, one of its options reads “Restart.” When selected, this restarts the primary Explorer process. Among other things, it handles the task bar and the default Start Menu.

Following that restart operation, my access to the default Start Menu is restored. If I’m using Start10, why do I still need the default start menu? Simple: there are some programs and searches (such as using the string “reli” to launch the Reliability Monitor) that work in the default Start Menu but not in Start 10. Thus, I do have the occasional reason to dive into that default instead of sticking solely to Start10’s capabilities.

My old friend and former partner at Win10.Guru, Kari the Finn always said “If there’s a built-in tool or utility in the OS, there’s no reason to use a third-party tool.” Let’s just say that I’ve recently been reminded that he had good reasons to make that assertion. Even so, I remain a fan of third-party tools in general, and a fan of Start10 in particular. I’ve just had to learn to work around this particular issue. Cheers!

Facebooklinkedin
Facebooklinkedin

Recent Laplink PCmover Experience

OK, then. Yesterday evening, after finishing work for the day, I used Laplink PC Mover professional to migrate the Windows 10 installation from the old Jetway mini-ITX PC to the new Dell Optiplex 7080 Micro I’ve been writing about so much lately. I’m pleased to say that, on this latest attempt, the program did what its makers claim it does with reasonably dispatch and facility. I had made an earlier attempt to use it about 10 days ago that failed. I now suspect it had something to do with a pending and incomplete update on the mini-ITX PC. Thus, I must rate my recent Laplink PCmover experience as “mostly positive.”

Preparing for Recent LapLink PCmover Experience

Before I got started on the transfer, I made sure both source and target PCs were completely updated. I also used Macrium Reflect to create an image backup of each PC, and made sure I had the Macrium Rescue Media at my disposal, in case I needed to roll back either or both machines. I also cleaned up the filesystems on both machines using Disk Cleanup, UnCleaner, and manual file deletions from the user account subfolders Documents and Downloads.  With all that behind me, I was ready to go.

Working Through Recent LapLink PCmover Experience

As is often the case, the prep work took longer than the transfer. With the source PC upstairs and the target PC in my office, connected via my wired in-home GbE, the whole transfer involved 2.3 GB of data across 48K-plus folders and just under 8K files. along with a merge from source to target registry of 82K-plus values just over 9 MB in size.

To my surprise, the whole process took just over 11 minutes, according to the program’s Summary.pdf report file. I’ve used Laplink’s PCmover before and I don’t ever remember things going that fast. Best guess: this machine has a relatively small number of applications installed and no huge file holdings under the various user account folders. Thus, it stands to reason that it wouldn’t take too long to migrate from one machine to the other. I was able to confirm that licensed applications from the source PC did work on the target after the process concluded, though I did have to provide (or re-activate) licenses before I could use those programs.

Benefits of LapLink PCmover Experience

I paid full retail for the software last December (I purchased it just over a year ago on December 6, 2019 and the price hasn’t budged since then). It cost me $42.45 ($39.99 MSRP plus $2.50 sales tax).

The obvious benefits of using PCmover are speed, ease of migration, and convenience. I’ve used this tool before, and I imagine I’ll use it again. I could have turned to the Microsoft User State Migration Tool (aka USMT) but here’s what its DOCs file says about that tool’s limitations:

USMT is intended for administrators who are performing large-scale automated deployments. If you are only migrating the user states of a few computers, you can use PCmover Express. PCmover Express is a tool created by Microsoft’s partner, Laplink.

I used the Pro rather than the Express version of PCmover. Express is free, but only for non-commercial use. Because I’m writing about it for publication I naturally chose the for-a-fee version. The Express version does most of what the Professional version did for me, but does not transfer applications, permit image based migration, or copy hard disk contents from source to target PC.

Where LapLink PCmover Experience Fell Short

I did have a little bit of cleanup to do after the migration process concluded. PCmover does not, as I discovered, move all browser settings and preferences from source to target PC. Thus, I had to go in and install some extensions, and change default home page settings in Chrome, Edge and Firefox. It did move favorites/bookmarks, though, as far as I could tell.

All in all, it was a positive experience and resulted in a running PC that worked properly with 99+% of user, account, preference, settings, and files from the old machine ready, available and working on the target PC. As far as I’m concerned the US$40-odd PCmover cost me was worth it, and produced the desired outcome. ‘Nuff said.

Facebooklinkedin
Facebooklinkedin

Implicit Perils When Multiple Accounts Get Interlinked

I went through an interesting adventure this weekend. I found myself trying but unable to reset the password for my Apple ID account — or so I thought, anyway. It wasn’t until I spent a couple of hours trying to fix things on my own that I gave up and turned to Apple Support instead. To my relief, the support rep recognized my problem more or less instantly. He showed me that I had logged into different accounts for iCloud and the Apple Store. Then he explained there are implicit perils when multiple accounts get interlinked in that way.

What Are the Implicit Perils When Multiple Accounts Get Interlinked?

Long, long story short when I was trying to change my password for one account I ended up changing it for another. The iCloud account took precedence over the Apple ID account for whatever reason. I didn’t see any visual cues to tell me that’s what I was doing. Thus, it took a call to tech support to clear up my misunderstanding.

Now, though, things have been set straight. I’ve got known usable passwords for both Apple accounts and have disentangled use of the two IDs on my iPhone which caused that immensely frustrating and bizarre set of symptoms and circumstances.

One More Thing, Though…

Right now, I can use my credentials on Firefox to access appleid.apple.com. But those same credentials don’t work on Chrome. I’m mystified and mortified, but I have no earthly idea why this is happening. Aha! Internet research tells me it’s likely a cookies or history issue (apparently old cached credentials trump newly entered ones at the keyboard). Just another wonderful aspect of living large as a digital person, I guess.

I swear! Sometimes I spend more time digging through login and credentialing issues to access accounts than I actually spend using those accounts directly. Sigh.

Facebooklinkedin
Facebooklinkedin

PowerToys Preview v0.28.0 Gets Videoconference Mute

OK then.  Liam Tung reported at ZDnet last Wednesday that Clint Rutkas and his team were at “one week and holding” on PowerToys. And in fact, they’d been stuck there for three weeks and a little bit more. Then on Friday, Experimental release v0.28.0 made its debut. As the lead-in graphic shows, the Video Conference Mute feature is present and accounted for. Indeed, that proves that PowerToys Preview v0.28.0 gets videoconference mute features.

If PowerToys Preview v0.28.0 Gets Videoconference Mute, Then What?

This simply means the feature has some remaining kinks to be worked out. That said, it’s ready for more adventurous types willing to run an experimental release to give it a try. I just loaded it up on my Lenovo X380 Yoga test machine. The various keyboard shortcuts to mute camera (Win+Shift+O), microphone (Win+Shift+A) or both (Win+N) all work for me.

Given the number of videoconferences I attend weekly (3 or more) it’s pretty darn handy. I’m also going to recommend it to my almost-17-year-old son, who’s attending school online this semester. For him, each schoolday is a long succession of Zoom meetings, for 7 or 8 periods a day. I *know* he’s going to appreciate this capability even more than I do!

If you can tolerate running an experimental pre-release to gain access to this feature, grab it today. Otherwise, you’ll just have to wait until it makes it into the regular distribution. If history is any guide, this will take anywhere from a week to a month. Stay tuned.


Facebooklinkedin
Facebooklinkedin

Dell 7080 Micro RAM Puzzler Solved

When something appears to be good to be true, watch out! I keep poking around on my new Dell 7080 Micro and learned something interesting, but also mildly distressing, about the configuration I ordered. The essentials show up as the DRAM frequency in the lead-in graphic for this story. The rated speed for that module is 2933 MHz, the reported rate is 1463.2 (doubled = ~2926 MHz). Something is amiss, eh? A quick trip to the manual’s memory section means makes this Dell 7080 Micro RAM puzzler solved.

RTFM = Dell 7080 Micro RAM Puzzler Solved

When I did the math, I saw the reported memory clock rate was half the SODIMM module’s rated speed. Immediately I suspected something might be up with dual-channel vs. single-channel memory performance. Ack! I was right: the very first entry in the memory section of the 7080 Micro manual reads as follows:

Dell 7080 Micro RAM Puzzler Solved.manual-noteI’m now aware that doubling up on memory is the right way to go on this machine. Sigh.

Turns out that the clock rate information is what it should be, though. DDR memory like this fetches two chunks of data with each cycle cycle. Hence the term “double data rate,” or DDR.

Doubling Up Is Good, So That’s What I’m Doing

I just ordered a pair of 16 GB G.Skill RipJaws modules for the machine. They’re rated for DDR4 3200, which means they’ll loaf along at the 7080 Micro’s default clock rate of 2933 with ease. I’m guessing further that the winsat mem command will show an improvement from its current level of 15954 MB/sec (the P-5550 reports 32945 by comparison, and I’m expecting something more along those lines). We’ll see.

But wait! I still have Dell’s Review Unit of the 7080 Micro, so I just booted it up to run the winsat mem command there. It has two 16 GB memory modules. And sure enough, the results are significantly higher than those for the single module unit: 26323 MB/sec hits more than halfway between the single-module value of 15954 and the P-5550 value of 32945. That’s an improvement of just over 31 percent. I’m pretty sure that’s what I’ll see on my unit once it’s upgraded, too. (Same CPU, same motherboard, so why not?)

I’ll know for sure sometime later today, because Amazon says my order will arrive no later than 10 PM tonight. While I was at it, I also purchased a Samsung EVO 860 1 TB SATA SSD to park in the 7080 Micro’s currently vacant SATA slot. The RAM set me back about $115, and the drive $100, both of which I consider excellent prices.

Given that the 7080 Micro was already pretty fast, I’m guessing this will make it just a tad faster. I’ll report the results of my checks after upgrading the RAM and installing the new SSD later today. Stay tuned!

Note Added 2 Days Later

Amazon didn’t deliver the goods until today. Took me all of 5 minutes to unbutton the 7080 Micro case. Only tool needed was a Phillips Head screwdriver. The SATA drive mounted into its sleeve with no tools, but I had to undo the thumbscrew on the outside of the case and remove the fan assembly (3-spring-tensioned PH screws) to replace the old memory module with 2 new ones.

Now for the good news: new test results are astounding. When I just ran the winsat mem command on the 7080 Micro I purchased, the results came back at 34430. That number seems to fall in a range from 34430 to 34450 on multiple iterations.

Guess what? This 7080 Micro’s RAM speed is slightly FASTER (just over 4%) than the Precision Workstation 5550. Woo hoo! Turned out to be a good investment. In fact, the new memory numbers are just over twice as fast for dual-channel RAM as they were for single channel. By doubling up, I got a great performance boost.

The moral of the story is: if you buy a Dell Micro 7080 make sure to populate both SO-DIMM slots, so you can get the best performance out of however much RAM you give it to work with. It makes a BIG difference.

Facebooklinkedin
Facebooklinkedin

Hard Disks Remain Useful PC Storage Devices

Hmmm. I just read a disturbing story over at Gizmodo. Something of a rant from Sam Rutherford, it explains “Why I’m Finally Getting Rid of All My HDDs Forever.” I’ve been following his work for some time, and he usually has intelligent and useful things to say. This time, though, I’m opposed to his position. In fact, I still firmly believe that hard disks remain useful PC storage devices. Quick count: I have at least 10 of them here in my office, at capacities ranging from 1 TB to 8 TB.

Why Say: Hard Disks Remain Useful PC Storage Devices?

If I understand his complaint, Mr. Rutherford is giving up on HDDs (Hard Disk Drives) because several of them gave up on him recently. One failure cost him 2 TB of data, some of it precious. I say: Boo hoo!

The lead-in graphic for this story comes from my production PC running a freeware program named CrystalDiskInfo. (Note: grab the Standard Edition: the others have ads and bundleware). Notice the top of that display lists Windows drives C:, J:, K:, G:, D:, I:, F:, and H:. In fact, all of them show blue dots and the word “Good” as well. These elements provide rude measures of disk health for both HDDs and SSDs. Of the 8 drives shown, 3 are SSDs, 4 are HDDs, and 1 is a so-called hybrid HDD; all are healthy.

Mr. Rutherford could have used this tool. Or used others like it, of which there are many (see these Carl Chao and WindowsReport survey pieces, for example). Then, he would have known his problem HDDs were headed for trouble before they failed. Plus, he himself admits he erred in not backing up the drive whose failure caused data loss. I check all my drives monthly (both SSDs and HDDs) looking for signs of impending trouble, as part of routine maintenance.

Backup, Backup and More Backup

SSDs are not mechanical devices, so they don’t suffer mechanical failures. Over the 10 years or so I’ve owned SSDs (perhaps a couple of dozen by now) not one has ever failed on me. Over the 36 years I’ve owned HDDs, I’ve had half-a-dozen fail out of the hundreds I’ve used. But it’s inevitable that I will suffer an SSD failure sometime, even though I’ve yet to experience one personally. Why? Because all devices fail, given enough time and use.

Personally, I think HDDs still have a place in my storage hierarchy. I just bought 2 8 TB drives earlier this year, for about $165 each. That’s way cheaper storage than even the cheapest of SSDs on today’s market, and much more capacity in a single device than I’d want to purchase in solid state form. (Note: a 7.68 TB Samsung 870 QVO SSD costs $750 at Newegg right now. Thus it aims at those with more money than sense, or those with cash-generating workflows that can actually cover such costs.)

The real secret to protecting data is multiple backups. I bought those 8 TB drives to back up all my other drives, so they’re my second local line of defense. I also pay for 5 TB of online storage at OneDrive and DropBox and have two extra copies of production OSes, key files and archives in the cloud as well. I backup my production PCs daily, my test PCs weekly, and key bits and pieces to the cloud weekly as well). Basta!

Facebooklinkedin
Facebooklinkedin

Interesting Single-Builder SSD Benefits

Just read an absolutely fascinating story at Tom’s Hardware by Sean Webster. Entitled Not-So-Solid State: SSD Makers Swap Parts Without Telling Us, it’s worth a read. The main point it makes is that many builders of SSDs — most notably Adata and its XPG brand — build SSDs using parts from multiple makers. Their products do change over time because of availability of component parts such as controllers and flash memory chips. In the case the story lays out, a highly recommended drive suffered performance losses owing to replacement of better faster parts with newer slower ones. This leads me to understand there can be interesting single-builder SSD benefits .

Where Interesting Single-Builder SSD Benefits Come From

Samsung, chief among SSD makers, builds all of the parts that go onto its SSDs. Thus, it controls the mix of elements on those devices completely. When constituent parts change, the company always changes its model numbers so that buyers know there’s “something different” on board. Tom’s points to practices from WD, Kingston, Crucial and other makers to indicate that the majority do indeed change model numbers as constituent parts change, too. Thus, the most interesting single-builder SSD benefits clearly come from end-to-end supply chain control. Third-party builders don’t have that luxury, because they buy parts from multiple suppliers.

Where does all this leave me? In fact, I bought an Adata/XPG SSD for my Ventoy “Big Drive.” It’s a 256 GB SX8200 Pro model, the very item that Tom’s Hardware finds fault with in the afore-linked story. Good thing I only use this device for storing and occasionally loading Windows ISOs. It’s new enough that I’m sure it’s subject to the flaws that Tom’s uncovered. If I were using it as a boot or internal SSD I’d be irate. As it is, running it over USB 3.1 means I’d never come close to the theoretical maximum read/write rates anyway.

The Moral of the Story

Ironically, this XPG device is one of two non-Samsung NVMe devices I currently own. The other such device is a Toshiba that came pre-installed in a cheap-o purchase of a year-old Lenovo X380 Yoga laptop. I wasn’t expecting top-of-the-line components because I paid under 50% of the unit’s original MSRP. But from now on, I’m sticking with Samsung NVMe drives, so I can avoid performance dings from covert or undisclosed parts changes in the SSDs I buy and use.

Who knew this kind of thing might happen? I certainly didn’t and I’m grateful to Tom’s for calling it to the world’s attention. It will certainly guide my future NVMe SSD buying habits…


Facebooklinkedin
Facebooklinkedin

DIY Desktops vs Prefab Still Favor DIY

I got started building PCs back in the mid-1990s when I hired a talented young man who worked in the PC parts department at Fry’s to come work with me. He showed me the ins and outs of system construction. Along the way I learned that careful parts selection could indeed deliver a faster, more capable system for less than the price of an OEM pre-fab desktop. That’s why, IMO, DIY desktops vs prefab still favor DIY, 25 years on.

Why Assert: DIY Desktops vs Prefab Still Favor DIY

As I write this item, it’s Cyber Monday. We’re in the market for another desktop here at Chez Tittel. As my son’s PC is getting older — i7-6700 and Z170 vintage, now 5 years old — it’s time to start planning a replacement. My findings show DIY still gets more than prefab, as I will illustrate.

Doing the DIY Thing

Given that major deals are available today, I decided to see what I could get for around $2K either pre-fab or DIY. I’ve already got a case and plenty of HDD storage, so what I need is a PC with a capable CPU, 32 GB RAM, a 1 TB NVMe SSD for boot/system drive, and a next-to-top-rung AMD or Nvidia graphics card. I found some motherboard/CPU bundles for about $550, memory for about $115, Nvidia 2070 $600, Samsung 980 Pro 1 TB $230,  Seasonic 650 Platinum PSU $130 for a total of $1,625. Even if  I price in the case (Antec P8 for $90) and an 8TB drive ($165) total pricing comes in at $1,880.

Looking at Prefab options

Looking around online at Newegg or amazon, with a $1,900 budget (I used a number range of $1,850 to $2,000 for my searches). I mostly came up with 16 GB RAM configurations, 4 to 8 core CPUs,  lower-end GPUs (e.g. Nvidia 1060 or 1070X), 512GB – 1 TB NVMe SSDs (at least 1 generation back from the Samsung 980 Pro), and 1 TB HDD storage. That’s quite a bit less oomph than the same DIY budget, as you’d expect. I did see some pretty amazing refurbished deals on one or two generations back (most Intel) CPUs and kit. It still looks like refurb is the way to go if you want to buy an OEM desktop, especially if it comes straight from the OEM with a like-new warranty (no sytem warranties on DIY systems, only component-level warranties apply).

As an example of a killer refurb deal, here’s an HP Z840 workstation with two Xeon 8-core CPUs, 256 GB DDR4 RAM (!), 1TB SSD + 1 TB HDD, and a Quadro K4000 professional graphics card for $1,750. Now that’s pretty tempting…

This bad boy comes with 16 cores and 256GB RAM. Zounds!

I’m still sold on DIY

When it’s all said and done, I guess I’m OCD enough that I like picking all my own parts, and putting my own systems together. I do think you get more for your money, but you also have to have the time, the patience and the knowledge to put things together and to troubleshoot and support them for yourself. I realize that puts me in a minority, but I can live with that.


Facebooklinkedin
Facebooklinkedin