Tag Archives: featured

Exorcizing Zombie Adobe Flash Player Elements

Some Windows 10 users may see a Flash Info logo show up on their desktops. Don’t worry: that’s Adobe’s way of telling you the Flash Player remains active on your PC, and needs to be removed.  I wrote about Flash end-of-life (EOL) and removal techniques on December 29. That story reported the EOL date falling at year’s end. Apparently not everybody has worked through its various uninstall possibilities yet, either.  The TenForums thread “Strange Logo on Desktop” turns out to be an admonition from Adobe to make Flash Player go away. Alas, the process doesn’t work 100%. Thus, I’ll explain how one goes about exorcizing zombie Adobe Flash Player elements.

Exorcizing Zombie Adobe Flash Player Elements.flash-info-logo

Here’s what the Flash Info log looks like: a faded Flash logo with the “i” (information) element superimposed.

Several Flash Player Uninstall Options Available

Flash shows up in lots of places, apparently. Likewise, uninstalling it requires a variety of removal techniques.  Adobe’s warning for its Flash Player Uninstaller hints at this. It reads: “These instructions are NOT applicable to Flash Player included with Microsoft Edge or Internet Explorer on Windows 8 and later or with Google Chrome…” It advises those users to check out the Flash Player Help page for disabling same.

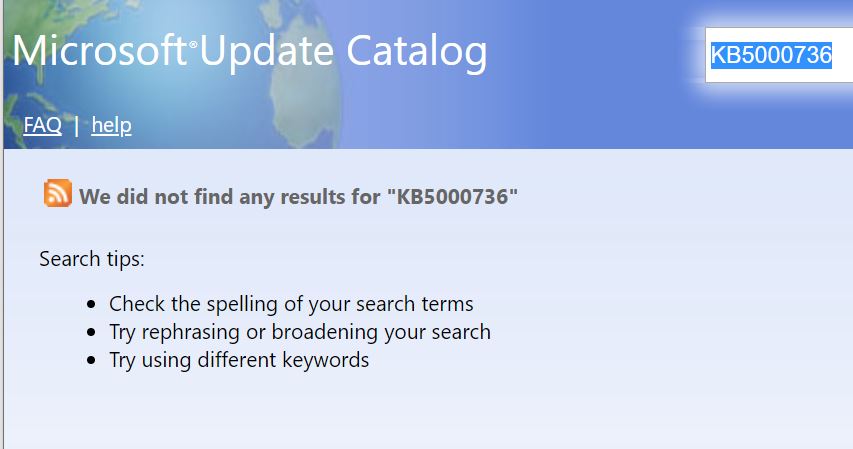
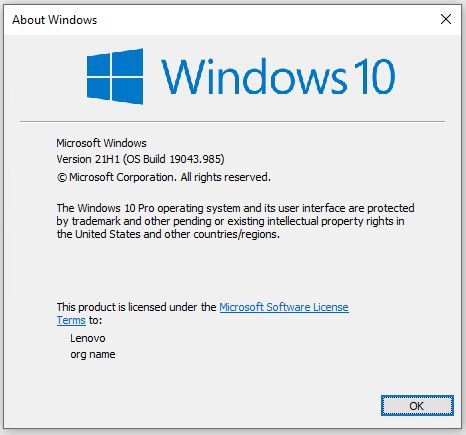
There’s also an uninstaller available via the Microsoft Update Catalog. Counter-intuitively KB4577586 is named “Update for Removal of Adobe Flash Player.” When downloading this item, be sure to grab the one that matches your current Windows version. Note: apparently, there is no such update for Windows 10 Version 20H2.

If Adobe Flash Player shows up in Programs and Features, you can use its built-in uninstall functions to get rid of it. Or you could turn to a third-party product like Revo Uninstaller to do the job instead.

Exorcizing Zombie Adobe Flash Player Elements May Require Manual Efforts

After running the afore-linked KB4577586, the original poster for the TenForums thread that prompted this story reports that the icon remained on his desktop. On top of everything else on screen, it wouldn’t get out of his way. Should that happen, one can remove the Macromed folder and its contents from these two parent folders:

1. C:\Windows\System32
2. C:\Windows\SysWOW64

Savvy readers will recognize that these folders are where Windows keeps 32-bit elements, tools and utilities for use on 32- and 64-bit systems, respectively. You may need to run a special-purpose delete utility to remove these folders or you can boot into command line recovery mode and delete them that way. Your choice. Either way, that should result in exorcizing zombie Adobe Flash elements that may still be hanging around your system. Et voila!

Facebooklinkedin
Facebooklinkedin

Restoring Missing 21292 N&I Taskbar Item

Here’s an interesting learning adventure. Upon introducing Windows 10 Build 21286, MS also introduced a News and Interests (N&I) taskbar item. I covered this topic on January 8. But after upgrading my Lenovo X220 Tablet to a newer Dev Channel release, N&I disappeared. Remembering a related WinAero.com story, I followed its activation advice. And that, dear readers, is how I found myself restoring missing 21292 N&I taskbar item a few minutes ago. Here’s the deal…

Going About Restoring Missing 21292 N&I Taskbar Item

Restoring or activating N&I requires the third-party ViVe tool. Helpfully, it can enable or disable Windows 10 A/B and hidden features. Download ViVe from Github, where the latest release is v0.2.1. For myself, I just observed that v0.2.0 also works. That’s because  I just used it successfully on my X220T, not yet realizing a newer release is available.

After you download the ZIP file, extract it into a folder. Next, run an administrative cmd or PowerShell session from that folder. Then, execute the following sequence of commands:


vivetool addconfig 29947361 2
vivetool addconfig 27833282 2
vivetool addconfig 27368843 2
vivetool addconfig 28247353 2
vivetool addconfig 27371092 2
vivetool addconfig 27371152 2
vivetool addconfig 30803283 2
vivetool addconfig 30213886 2

Note: If using PowerShell, prepend the string “.\” before each command or it won’t work.

Cut’n’paste these commands into the window. Please execute each one individually. Next, you’ll need to restart your PC. Voila! The N&I item reappears in the Taskbar. At least, it did on my X220T PC.

8 Commands Too Much? Try Some Batch Files

OTOH, if you prefer, WinAero offers a ZIP file in its story. It  activates all necessary settings from one batch file, and deactivates them from another.

And remember, N&I only appears in Build 21286 or higher-numbered Dev Channel Insider Preview releases at the moment.

More About the ViVe Developers

Note: the authors of ViVe are Rafael Rivera and somebody named Lucas/thebookisclosed/albacore. Both are active Windows developers and toolsmiths. Rivera is also an occasional contributor to Thurrott.com (which is where I first came across him and his work). The other person is also the author of the excellent Managed Disk Cleanup utility, also available on GitHub.

Facebooklinkedin
Facebooklinkedin

MTPW Data Recovery Works Eventually

This is not a dig at the Data Recovery Tool in  MiniTool Partition Wizard (MTPW). When I entitled this item MTPW Data Recovery works eventually, I only meant to observe that it takes FOREVER to recover the contents of a damaged or corrupted drive.

I just learned this the hard way, when something corrupted both drives in my Wavlink ST334U dual drive dock. One of the two drives involved was a Toshiba 8TB unit with approximately 4 TB worth of production PC backups. Thus, I really wanted to recover some — but not all, at north of 100GB per image — of those files. The lead-in screencap for this story shows Data Recovery scanning to recover the contents of the other drive. It’s a mostly disposable 500GB unit that incorporates two Samsung EVO m.2 SSDs into a pseudo-array on a Syba SATA adapter card. Note that it plans to take 4:25 to recover 207.17 GB in 4119 files.

How Long, When MTPW Data Recovery Works Eventually?

Hmmm. Let’s see 4:25 for 207 GB means 19.787 times longer to recover 4 TB. That’s roughly 89.4 hours. Which in turn is 3 days, 17 hours, and 24 minutes. Of course, that’s way too freaking long for most ordinary people to wait for the whole thing to complete. Especially me.

Turns out that you can manipulate the left-hand menu in MTPW Data Recovery, and instruct it to recover only the files you tell it to by clicking checkboxes. And, as it turns out, by expanding listing items with a plus sign (“+”) to their left. Eventually, you get a map of what the recovery utility finds on the drive, and can pick what you like.

In my case, I liked the following:

1. About 1.5 TB worth of the most recent backups
2. About 2.5 GB worth of legal work archives
3. About 124 GB worth of info snapshotted from a now-retired E: drive

Thus, of the 4-plus TB worth of holdings on that 8 TB drive, I decided to recover under 1.7 TB. How long did this take? Somewhere in the neighborhood of 30 hours. Long enough that, when I copied the recovered files from the 4 TB HGST drive I pressed into service to receive them back to their original home, that process took 2:43:00.

What About the Other Drive?

I let Data Recovery scan for about an hour, then checked over the drive’s contents. It’s always been a scratch drive, so I was able to confirm there was nothing on that drive I couldn’t live without. So, I quit out of Data Recovery and MTPW. Next, I opened Disk Management, where the drive showed up as RAW at full capacity with an E: letter assignment. I changed it back to its original M: assignment to produce this screencap:

With the right drive letter in place, I can recreate the drive.
[Click image for full-sized view.]

Next, I right-clicked on its box, and then selected “Format” from the pop-up menu. I named it Syba.5 (Syba dual SSD adapter with 0.5 TB of storage space, give or take). The formatting operation took a surprisingly long time to finish (almost a minute) with the following result:

Even on a Quick Format, it took almost a minute for this drive to format.
[Click image for full-sized view.]

OK, then. I guess I’m back in business. Now if I can only figure out what went wrong in the first place, so I don’t do this to myself again. Sigh.

Facebooklinkedin
Facebooklinkedin

Failing Drives Need Copy First and Foremost

I’m a long-time member and supporter at TenForums.com (joined November 14 2014). Just recently I saw a thread where a member reported issues with an apparently failing hard disk drive (HDD). Immediately, he and other responders started chewing on how to diagnose and possibly fix the HDD. “NO!” I remember thinking as I started reading the back-n-forth. “Failing drives need copy first and foremost,” I went on, “so progressive failures won’t cause more data loss.”

Why Do Failing Drives Need Copy First and Foremost?

If an HDD is starting to fail, there’s usually a cascade involved. First, one or two small failures, followed by increasing frequency and severity of failures. After that: complete drive failure. Once you have a clue that a drive is starting to fail — and SMART monitors like HD Sentinel or CrystalDiskInfo will clue you in quickly — the next step in troubleshooting is: Make a snapshot!

When trouble rears its head, the temptation to start diagnosing and attempting fixes can be nearly overwhelming. But in this particular case — a possibly failing HDD — such diagnosis and fix activities can severely exercise the disk. If it is failing, that could either make existing data losses worse, or cause data losses that haven’t yet occurred.

How to Get That Snapshot

I’d try a disk image using something like Macrium Reflect Free. If the disk is seriously corrupted, however, it might not work. In that case, use File Explorer or copy commands at the command line/in PowerShell to copy anything and everything you can see.

On the other hand, if you have a reasonably current backup of the failing drive — and you should — you can copy only items dated since the backup was made. Once you’ve captured what you can, you won’t experience further data loss as you pursue various troubleshooting strategies. Now that you’ve done due diligence for data protection, go for it!

When in Doubt, Replace the Disk

In my experience over 36 years of working with personal computers, I’ve had half-a-dozen hard disks fail on me. (I bought my first PC in 1984: a Macintosh 512K, aka “Fat Mac.”) As disks start to fail, they become increasingly unreliable and problematic. I’ve always replaced them as soon as diagnosis pointed out unquestionable failure signs or symptoms. I learned the hard way to backup, too: I lost the better part of a book manuscript in the late 80s when an external (and expensive!) 300MB SCSI hard disk experienced a head crash. Please: learn from my bad experiences. Don’t wait to have your own. Take my word for it: you won’t like them, not one little bit.

Facebooklinkedin
Facebooklinkedin

Lenovo X220 Tablet Hits IME Wall

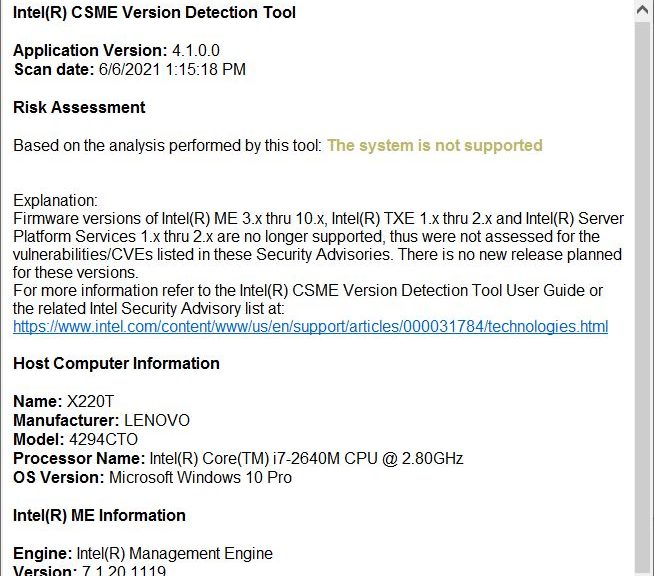
I knew it was coming, but not when. I’ve already retired my Lenovo T520 laptop. I bought them together, so my X220 tablet has the same CPU — an i7-2640M Sandy Bridge– and  a 6 Series/C200 Series chipset. In the wake of the latest Dev Channel (Fast Ring) 21286 Build, this machine is now throwing  Intel Management Engine errors. As the lead-in screencap shows it tells me “ME is in Recovery State.” Then, it hangs until I hit the proverbial “Any Key.” When I say the Lenovo X220 Tablet hits IME wall, I’m really saying it’s too old for the installer. Simply put, Windows 10 apparently doesn’t know what to do with this old hardware any more.

If Lenovo X220 Tablet Hits IME Wall, Then What?

I can keep this machine going for a while yet, but I can tell its days are numbered. Upon investigation, its most current IME drivers and software date to the Windows 8.0 and 8.1 era. And then, there’s this cheery warning on the drivers and software download page for the X220 Tablet:

Key phrases in the warning are “no longer being actively supported” and “available ‘as-is'”. Translation: PC is old, and you’re on your own. [Click image for full-sized view.]

I found some fascinating discussion from others who’ve had this problem with this PC and others of its vintage. The most interesting item is at Bill Morrow’s Thinkpads.com forum. It prescribes a firmware hack as the best fix, which more or less turns off the Intel Management Engine (more recently renamed to Active Management Technology, or AMT).

To use this approach, I would have to buy a cheap (under US$20) EEPROM burner. Then I’d need to hack the bits for the BIOS myself  (through a Python program named ME_CLEANER).

I’m still chewing on whether or not I really want to do this. I will keep it running as it stands as long as I can, I think. I’ll pass it along to my old buddy Ken Starks at Reglue.org when I can’t upgrade Windows 10 on it anymore. Even with this glitch, by pushing the “Any Key” after each reboot during the Windows 10 install process, I got this machine upgraded to Build 21286. For the time being, I’ll just keep on keeping on until I have to do something else. Stay tuned!

Facebooklinkedin
Facebooklinkedin

About 21286 News and Interests

OK, then. Right after I upgraded to the latest Dev Channel Insider Preview Build (21286.1000) I expected to see the new “News and interests” item show up in the notification area on my Taskbar. No dice on my Lenovo X380 Yoga test machine. But as I learned more about 21286 News and interests I came to understand that the Edge Browser is involved in its inner workings. So, I checked the update level on Edge on that PC. And sure enough: it needed to come up to the current version 87.0.664.75 to be fully up-to-date.

More About 21286 News and Interests

After updating Edge, and another reboot, News and interests showed up. You can see it in the lead-in graphic for this story, which shows the notification area on my taskbar. It’s off to the left. It shows the sun occluded by a cloud, and reads “45°F Partly sunny.”

If you’re running this Dev Channel release and News and interests fails to appear, try upgrading Edge. Another reboot, and you should see something like the lead-in graphic for this story. That’s because in this build, News and interests is turned on by default. What if you want to turn it off, or see less of what it has to show? Easily done!

Managing This New Taskbar Item’s Appearance

To manage News and interests, right-click on a blank area in the taskbar. A menu will pop up that includes the “News and interests” item (see below). Click on the fly-out symbol to the right, and a fly-out menu with controls appears. Set the one you want. It’s just that easy.

Tip: Hidden means you won’t see it. Or you can Show icon only, if you don’t like the default value Show icon and text. ‘Nuff said.

About 21286 News and Interests.controls

If you don’t like the default value (“Show icon and text”), here’s where you change related settings.

Facebooklinkedin
Facebooklinkedin

Early One Outlook Screencap Eases Concerns

Following quickly in the wake of news of Microsoft’s Project Monarch, (reported here on Monday), a screencap from an actual user allays some of my fears. Notice the left-hand column in the lead-in screecap for this story. It shows the Archive folder amongst the other Outlook folders present. I take that to mean there is a way to integrate an archive with live, web-based messages in the cloud. Thus, an early One Outlook screencap eases concerns about business use.

Why Early One Outlook Screencap Eases Concerns

The name for the app is currently “One Outlook.” This speaks directly to Microsoft’s desire to assemble all Outlook clients in a single code base. Obviously, they’ve thought about the importance of archives in the Outlook environment. In fact, I’m relieved it shows up in such early intimations of where the app is headed.

My old friend and former Novell colleague, John King, responded to my previous post. He proposed the notion that an archive might  be uploaded to the cloud to remain accessible. I’m not certain. I could see it either way, given that I’m sure I’m not the only person with a 10+GB Outlook archive.pst. Millions of 10GB uploads may be more of a storage load than Azure wants to handle. It may make more sense to build plumbing into the app to access a local archive.

Those details, however, are a long way from being settled. According to OnMSFT.com, which reported on this phenom and the screencap, One Outlook is unlikely to appear until 2022. Right now, they say, it’s only available to “brave dogfooders” with in-house, internal Microsoft accounts.

Give Me Preview Access, Please

As the app evolves and develops, I sincerely hope that MS will provide more brave dogfooders outside the company with early access. In fact, I’d like to nominate myself among the ranks of “early outside adopters.” I’ll use it on a test machine, for sure, but it could help me further ease my concerns, as I explore its capabilities. For something this central to how I work and live, I hope that’s not too much to ask. Stay tuned: I’ll keep you informed.

Facebooklinkedin
Facebooklinkedin

MS Publishes CloudPC Details Amidst Microsoft Graph Docs

Finally, there’s some substance to back up the long-swirling rumors about Microsoft’s upcoming CloudPC offering. We know it will be an Azure-supplied virtual Windows 10 instance, ready for Internet based use on a variety of endpoint devices, including smartphones. Just before Christmas, MS publishes CloudPC details amidst Microsoft Graph docs, as shown in the lead-in graphic above. The document is a changelog for Microsoft Graph released on 12/21/2020. Happily, it includes a surprising amount of detail.

Details from MS Publishes CloudPC Details amidst Microsoft Graph Docs

A quick look at the section depicted above shows that readers can drill down into all kinds of interesting details. Take, for example, the virtualEndpoint resource type. Readers will find a fascinating collection of methods and relationships.  Among many other entries, here are some scintillating samples:

virtualEndpoint Method Info
Method Return Type Description
 List cloudPCs  cloudPC collection  List properties and relationships of the cloudPC objects.
 List deviceImages  cloudPcDeviceImage collection  List the properties and relationships of cloudPcDeviceImage objects.
 Create cloudPcProvisioningPolicy  cloudPcProvisioningPolicy  Create a new cloudPcProvisioningPolicy object.
List provisioningPolicies  cloudPcProvisioningPolicy collection  List properties and relationships of the cloudPcProvisioningPolicy objects.

What this tells me is that MS has taken CloudPC pretty far down the implementation path. In fact, it shows evidence of long-standing design, time, effort and use. I’m hoping this means wider access to CloudPC will be part of the big picture soon, especially for Windows Insiders.

I’ve raised questions about this within the Windows Insider MVP community, but as yet have no official responses to report. Given that MS is showing more of its hand now, I have to guess that additional early adopters/beta testers/Insiders may be invited to participate. Hopefully, that will happen sometime soon. Personally, I’m itching to get a crack at this interesting and possibly game-changing new technology.

What Do Other Sources Say?

In a WindowsLatest story dated January 3, Mayank Parmar claims that “There’ll be at least three different configurations for Cloud PC – Medium (general-purpose computing), Heavy (better performance) and Advanced (business customers).” Good to know! And it will be interesting to understand their resources. That is, how many cores, how much RAM, and what levels of storage come with each configuration. Likewise, experiencing CloudPC on a smartphone should be highly educational. Moreover, it should help set expectations for CloudPC’s performance and capability. Right now, we still in limbo waiting for CloudPC to show up.

No doubt, there’ll be more cool and interesting stuff to learn and understand when increased access to CloudPC is enabled. I can’t wait! Alas, there’s really no telling exactly when CloudPC might go more public. That said, count on me to keep you informed. For my own part, I plan to be as early among the early adopters as possible. When the time comes, I plan to dig in deeply and enthusiastically.

According to Parmar Windows 10 Cloud PC should “drop sometime between March and June 2021.” Further, he reports that users can access CloudPC using the Microsoft Remote Desktop app. Given that this app runs on Windows, Android and iOS it’s the gateway to the most mobile of platforms. Even more suggestively, he shows a screenshot with a couple of CloudPC instances. Each has 2 virtual CPUs, 4 GB RAM and a 96 GB virtual SSD. My best guess is that this is the “Medium” config for a CloudPC instance. Hope we find out soon!

Facebooklinkedin
Facebooklinkedin

Top 3 2020 Windows 10 Utilities

Over the past year, I’ve worked with numerous Windows 10 tools and utilities. IMHO, my top 3 2020 Windows 10 utilities have to be:

This doesn’t mean the tools were first introduced in 2020: PatchMy PC has been around for some time, in fact. But all 3 were new to me in 2020. They also quickly became incredible favorites used frequently. Let me briefly introduce them in upcoming sections, with links to longer explanations and information.

Top 3 2020 Windows 10 Utilities #1: Ventoy

Ventoy is sheer genius. It partitions any USB drive into a 32 MB FAT EFI partition named VTOYEFI, and the rest of the drive into an exFAT partition named Ventoy. There’s enough smarts in the EFI partition to let a PC boot. It then mounts any ISO in the Ventoy partition from a pick list. Finally, it passes boot control to that mounted ISO image.

This means you can use a USB drive to store all your ISOs  for Windows 10, repair,  and so on. That includes low-level operational images such as MemTest86 for extended RAM testing. I currently have a nominal 256 GB (238 GB actual) NVMe SSD mounted in a Sabrent NVMe enclosure for my Ventoy drive. Any time I grab a new Windows 10 ISO that’s where it goes. It’s a blast.

Read more about it through this Google search, which provides links to all the great Ventoy coverage at Win10.Guru.

Top 3 2020 Windows 10 Utilities #2: PatchMyPC

For many years I was a big fan of Secunia’s excellent Personal Software Inspector (PSI) and Corporate Software Inspector (CSI) tools. When Secunia got acquired a few years back, it didn’t take long for PSI to fall by the wayside and become obsolete. I like KC Software’s Software Update Monitor, aka SUMo, but its free version is painful to use and its for-a-fee version doesn’t handle automatic updates as well as it could. PatchMyPC doesn’t recognize as much software as SUMo, but it’s free. Plus,  it updates everything it finds automatically and with minimal muss and fuss. There’s an enterprise version, too, that works with SCCM and InTune. Definitely worth getting to know (or at least playing with).

I blogged about PatchMyPC here at EdTittel.com in a piece entitled “Patch My PC Updater is worth checking out” on December 14, 2020.

Top 3 2020 Windows 10 Utilities #3: PowerToys

The original PowerToys utilities go back to the Windows 95 days. The current GitHub version is a major reboot in the form of an Open Source project under Clint Rutkas’ able leadership. Instead of operating as a bunch of independent tools under a general PowerToys label, the latest version (v0.29.0 as I write this) brings all of these tools together under a single umbrella for download, install and update purposes. All kinds of cool stuff going on here, and worth using.

I wrote a PowerToys Intro for ComputerWorld on October 9, 2020, and have written lots of other stuff on this tool here and at Win10.Guru in the past year.

Any or all of these tools will make a great addition to your Windows 10 toolbox, if you’re not using them already. Happy New Year, too!

Facebooklinkedin
Facebooklinkedin

Resolving BitLocker Recovery Key Confusion

In removing the last vestiges of Adobe Flash Player from my Surface Pro 3 (SP3) yesterday, I found myself in need of a BitLocker Recovery key. Why so? That system has BitLocker turned on. Thus, one can’t get access to the C: drive’s content without providing its 48-digit recovery key. Because that’s what I needed to do, I quickly found myself resolving BitLocker Recovery Key confusion.

Secrets to Resolving Resolving BitLocker Recovery Key Confusion

Because I didn’t realize the SP3 had BitLocker turned on, I turned to my Microsoft Account’s recovery key page. That’s when I got confused. As you can see from the lead-in graphic, there are four devices named Surface in the list shown. “Simple,” thought I to myself “I’ll just grab the Surface item with the most recent Key Upload Date and that should do it.” (Note: Key Upload Date is another column on the afore-linked key recovery page, not shown in the screencap above.) Wrong! In fact, it turned out that NONE of the recovery keys for devices named “Surface” worked to provide access to the drive. Uh-oh!

Key ID to the Rescue

Knowing there had to be a way to link the recovery key to the information that BitLocker provided at bootup, I noticed the on-screen prompt supplied a Key ID tied to the recovery key. (It’s the right-hand column in the lead-in screencap.) On close examination, the first 8 HEX digits in that ID match the key column for Device Name DESKTOP-DT16BLB. And in fact, it is tied to the Recovery Key that allowed me access to the SP3’s BitLocker-protected C: drive.

An Ounce Of Preparation…

If you should ever wish to manually edit otherwise protected files in an OS installation at the command line, you’d be wise to check to see if BitLocker is turned on for the target drive.  Easily done, using the Bitlocker Drive Encryption utility in Control Panel. Here’s what running it on the SP3 produces, with some info and fields of particular interest.

Resolving BitLocker Recovery Key Confusion.cpl-output

Notice this Control Panel item shows BitLocker turned on for Drive C: Notice further, the link that reads “Back up your recovery key.”

The “Back up your recovery key” entry lets you save it to your MS account, save it to a file, or print the recovery key information to any available printer. It showed me the complete recovery key ID as well as the complete recovery key itself. And it confirmed what I’d already figured out. Indeed, none of my devices named “Surface” hold the valid recovery key for the SP3 device.

As it turns out, I did a clean install on that machine around October 4 2018. This produced a randomly generated device name DESKTOP-DT16BLB whose Recovery Key is the one the SP3 uses. Afterward, I changed the Device Name back to Surface, without realizing that related Recovery Key info at my MS account did not change along with it. Live and learn! I’m also taking the opportunity to delete a bunch of now-obsolete BitLocker Recovery keys, too.

PowerShell Tools for BitLocker Automation

Knowing that admins like to work through SCCM or similar tools, and work on systems using scripts, I found a useful PowerShell script to grab BitLocker Recovery keys. Here’s its output (best directed to a text file with additional identification info, if run against a slew of remote PCs), along with the handy built-in PS cmdlet manage-bde.

Resolving BitLocker Recovery Key Confusion.ps-stuff
Use them in good health, to good effect, please.

Facebooklinkedin
Facebooklinkedin