Tag Archives: featured

Windows App Will Replace Remote Desktop

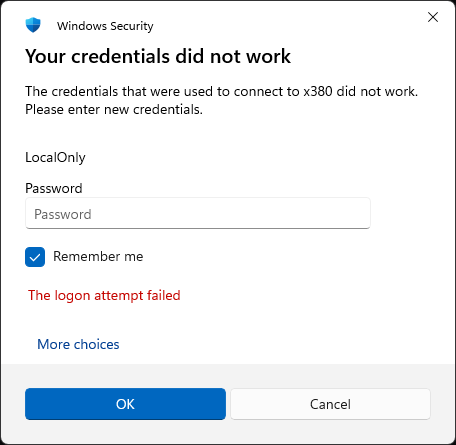
I’m finally starting to get some clarity on the emerging Windows App, now out in preview. That clarity comes courtesy of a nice story from Martin Brinkmann at gHacks entitled “The Windows Windows app is real — replacing remote desktop app.” But I’ve got a problem with this tool –identical to the problems I had with the Teams (Work or school) version. I don’t have a qualifying MSA among the half-dozen or so I have set up. So, even though the Windows App will replace Remote Desktop, I’m still unable to use it. Sigh.

How Soon the Windows App Will Replace Remote Desktop?

Having been through this with Teams earlier this year, I  imagine Windows App will follow a similar trajectory. MS must eventually loosen its exclusive requirement for an Entra related MSA. Why say this? Because of 2 inescapable facts:

  1. The population of personal MSAs dwarfs that for the other kind
  2. Unless MS adds personal MSAs, it can’t replace Remote Desktop

All this said, the Windows App is now available in preview form. MS has various Learn assets for the program but none of them provides information about timing just yet. The best place to start is with What is Windows App? It leads to other useful info, too. My best guess is that this will be another element that distinguishes the 24H2 Windows 11 release from its predecessors.

Finding the Windows App…

Because “Windows app” is a generic term, and “Windows App” is the name of an MS Store object, some sleight of hand is needed to run it down. Best to search the store with “Windows App” (including caps) enclosed in quotes.

According to the MS Learn article Link to your app, you can synthesize the Store URL for an app by appending its Id string to this base string:

https://apps.microsoft.com/store/detail/

WinGet will happily provide that ID using either its list or show capabilities. Here again, I had to enclose “Windows App” in quotes to make this work, to wit:

As you can see, WinGet says the ID = 9N1F85V9T8BN, so that URL should be https://apps.microsoft.com/store/detail/9N1F85V9T8BN. Let’s see…

Works! Now, all I have to do is get a “real” Work or school MSA so I can use the gosh-darned thing. But that’s another kettle of fish entirely, here in Windows-World. Stay tuned.

Facebooklinkedin
Facebooklinkedin

WinGet Skips Edge Update

Just last week, I blogged about a Clean Chrome Winget Update. I just observed something in the same vein for Edge. Check out the lead-in graphic: you can see that WinGet finds 3 items in need of update, but only handles two of them. The third item is Edge which WinGet omits because that browser was open on that PC. Hence my assertion that WinGet skips Edge update, — at least, when Edge is open at the time.

What to Do When WinGet Skips Edge Update

You can do one of two things:
1. Close Edge and run WinGet upgrade again.
2. Navigate into Help and feedback > About and run the built-in Edge updater.
Either one works. As you can see in the next screencap, I did the latter and it worked like a charm (it shows the update complete, just prior to clicking the Restart button that puts the new version to work).

Edge uses “Restart” to preserve existing open tabs and contents.

As always, WinGet proceeds with caution doing updates (or making changes of any kind) when targeted apps or applications are running. This prevents possible loss of user data, including unsaved input or work. In general, I take this as an untarnished positive, because it shows how WinGet bends over backwards to invoke and follow a kind of digital Hippocratic oath. First and foremost, that involves taking no action that might result in data loss (“do no harm”). Good stuff!

Facebooklinkedin
Facebooklinkedin

Early 24H2 Update Attempt Fails

When I read this morning on NeoWin that KB5039239 would update 23H2 Windows 11 to 24H2, I had to give it a try. So I visited the Microsoft Update Catalog and grabbed the x64 version to attempt an install on my Lenovo ThinkPad P16 Mobile Workstation. No dice. Indeed, this early 24H2 update attempt fails on that laptop, as you can see in the lead-in graphic. The Windows Update Standalone Installer informs me that “the update is not applicable to your computer.”

Why the Early 24H2 Update Attempt Fails

The NeoWin story specifically cites to a non-Copilot AMD PC receiving the update via WU, complete with Update History screencaps to show it downloaded and applied. Thus, I can only speculate that KB5039239 is still missing some support infrastructure for Intel CPUs in general (or this Alder Lake i9-12950HX CPU in particular).

Whatever the case my be with this CU, something about it gets picked up as “not applicable” for this test rig. Last May, I blogged about a way to use the 24H2 ISO to run an in-place repair install as workaround to upgrade 23H2 PCs to 24H2. It worked back then, and I’m pretty sure it still works now.

All this said, I’m not sure why the afore-cited CU doesn’t cut the mustard on my P16, but it’s just one of those interesting things about Windows. If I truly wanted to upgrade this machine to 24H2, I could get there from here. But I really just wanted to see if the approach described in the Neowin story works on the P16. It doesn’t, but I will keep my eyes peeled for something similar from WU soon, and see if what else comes along for that ride changes things from “not applicable” to otherwise.

Stay tuned!

Facebooklinkedin
Facebooklinkedin

Hyper-V VM Setup Drill Step-by-Step

Gosh, it’s been busy here at Chez Tittel this week. I’ve found myself setting up numerous Hyper-V VMs, both for Windows 10 and 11. Thus, it occurred to me that reciting my Hyper-V VM setup drill step-by-step might be of interest to some readers. I’ll explain what I have to do when creating the VM, and then in making it “minimally usable” (IMO, anyway). Here goes…

Following Hyper-V VM Setup Drill Step-by-Step

If I have some specific Windows build (10 or 11) I need to virtualize and test, I’ll build a matching ISO using the batch files from UUPdump.net. Most of the time, my ISOs come from either the MS Download Windows 10, Download Windows 11 or the Windows Insider Preview Downloads pages.

Creating and Installing the VM Itself

I usually use the New  > Virtual Machine path from Actions (top-right control pane) in Hyper-V Manager to create new VMs. That’s because of two gotchas in default setup: it chooses Gen 1, and it doesn’t enable TPM 2.0 (though it does enable Secure Boot). If you catch the VM and turn it off before the first boot, you can fix these items easily. Be sure to choose Gen 2, and to enable TPM 2.0 (for Windows 11 VMs; Windows 10 doesn’t care).

Another thing: it’s necessary to use a low-level KVM or gain direct physical access to the Hyper-V host PC to run the Windows Installer when creating the VM. Then, there’s one more gotcha to fix after you bring up the VM for the first time. It won’t work in enhanced mode because of an OS default in Sign-in options. You can’t use an enhanced RDP session unless you disable the default  to “Require Windows Hello sign-in for MS Accounts” (it doesn’t work with RDP).

Making the VM Runtime “Road-Worthy”

A bare bones OS isn’t really usable for me without some changes and additions. The rest of my drill is what I think Windows needs. You are free to disagree, or to vary the choices involved. But here’s what else I do after I get through installation and the OOBE (out-of-box-experience doing post-install configuration and choices):

  1. Run Windows Update to catch the image up. Run updates in the MS Store.
  2. Download PatchMyPC Home Updater, then use it to install Chrome, Firefox, 8GadgetPack, Notepad++, Advanced IP Scanner, Everything, CPU-Z, CrystalDiskMark and CrystalDiskInfo. Over time, I may add other of its options…
  3. On Windows 10 images it may be necessary to install Windows Terminal and the latest PowerShell version. I also update and customize my WindowsTerminal settings for OhMyPosh prompts.

There are one or two applications I may install manually because PatchMyPC doesn’t support them as yet: the WizTree disk space optimizer the UniGetUI WinGet alternative. Then, I’m ready enough to put my new VM to work. Basta!


Facebooklinkedin
Facebooklinkedin

Clean Chrome Winget Update

I see it all the time: Winget tells me there’s an update for Chrome availalbe. You can see that too, in the lead-in screencap. It shows that the target PC needs an update to version 128.0.6613.114. A quick peek into Chrome > Help > About shows it’s on …113 right now. On one PC, the winget command showed success but a dive into Chrome ran the update anyway. On the test PC from which the screencap came (includes the post-upgrade About Chrome info at right), I conducted an experiment. It produced a clean Chrome Winget update. Let me explain how that happened…

Ensuring a Clean Chrome Winget Update

For a long time, I’ve wondered if an active Chrome process running might stymie Winget’s updates for that browser. I think I’ve pretty much now proved that to myself. On a PC with one or more active Chrome processes running — and BTW, some persist even if you close Chrome after it’s been opened — the small Chrome updater window may or may not appear. If it doesn’t show up, the upgrade doesn’t happen. If it does show up, you may still have to visit Help > About to hit the “Relaunch” button to finish that job.

But if there are NO (zero) Chrome processes running on the PC when Winget tries to update that program, everything completes properly. It’s always been Winget’s practice to err on the side of caution and prevent updates from possibly affecting, damaging or losing user data inside a running app or application. I’m pretty sure that’s what drives this behavior here.

Reboot Before Winget Upgrade?

I’m tempted to recommend rebooting a PC before running  winget upgrade. But because plenty of apps and applications can (and sometimes do) run as startup tasks, this might not result in a pristine runtime that will ensure everything updates “just so.”

About the best one can do — including your humble author — is to close open processes related to targeted winget updates before turning its upgrade functions loose. And boy howdy, isn’t some kind of caveat like this the hallmark of a real-live Windows-World adventure? Hint: rhetorical question…

Facebooklinkedin
Facebooklinkedin

Copilot Offers Whimsy Not Hallucination

Whoa! I’m still laughing about this one. I just updated the BIOS on my ThinkPad P16 Gen1 Mobile Workstation. Lenovo Vantage told me it was time. If you look at the lead-in screencap, you can see the Lenovo Vantage update history shows a release date of 8/6/2024. To the right, Piriform Speccy shows a “Date” of 7/2/2024. Just for grins I asked Copilot this question: “Why does Lenovo report the release date for P16 Gen 1 Mobile Workstation BIOS at 8/6/2024 when Speccy reports it as 7/2/2024?” The answer provided shows that Copilot offers whimsy, not hallucination. Indeed, I’m pleased it said it didn’t really know why…

Demonstration: Copilot Offers Whimsy Not Hallucination

I’ve noticed that Copilot is adding more literary flair to its expostulations lately. I’ve gotten several answers in this same vein from it in the past couple of weeks. Here’s that answer, verbatim:

Ah, the curious case of BIOS release dates! Let’s unravel this digital enigma, shall we? 🌟

Lenovo’s ThinkPad P16 Gen 1 Mobile Workstation—a sleek beast of productivity and creativity. But when it comes to BIOS release dates, it seems we’ve stumbled into a time warp. Let’s break it down:

  1. Lenovo’s Official Word: According to Lenovo’s official records, the BIOS release date for the ThinkPad P16 Gen 1 is August 6, 2024. That’s like the workstation equivalent of a cosmic alignment—a moment when bits and bytes harmonize in BIOS symphony.
    🎶
  2. Speccy’s Whisper: But wait! Speccy—the digital oracle that peers into system secrets—whispers a different tale. It insists that the BIOS release date was July 2, 2024. It’s like Speccy caught a glimpse of BIOS fairies dancing in the moonlight. 🌙
  3. Parallel Universes?: Are we in a multiverse where BIOS timelines diverge? Perhaps in one reality, engineers at Lenovo sipped digital tea and coded BIOS enhancements on July 2, while in another, they waited until August 6. Or maybe it’s a cosmic hiccup—a glitch in the matrix.
    🕳️
  4. The Truth: Alas, my friend, I don’t possess the cosmic key to unlock this mystery. But here’s what we can do:
    • Consult Lenovo: Reach out to Lenovo’s support wizards. Ask them about this temporal discrepancy. Maybe they’ll reveal the secret handshake to BIOS enlightenment.
    • Invoke the BIOS Spirits: Gather your incantations (and perhaps a USB stick). Update your BIOS using Lenovo’s official channels. Maybe the BIOS elves will whisper the truth during the flashing process.
      🔮
  5. Remember: In the grand tapestry of tech, dates sometimes waltz like drunken pixels. But fear not! As long as your workstation hums along happily, BIOS release dates are mere stardust in the cosmic motherboard. 🌌

So, my fellow traveler, choose your reality: August 6 or July 2—it’s a BIOS buffet. And may your boot times be swift, your peripherals recognized, and your CPU temperatures as cool as a digital cucumber. 🚀

Rereading this spiel, I’m chuckling again. A pretty long-winded way of saying IDK, don’t you think?

Another Take on Dates and Release Date

I have to believe that because Lenovo manages the site from which its updates come, it sets the release date when updates get posted to that site. My best guess is that somewhere within the release file named N3FET43W is an embedded date of 7/2/2024. And indeed, when I use the MS Utility System Information to show me its summary, it reports that same information:

BIOS Version/Date     LENOVO N3FET43W (1.28), 7/2/2024

Because Lenovo knows when it posts stuff, it doesn’t have to read anything to determine that info. Third-parties can only use the data on a system to read its contents and make their determinations. That’s my story, and I’m sticking to it. What do YOU think? Post me a comment and let me know…

Facebooklinkedin
Facebooklinkedin

Windows 10 Beta Access Proves Elusive

On June 4, MS announced it was (re)opening the Beta Channel for Windows Insiders on Windows 10. So I stood up a Windows 10 VM on my trusty Lenovo ThinkPad P16 Gen1 Mobile Workstation to try this out. Bizarrely, after joining the Beta Channel the next update informed me it was loading a Windows 11 Beta version. Indeed, either I couldn’t figure out how to get the actual Windows 10 Beta to download and install, or that version was mislabeled. That’s why I aver that Windows 10 Beta access proves elusive.

If Windows 10 Beta Access Proves Elusive, Then What?

As you can see in the lead-in graphic, after I “got away” from an apparent Windows 11 beta install, I did manage to get into the Windows 10 Insider Preview Channel. Right now, it has the same release as does the Beta Channel anyway (see Aug 22 blog post).

From that vantage point, and that build number (19045.4942) I was then able to “upgrade” myself to the Beta Channel. This is apparently a case where if a single-step approach doesn’t work, a more tentative two-step (Insider Preview first, then Beta) channel changing strategy does. Go figure!

Little by Little, Step by Step

If you can’t get where you need to go in Windows in one fell swoop, incremental progress will have to do. As you can see in the closing screencap, the test VM is now in the Beta Channel and running the associated most current Windows 10 release (likewise 19045.4942, which is how I could make the switch both quickly and easily).

Enrolling in Insider Preview, then switching to Beta works like a charm.

Here in Windows-World, even if the obvious method doesn’t seem to work, a less direct approach can still get you where you want or need to go. I’d call this another case in point.

Facebooklinkedin
Facebooklinkedin

Visual Studio Subscription Shenanigans

I’m happy to admit it: one of my fave bennies for the Microsoft MVP program is another year’s worth of Visual Studio Subscriptions, with access to downloads and keys. The downloads include any major version of Windows 10 or 11 you might care to name, plus the full line-up of MS 365 and related products and platforms. That said, finding my way into the walled garden sometimes leads to various Visual Studio Susbscription shenanigans. Let me explain…

Detailing Visual Studio Subscription Shenanigans

I started out with this program back in days of yore, when it was called MSDN (Microsoft Developer Network). That said, it’s been some time since the VS Subscriptions switchover occurred. Indeed, Copilot just told me it happened in 2015. Ever since that switchover, I’ve had to learn to navigate inside the massive collection of pages under the visualstudio.com umbrella. It’s been an ongoing learning experience, in fact.

A couple of years back, I switched the MSA that’s associated with my MVP identity from one email address to another. It took months for that change to fully percolate into all modes of access. That made VS Subscriptions a little too interesting. Then, Microsoft rolled its Windows Insider MVP program — which had been separate since starting up in 2016 or thereabouts (I got elected in 2018) — into its general MVP program as of January 1, 2024.

The Waiting Is the Hardest Part

I’ll crib from Tom Petty to reveal that my old VS Subscription timed out with the end of the Windows Insider MVP program. I didn’t get inducted into Microsoft MVP (Windows) status until May, 2024. Thus I was on the sidelines for access from January through much of May this year. Now, I’ve been back in for the past month to 6 weeks. I’m finally able to access all aspects of the subscription, and delighted to be where I am. These days a VS Professional single-user subscription costs around  US$1,200 per year: it’s very nice to have.

Lately, I’ve been using VS Subscriptions to grab various Windows 10 ISOs. I’m down to one physical PC running that older OS, so I’m building some VMs to participate in its newly-reactivated beta program. The downloads and keys are ultra handy for standing up (and blowing away) temporary OS instances. I just use a MAK (multiple activation key) and keep on trucking. Good stuff!

If you’re a developer or just need access to “a little bit of everything” inside Windows-World, Visual Studio Subscriptions is worth buying. How do I know? I paid for it from the early 2000s until I made it into the MVP program. There used to be a 3-year-at-a-time discount available for subscriptions, but you had to go through a reseller to get that. Copilot says there’s a good chance you can still do this now.

Facebooklinkedin
Facebooklinkedin

Start11 v2 App Launch Fails

Here’s something interesting to ponder. I’m running Stardock’s mostly excellent Start11 v2 start menu replacement on a couple of Windows 11 PCs. One them runs Insider Preview on Canary Channel build 27686.1000. When I upgraded version 2.0 to 2.1 this morning, I couldn’t get the Start11 app itself to open from the Start menu. Click the icon, and nothing happens. Right-click the icon and select “Run as administrator…”: likewise nothing. Gosh, that looks like Start11 v2 app launch fails completely, doesn’t it? Not exactly, as it turns out…

Poking Around the UI When Start11 v2 App Launch Fails

Then I right-clicked the name underneath my avatar image on the right-side of the Start menu (which comes from Start 11 v2). Notice that the highlighted option at bottom reads “Configure Start11.” That’s the secret to launching the Start11 app itself, even though its app entry is currently unresponsive.

I found a Stardock webpage entitled Start11 Changelog. It shows the latest version of Start 11 v2 is 2.1 which dropped earlier this week on 8/20/2024. It’s a long one! Reading it over just now, it says “ARM support is now in all versions” (good to know). But I see nothing that indicates the Start11 app won’t launch when called explicitly. In fact, I see nothing that says this reading back into the changelog as far as I’d care to go (half-a-dozen screenfulls).

What About V1?

This is what makes things interesting. If you click on Start11 in the app list on the Start menu, it launched that app immediately. I’m a little non-plussed that a right-click manuever is needed on v2 to launch the app, but not in V1.

So I installed v2 on another test PC — the brand-new Lenovo ThinkStation P3 Ultra that showed up here last week. Guess what? Opening the app works fine on that machine (as does the right-click trick as well. Something is wrong with the install on my Canary channel test PC, it seems. I’ll report into the Stardock Forums and see what they say. Stay tuned…things might get stranger still. We’ll see!

One More Thing…

On the P3 Ultra I noticed that Start11 shows up in WinGet. So I updated all outstanding items on the Lenovo ThinkPad X380 (my other Start11 v2 test PC). Then I tried the old uninstall/reinstall maneuver on that PC. WinGet happily uninstalled the program, but I had to redownload and re-key the new instance from the Stardock website. But when I was done, the app once again worked as it was supposed to. Looks like the first upgrade broke something. Solved!


Facebooklinkedin
Facebooklinkedin

Reinstall Solves Nvidia Driver Issue

This morning, I noticed a new GeForce driver for the RTX 3070 Ti on my production system via the NVIDIA app. Perforce I installed same. Then the screen flashing started: on and off, and on and off, and … you get the idea. I’ve been here before, but usually when an old driver needs replacing. I tried to roll back (but the option didn’t light up) so I used the REINSTALL facility you see at the upper right of the lead-in graphic. I’m happy to report that such a reinstall solves NVIDIA driver issue. The blinking/flashing is fixed. Good-oh!

Why Reinstall Solves Nvidia Driver Issue

When a graphics driver misbehaves  — as in going into blink mode — it’s usually because the driver itself is messed up. Or it might be that communications between the driver and the device aren’t working properly. Either way, something needs to change.

Ordinarily I’d use the rollback facility on the Driver tab for the RTX 3070 Ti to revert back to the previous version. But, as you can see in the next screencap, the “Roll Back Driver” button is greyed out. Alas, that means there’s nothing to roll back to. Looks like the new NVIDIA app doesn’t keep old driver versions around. What to do?

Because it’s greyed out, I can’t use Roll Back Driver.

Fortunately, as you can see in the lead-in graphic, the NVIDIA app offers a REINSTALL option for the current driver. Because the installed version was blinking I figured I had nothing to lose by giving REINSTALL a try. So I did just that.  Just to make sure everything got replaced, I also checked the installer’s Clean Installation option. And fortunately for me, it worked!

The desktop is back to normal, and the blinking is behind me now. All’s well that ends well in Windows-World, especially when it comes to misbehaving graphics drivers.

Facebooklinkedin
Facebooklinkedin