Tag Archives: featured

Copilot+ PC High-Perf Power Plan

Here’s something interesting. I’ve got a Lenovo ThinkPad Yoga Slim 7i Aura 15 (aka Model 15ILL9) Copilot+ PC. It’s the Intel follow on to the Snapdragon X models let go earlier this year. In reading over Paul Thurrott’s November 14 review of that unit, I saw that defining a Copilot+ PC high-perf power plan will produce more reliable and faster output, albeit at some cost to battery life. FWIW, this accords with my own observations and experience. But by default, all Copilot+ PCs use the Balanced power plan. It gets better…

Where’s the Copilot+ PC High-Perf Power Plan?

Alas, likewise by default, Balanced is the ONLY power plan defined and available for Copilot+ PCs (and indeed, for most PCs that support the S0 sleep state). What to do? You can create one, but that involves tweaking more than a handful of settings. Wait: there’s a better way.

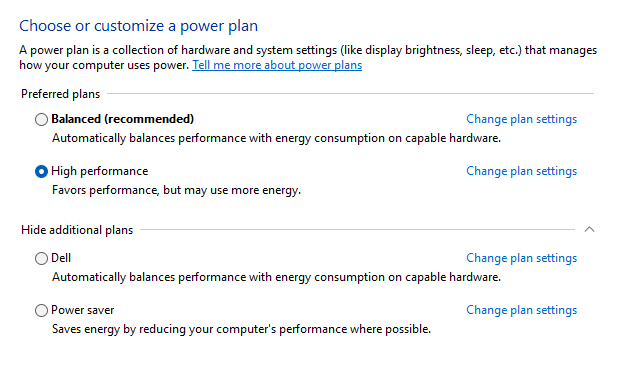
I went trolling around at ElevenForum.com and found a thread that linked to a Web site named  Windows Answer File Generator. It includes an entry named Windows 10 Power Configuration. Indeed, that script works for Windows 11 as well. So I used it, then downloaded the resulting file named power.bat to the afore-mentioned 15ILL9 Copilot+ PC. It ran within a Command Prompt session without issue, and shows up now as the current, in-use Power Plan:

After running the script, High Performance is the chosen Power Plan.

Good stuff! If you find yourself in a situation where you need more performance or reliability from a Copilot+ PC, this technique and its tool stand ready to help. Do yourself a favor, and give them a try…

Facebooklinkedin
Facebooklinkedin

Pondering Apparent Windows 11 Build Fork Jump

If you look over my blog posts for the past few days, you’ll see I was trying to get the Lenovo ThinkPad X1 Extreme (2018 8th-Gen i7, etc.) from 23H2 to 24H2. I provide a list of links and capsule summaries to those item below. But the reason I’m puzzled is that manually applying KB5046633 took me from Build 22635.4460 (23H2 Beta) after which using the Installation Assistant took me to Build 26100.1742 (24H2 GA/Production). That’s supposed to be impossible. Thus, it’s got me pondering apparent Windows 11 build fork jump that somehow occurred.

Installer Oddity Has Me Pondering Apparent Windows 11 Build Fork Jump

I didn’t think the installer let one jump from Insider Preview versions (Beta Channel, in this case) to GA/Production images. But something I did — I think it’s the manual application of KB5046633 — let that happen. Once I got there, though, I was stuck. I couldn’t repair install my way to either the current GA Build (26100.2314) or its Beta Channel counterpart (22635.4510).

I can only surmise that I somehow slipped a version check. It might have happened when using the afore-linked KB item. Or, it could’ve happened when running the Windows 11 installation assistant after that. Truth to tell, I was relieved when my final repair operation hit a dead end, and the Windows Installer basically forced me to clean install Windows 11 from scratch.

Factor 1: Multi-Version Manual KB Installs

Indeed, KB54046633 works on both 23H2 and 24H2 based Beta Channel versions. The upgrade path from one to the other doesn’t necessarily need the full-blow installer (including the Installation Assistant). Indeed, Copilot tells me that when I applied KB5046633 it could’ve upgraded me from 23H2 to 24H2. But it did not.

Factor 2: Using the Windows 11 Installation Assistant

When I ran the assistant, that’s when the fork jump actually occurred. And again: I didn’t think it was supposed to work at all, let alone the way that it did. That’ s how I found the X1 Extreme enrolled in the Beta Channel but showing a GA/Production Build number.

The moral of this story is to limit yourself to the kinds of upgrade techniques you elect to use. Thank goodness these were all well-backed-up, non-essential machines. This could turn into a real snake pit for those not aware of such potential pitfalls. Me: I enjoy fallling into them, and then figuring out how to get to a better place. Thus, I hope you can learn from my mistakes … errrrr … adventures here in Windows-World.

Here are links to my previous blogs in this series with capsule summaries:

  • Nov 12 X1 Extreme Still Gets No 24H2 Offer: explains that this 2019 vintage laptop is still on some kind of update hold
  • Nov 13 X1 Extreme 24H2 Beta Pickle: Explains the sequence of updates that got me from a 23H2 Beta Build to a 24H2 GA Build
  • Nov 14 MSA Switch Brings Standard 24H2 Aboard: Explains how changing to a non-registered MSA produces only clean install option for 24H2.

Gosh this has been interesting and educational, too.

Facebooklinkedin
Facebooklinkedin

X1 Extreme 24H2 Beta Pickle

For me, a key aspect involved in learning Windows’ many ins and outs is occasionally painting myself into a corner. That’s what I seem to have done with the Beta Channel Windows 11 install image on my Lenovo ThinkPad X1 Extreme. ( Equipped with 8th-Gen i7-8850H, 32GB RAM, 2xNVMe SSD, and NVIDIA GTX 1050 Ti/Intel UHD 630.) As I explained in yesterday’s post I got it to build 22635.4460 under the 23H2 version umbrella. Upon discovering it was an Insider Preview anyway, I decided to run the 24H2 Installation Assistant, and let the chips fall as they would. Fall they did, and now I’m in an X1 Extreme 24H2 Beta pickle. Let me explain…

Easier Into than Out of X1 Extreme 24H2 Beta Pickle

Take a look at the lead-in graphic. It shows Settings > Windows Update > Windows Insider Program with the X1 Extreme in the Beta Channel. Alas, it also shows the Build number as 26100.1742. According to Copilot it was released on September 10. 2024 as part of the original Windows 11 24H2 update. It’s not a Beta Channel release. Rather, it’s a production release build (and what obviously provided the image info for the corresponding ISO or contents that the Installation Assistant uses).

That’s the corner I’m in right now. The Insider Program thinks I’m in the Beta Channel, but my current build and image fall outside that channel. On a whim I tried repairing the image with an ISO for 26100.2314 — the most current production build. To my combined relief and chagrin, this failed with a “The install failed” error. That’s what I’d expect from a version mismatch.

Onto the Next Repair: Beta Channel ISO

I’m now going to try again, with the latest Beta Channel item from the Windows 11 Inside Preview ISO Downloads page. My best guess, and my fervent hope, is that this will make for a successful in-place upgrade repair. At this point, I’m past the half-way point in the download. I’ll be able to access and use the ISO shortly…

The ISO mounted as the G: drive. I’m running setup.exe from the root directory right now. It’s checking for updates, then the installer had to restart itself. I’m now accepting the EULA and then comes the moment of truth: the only option available is for a clean install, as you can see here (note the two “keep” options are greyed out, and unavailable):

The Windows Installer finally gets wise and requires a clean install.

That’s an acceptable offer, and I’m going to take it. But first I want to experiment with WinGet Export to save all my stuff and attempt to import it back later on. I also need to make an image backup in case something goes wrong in my next planned steps.

Tomorrow, I’ll close this out, report on how the clean install went, and reflect on the whole experience. Stay tuned…

Facebooklinkedin
Facebooklinkedin

X1 Extreme Still Gets No 24H2 Offer

I’m getting down to the bitter end, and it’s troubling me. The Lenovo ThinkPad X1 Extreme still gets no 24H2 offer from Windows Update. Indeed, it’s my only remaining 23H2 holdout. Looking at the 24H2 Known Issues List, I can’t figure out why. One outstanding possibility is the Synaptics WBDI fingerprint reader. But shoot, it’s dated 12/4/2022. I’m puzzled… OTOH, Copilot says that Intel Display Audio drivers include Intel SST audio support, and that’s a listed issue as well. It could be the blocker, and a good thing to know.

Waiting Impatiently, as X1 Extreme Still Gets No 24H2 Offer

Here’s what I’ve done to try to address potential update hold issues:

  1. Applied all Optional updates, including drivers
  2. Use Snappy Driver Installer Origin (SDIO) to update NVIDIA and Intel Display Audio drivers (restart required)
  3. Run comprehensive cleanup and integrity checks (PC Manager, DISM, sfc, etc.)

Still no joy, and no real clue on how to get over this hump. All in all, I’m both miffed and bemused that a 2018 vintage (8th-Gen) i7 PC is still lagging behind the update pack. I’m biting my tongue, holding back on forcing matters. I guess I have a perverse desire to see how long it’s going to take for WU to come through with 24H2.

Only time will tell, I guess! And that’s they way things go sometimes, here in Windows -World.

Additional Oddments Present on X1 Extreme

OK, so today is Patch Tuesday. I couldn’t get WU to present KB5046633, so I downloaded the self-installing update file (.msu). It took nearly an hour to get it up and going again, but the PC is now running 22635.4460. I suddenly understand that this PC is running the Beta Insider version (a surprise to me, or perhaps a “senior moment”). THAT explains why the update took so long: it had LOTS of work to do to fit it into the beta release…

Given that it’s running an Insider version anyway, I’ve decided to force matters using the 24H2 Installation Assistant. Here goes… Chunking through the GUI portion without issues, but took awhile (~ 45 minutes). First reboot to completion: same again. But I had no idea the Windows Installer could play such hopscotch with Insider Preview updates. I just flat thought it wouldn’t work. It’s actually kind of amazing. And, with many things in my Windows experience, the biggest surprises — like this one — are mostly self-inflicted.

There is a problem though: the Build Number currently self-reports at 26100.1742. This corresponds to the early October build for plain-vanilla 24H2, NOT the beta version. I just ran WU and updated again, and it still reports the same build number. Very strange! I’m going to build an ISO for 22100.2314 and see if it will repair install. This is getting decidedly interesting…

Facebooklinkedin
Facebooklinkedin

Fixing Winget Source Update Fail

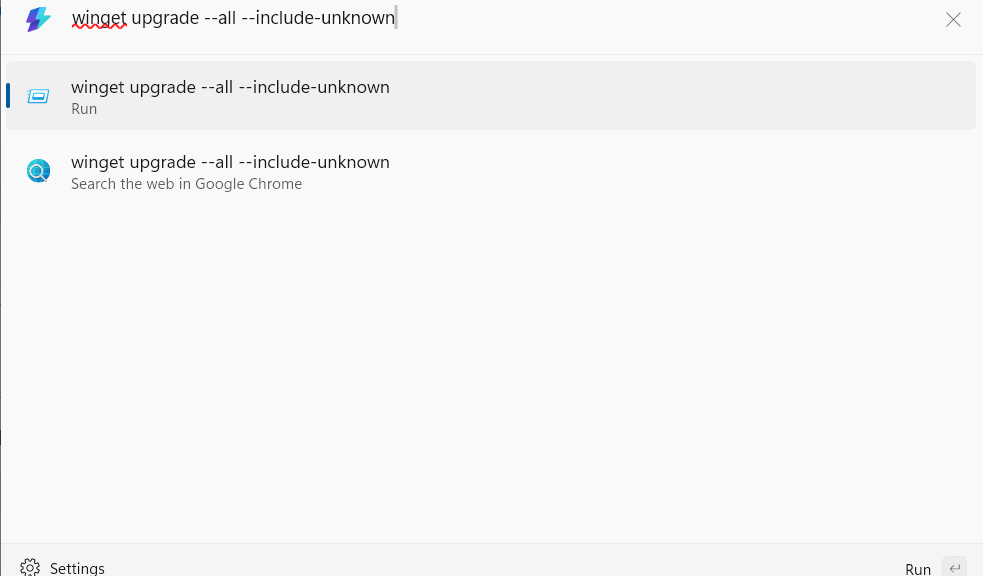
In the past two-plus years that I’ve used WinGet nearly every day, I’ve seen one error show up occasionally. It reads “Failed in attempting to update the source: winget.” This means that the winget command is looking to its own repository of known packages to obtain the latest list but unable to complete that access request. You can see what this looks like at the top of the lead-in graphic. The error follows right after the initial WinGet upgrade… command. The bottom part of that same screencap (it’s two pieces stitched together, actually) shows what’s involved in fixing WinGet Source update fail.

Fixing Winget Source Update Fail Has Its Own Command

It should come as no surprise that there’s a WinGet Source command that takes various subcommands to add, list, update, remove, reset and export WinGet sources. You can read all about these items in this MS Learn item The winget source command.

As you can see at the bottom of the lead-in graphic I used WinGet Source Update -n WinGet for my fix. Basically, that tells Winget to “try again” with updating the default WinGet source named WinGet. It does so automatically when you run WinGet Upgrade… But it does occasionally fail. And when it does, most of the time the Source Update at the head of this paragraph fixes things.

When Might WinGet Source Update Itself Fail?

A variety of problems could provoke error messages from the WinGet Source Update -n WinGet command I used for my fix. It might be that the WinGet source is offline. It might be some kind of networking communication problem is preventing access. I’ve never had this happen, but it would no doubt produce a different error message to help point you in the right direction. WinGet is well engineered that way.

Indeed, WinGet is now an essential part of my admin toolbox. I simply can’t live without it anymore. Cheers!

Facebooklinkedin
Facebooklinkedin

Replacement Production PC Planning

All righty, now. I’m making the move to switch over from my now-ancient i7 Skylake B550 desktop to a Lenovo ThinkStation P3 Ultra. That has me jumping 6 Intel generations: the Skylake is a 7th-Gen beast; and the P3 is home to a Core i9-13900. I’ll also be switching over to a newish 46″ 2022 vintage monitor from a pair of 2017 Dell 27″ UltraSharps. As I get into the minutae of replacement production PC planning, big changes are afoot. It’s past time — and I’ll keep the Windows 10 box running to observe EOS and beyond — but I need to get production on a newer footing.

Comparing Cases: Replacement Production PC Planning

The lead-in graphic shows two PC cases side by side. On the left: the new SFF case on its side for the P3 Ultra. On the right, the Rosewill BlackHawk Ultra case (ordered from Newegg in 2015).  The picture is emphatically not to scale. By volume the P3 case would fit 4.77 times into the Rosewill case. The old beast is MUCH bigger.

But much of that size is meant  to accommodate as many as 8 3.5″ HDDs. By contrast, the P3 can accommodate 1 2.5″ SATA device and 2 M.2 NVMe SSDs. This is driving a lot of my pre-migration acquisition plans. Here’s the current iteration:

  • A modestly-priced Gen4 NVMe for the 2nd unoccupied slot in the P3 (estimated cost ~US$200).
  • 2 more 32GB DDR5-5600 SO-DIMMs to bring the unit up from 64GB to 128GB RAM. ($US150 or so).
  • If it will fit, I’ll use one of my Seagate 5 TB 2.5″ SATA drives in the unit’s SATA enclosure (it’s a tall drive heightwise: 15mm). If not, I’ll probably buy another 4TB SATA SSD (US$180 or so)

I’ve got everything else I need to bring the build together and start moving everything over. Max total budget looks like US$530 or so. Not too shabby. I’ll probably buy another copy of PC Mover to get everything moved over, unless I somehow get persuaded otherwise. It’s been my modus operandi for my last two production moves and seems to work reasonably well.

Stay tuned: more is surely coming … and soon, I hope.

Facebooklinkedin
Facebooklinkedin

Copilot Still Hallucinates Occasionally

I knew it remains a possibility. And I’ve seen it myself, from time to time. But this morning, I got slapped in the face with it: Copilot still hallucinates occasionally. I’m assembling parts to migrate my production desktop over from a 2016 vintage i7 Skylake desktop rig. I’m moving to a snappy 32-core Lenovo ThinkStation P3 Ultra. I need a lot of storage for that setup, so I asked Copilot the question in the lead-in graphic: “What’s the highest-capacity 2.5″ hard disk available right now?” I was stunned by the answer at at first, then…

Showing Copilot Still Hallucinates Occasionally

I’ve got a couple of Seagate 5TB HDDs here at Chez Tittel. I purchased them 3 years ago. At the time, they were the biggest 2.5″ drives available. And as it happens 5TB Seagates are STILL the biggest 2.5″ models for sale today.

Follow the link to the Tom’s story cited in the Copilot response. Then jump to Amazon for that Seagate IronWolf Pro 20TB item. Guess what? It clearly says “CMR 3.5 inch SATA 6 Gb/s, 7,200 RPM, 256 MB Cache” in laying out that drive’s specifications. It’s not a 2.5″ drive, period.

The good news is: if I want to use a 5TB 2.5″ HDD in this rig, I’ve already go two of them. The bad news is they’re pretty slow, as old-fashioned mechanical storage media can’t help but be. But there’s another hope!

Given the 5TB Limit, I consider 4 TB NVMe

Gosh, there’s not much capacity difference (25% figuring up, and 20% figuring down) between a 5 TB HDD and a 4 TB NVMe SSD. I’m coming around to the idea that I should buy a 4 TB NVMe for my second storage slot in the P3 Ultra. Decent models are available for around US$300, while the 5TB Seagate HDD costs US$233 or so. This provides roughly 10X the speed for 130% of the price. That’s a good trade-off. I’m still thinking but now I know how I’m leaning.

In the meantime, keep checking those blithe and speedy Copilot answers carefully. You wouldn’t want to be misled. Here in Windows-World it’s smart to stay skeptical, and double check what AI tells you.


Facebooklinkedin
Facebooklinkedin

WinTerm Customization Remembered & Repeated

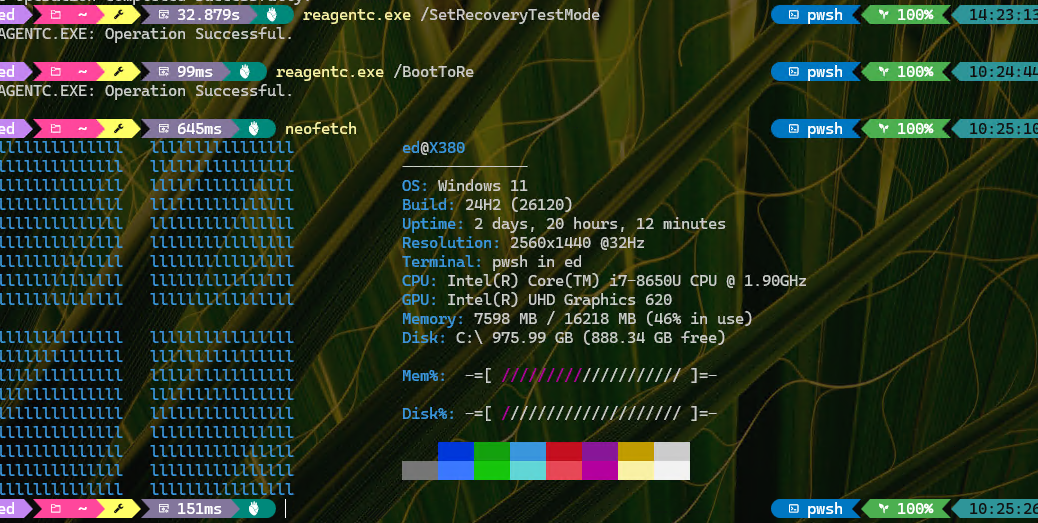
I’m closing setting up and tweaking my Lenovo loaner SFF PC , just the way I like it. Indeed, I plan to switch my production desktop over from the 2016 vintage Skylake i7 I now use.Instead I’ll go with an uber-powerful ThinkStation P3 Ultra. It’s equipped with a 13th-Gen i9-13900, 64 GB RAM, Nvidia RTX A2000 12 GB, and a Hynix 2TB Gen 4 SSD. As a near-final step, I am fumbling through WinTerm customization remembered & repeated. You can see what I mean in the lead-in graphic…

Digging Thru WinTerm Customization Remembered & Repeated

It took four steps to get all the pieces lined up to customize my Windows Terminal as you see it in the graphic:

  1. Install Jan DeDobbeleer’s OhMyPosh for a custom prompt. That also required creating a $Profile file for startup. There are plenty of good how-tos around on this. I’m sad to report, however, that TekkiGurus.com is off the air. And thus, my series on this subject, too — find it instead on the WayBack Machine.
  2. Download and install the CaskaydiaCove Nerd Font (which I grabbed from NerdFonts.com) so that OhMyPosh can do its fancy thing with Windows Terminal prompt characters and environment variables. Handy now that drag-n-drop font install works inside Settings > Personalization > Fonts.
  3. Grabbed one of my favorite MS SpotLight images and then dimmed it up (30% opacity or thereabouts) to use as the Windows Terminal background. Dare I say I find it fetching?
  4. Ran the command Install-script WinFetch inside WinTerm to visit the script archive and install the eye candy that this displays about target systems when run.

Looks pretty good, doesn’t it? I’ve learned to expect and appreciate a bit of Windows Terminal pizazz to keep my eyeballs entertained while working at the command line.

And there you have it. Just another day in the paradise known to some as Windows-World. Good stuff!

Facebooklinkedin
Facebooklinkedin

PatchMyPC Home Updater Mini Annoyance

First things first: I’m a HUGE fan of PatchMyPC’s Home Updater product. Indeed, I got invited to try out the company’s latest version — an app-based implementation that supersedes PatchMyPC.exe — because I’ve written about it often and positively. In the interests of sharing my enthusiasm and support, I also have to report a recent PatchMyPC Home update “mini annoyance.” Let me tell you more…

What Is the PatchMyPC Home Updater Mini Annoyance?

It’s a Store app, so you must call it via the Start menu as “PatchMyPC Home Updater” to launch the program. But it’s NOT available in the Windows Store. Rather you must download it direct from the maker’s website, from the PatchMyPC Home Updater home page. If you try to find it in the MS Store, you get a big fat zip instead. Ditto for a search on “Patch My PC” as it appears here:

Only the website will do: the app is NOT in the MS Store.

Forewarned is forearmed, I guess. But gosh, it’s kind of a minor thing to add an app to the Store, isn’t it? C’mon guys: fix this sooner, rather than later. I applaud the new UI and the switch to a modern app style for this excellent tool. But please: finish the job and put it in the Store. Just sayin…

Facebooklinkedin
Facebooklinkedin

MS Sez: Copilot+ PCs 5X Faster Than 2019 Models

Here’s an interesting MS announcement from last week. I saw it, but didn’t read it all the way through. This morning, I read follow-up coverage (e.g. this WindowsLatest story). It’s entitled “How prepare for Windows end of support by moving to Windows 11 today.” Overall, it’s an eminently predictable bit of upgrade rah-rah. But specifically MS sez: Copilot+ PCs 5X faster than 2019 models.  I translated “5-year old PCs” from the original to get this year.

Weighing Copilot+ PCs 5X Faster Than 2019 Models

It just so happens that this cut-off equates to 10th Generation Intel CPUs (e.g. Comet Lake and Ice Lake). It also hits 3rdGeneration AMD Ryzen models (Matisse and Renoir). I’ve got 4 8th Gen Intel laptops here at Chez Tittel. I’ve also worked with 3 Copilot+ PCs (2 Snapdragon X models, and 1 Intel Aura/Lunar Lake model). My own gut feel, and my ongoing observation of resource intensive tasks — such as disk cleanup, updates, upgrades, big installs, and so forth — absolutely agrees with this claim.

If you dig into the October 31 announcement, you’ll find a section entitled “Benefits of upgrading to Windows 11.” Therein, author and MS EVP/Consumer Chief Marketing Office Yusuf Mehdi avers that when compared to Windows 10, 11 is

  • more sure and trusted
  • better optimized for speed and efficiency
  • better at multitasking
  • more accessible
  • more energy efficient

The 5x speed claim is footnoted to a May 2024 MS Learn item entitled Copilot+ PC performance details. That’s where the 5X claim gets some substance, which turns out to rest on the Cinebench 2024 Multi-Core benchmark. Further investigation shows this to be a 10-minute rendering test using the Redshift engine. Looking at the laptop segment at CPU Monkey, I see the first recognizable Copilot + PC in 17th place, with a value of 1,150 (Apple M2 Ultra (76-GPU) takes 1st place , with a value of 1,918).

Moving Up Probably Means Copilot+

With a handful of older PCs that I’ll need to upgrade in the next year or two, I am thinking about “what’s next” here at Chez Tittel. And indeed, most of what I’m thinking about buying into is Copilot. My first such purchase will probably be a Yoga Slim 7x (blogged July 1, 2024). It’s got a killer screen, runs like a demon, and represents a good value for its cost (~US$1,200 for 16 GB RAM, 0.5 TB SSD, and X1E-78-100 Snapdragon X CPU).

There will be plenty of other models to consider in the months ahead, as the Intel and AMD offerings get fleshed out alongside the earlier ARM Snapdragon X offerings. I’ll be choosing among those, or their successors, in the next year or two as I start upgrade. You should probably be thinking along those same lines. Unless and until something better comes along…

Facebooklinkedin
Facebooklinkedin