Category Archives: Windows Update

Correlating KB Items and DISM Package IDs

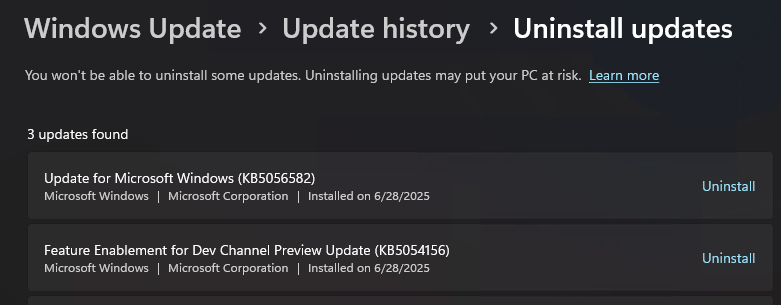
Here’s an interesting situation. I was reading on Neowin this morning that MS has fixed a Windows 10 issue that caused BSODs on some systems (not mine, thankfully). To find or uninstall such an item, one must use DISM. But DISM deals in “Package Identity” strings, not in KB article numbers (e.g. KB5057589, as in this case). Surprisingly, correlating KB items and DISM package IDs turns out to be vexing and tricky. Indeed, this SuperUser thread more or less confirms what I quickly figured out. That is: the only datum both items have in common (using Update History for KB items and DISM Get-Packages for PkgIDs) is their install date/time.

Fortunately, what I was seeking showed up dead last in the Get-Packages output in PowerShell/Windows Terminal. As you can see in the lead-in graphic, it’s the only item whose install date matches that for KB5057589. But there’s no inherent correspondence with its PkgID: Package_for_WinREServicing~31bf3856ad364e35
~amd64~~19041.5728.1.1. What to do?

More On Correlating KB Items and DISM Package IDs

I figured there might be a PowerShell script (or something similar) already available to establish this correlation. AFAIK, nope! I thought that Copilot might be able to write me such a script. Nope again: it wants to look for the KB item ID inside the PkgID. You can see from the foregoing item (or by looking at installed updates using DISM Get-Packages) that this just ain’t so.

It looks like the only way to put all this together is to install the PSWindowsUpdate module, then use its built-in Get-WuHistory cmdlet. By writing that to a file, and then doing likewise with output for DISM Get-Packages, it should be possible to use matching date strings for KBs from the former with the “Install Time” attribute value from the latter to find and document matches.

Another Project for My List

Now that I know what I must do, I need to figure out how to do it. That will make excellent fodder for another blog post. As soon as I find the proverbial “round tuit” I’ll put that together and post it here. In the meantime, it’s nice to see that the obvious path to success (looking for the KB item ID inside the DISM PkgID) isn’t the actual path to success. Here in Windows-World, that’s all too often the case. I’m glad it keeps me entertained. I hope you feel likewise.

Facebooklinkedin
Facebooklinkedin

Reinstall Now Builds Current Images

Last Wednesday, I blogged that a repair install for Windows 11 unsticks WU. As I think about what that really means, I want to emphasize that using Settings > System > Recovery > Reinstall now does something remarkable. That is, Reinstall Now builds current images for whatever version Windows Update is serving at the time. It used to be only UUPDump.net could do that, by slipstreaming all the latest updates into the base Windows image (24H2 in this case).

How To See That Reinstall Now Builds Current Images

If you look at the Settings > System > About info that appears in the lead-in graphic, it tells pretty much the whole story needed for evidence. You can see it shows version 24H2, Build 26100.3775 with an install data of 4/9/2025. That’s the very day I ran the repair install, and the build number matches what follows in the wake of the latest CU (KB 5055523 — see the parenthetical phrase at the end of that title).

What makes this facility remarkable is that UUPDump.net has to build a Windows image for the baseline release, then apply as many updates — the latest security, cumulative and servicing stack items — as it needs to bring the image current. This requires some time-consuming DISM manipulations that can take an hour to complete. Interestingly, the WU facility handled the entire repair in about 35 minutes.

I still recommend UUPDump.net as a way to create an ISO for some specific (and non-current) Windows Build. But if you need to repair a current version, it looks like built-in Windows 11 recovery really is your best choice. Good to know! That’s why I’m telling you…

Facebooklinkedin
Facebooklinkedin

Repair Install Unsticks WU

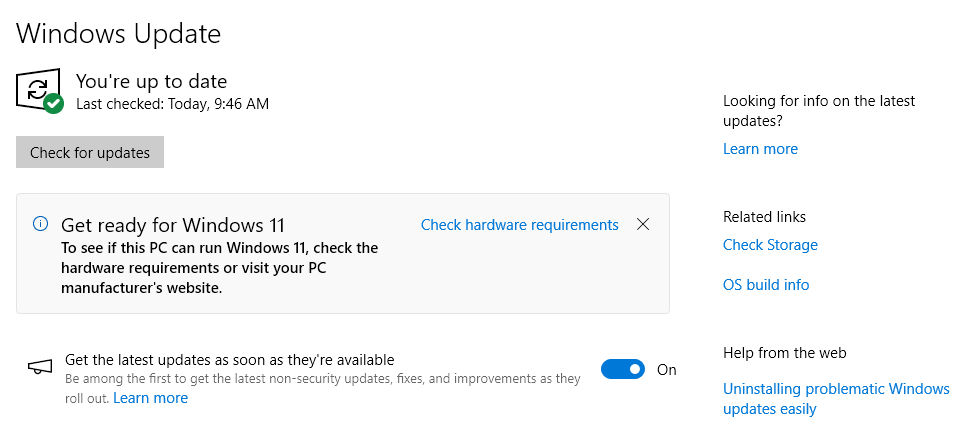
For the past 5 weeks or so, I’ve been working with the Lenovo ThinkPad T14s Gen5 laptop. For the last two weeks, updates have been stuck, with an error code that indicates file download issues. The usual repair techniques haven’t helped, either — namely run the troubleshooter or the reset & re-register Windows Update components. So this morning, with a new cumulative update out, I installed the latest Windows 11 24H2 repair version. That built-in repair install unsticks WU and catches me up with pending stuff, as you can see in the lead-in graphic.

Repair Install Unsticks WU Trades Time vs. Convenience

The problems with the afore-mentioned techiques (troubleshooter, reset&re-register) is that they take multiple steps and a bit of effort. Double that when, as often happens, remediation is also needed. It took a while to click Start > System > Recovery > Reinstall now and then work through that process. But the details took care of themselves and I didn’t have to do anything except fire it off to make it work.

In the end, this turned out to be easier and less vexing than the other techniques. Its results were also immediately apparent, and entirely positive, once completed — as you can see in the lead-in graphic. That said, Update History does become a little opaque when you conduct this repair. Here’s what it says now:

It doesn’t show the problem CU installed and running. It simply shows that “Windows 11, 24H2 (repair version)” got installed today. Of course, that means the installer used the latest version of the Windows image — including those problem CUs — as the install base. So really, it’s all fixed now. You just have to know what this reference means.

And ain’t that just the way things go here in Windows-World? The problem may be solved, but a hint of mystery — or is it confusion? — remains. Cheers!

Note Added 4 Hrs Later: Get-Hotfix Tells the Story

Reading through ElevenForum.com threads just now, I learned that running Get-Hotfix in PowerShell will shows installed KBs from a repair install image, to wit: This shows that various updates and security updates are indeed present in the newly repaired image. The current build number for that PC — 26100.3775 — also shows that KB5055523 has been applied. Good stuff…

Facebooklinkedin
Facebooklinkedin

KB5053643 Kills Mouse, Keyboard

Last Thursday, I downloaded and installed a new Preview CU for Windows 10 — namely KB55053634. After lunch Friday, I finally got around to rebooting to complete that process. Eventually, it succeeded. But first, just to make things incredibly exciting KB5053634 kills mouse, keyboard — my vital USB peripherals — dead. Here’s the story of what I had to do to bring those devices back to life, and actually log in to Windows 10.

KB5053643 Kills Mouse, Keyboard: Now What?

Because I couldn’t get past the lock screen without a valid input device, that turned out to be a little more vexing than one might guess. So first, of course, I rebooted again. Still no joy: the keyboard didn’t respond to keypresses (a good test on my Comfort Curve 4000 is to toggle the Function Lock or Scroll Lock keys because those also toggle handy little green indicator LEDs). Nor did a mouse click open the PIN input box as usual.

So I tried again. Still no dice. Then I thought: “maybe the device needs a cold, hard boot?” That means powering off the PSU, waiting 1-2 minutes, powering back up, and pressing the power button. And indeed, that did the trick. Once I went through that maneuver, the hardware got completely reset, reinitialized and enumerated. It was enough to restore my key USB peripherals to working order.

What (Would Have Been) Next?

If the cold boot or hard boot didn’t work, I’d have had to jump into UEFI, turn off Secure Boot, and then target bootable repair media to get something running on that PC. I’ve done it many times before and will no doubt do it again. But hey: I was glad not to have to do it this time. Cold, hard boot did the trick.

Makes me feel like I dodged a bullet. Remember to give that a try if you find yourself bereft of mouse and/or keyboard after installing a Windows update or upgrade. If you’re lucky like I was, that will bring the USB drivers back into play, and let your PC get back to work. Cheers!

Facebooklinkedin
Facebooklinkedin

Ghost in the Machine Needs Printout

I have to chuckle when I read about these kinds of things. For much of the week I’ve been reading online (see list of articles near the end) about printers waking up and printing stuff on their own. On  Windows 11 PCs running Build 2263.4825, it seems that those with specific printers may start printing garbage output spontaneously. ICYMI, “ghost in the machine” is a British philosopher’s shorthand phrase for Descartes mind-body dualism. In this case, I’m twisting that metaphor further to impute independent action to a Windows print driver gone wrong. That’s why I aver that the Ghost in the Machine needs printout.

Why the Ghost in the Machine Needs Printout…

Newer printers (mid-2010s and afterward) that support driverless printing technologies such as Mopria  (a printer maker alliance that includes Canon, HP, Samsun and Xerox) and AirPrint (an Apple technology widely used by printer makers, too) also support dual-mode printers. For the ghost to start printing on its own, such devices much support both USB print and IPP over USB protocols (IPP is the Internet Printing Protocol). After updating Windows via KB5050092 (release 1/29/2025) such printers may start spewing pages, no user print requests nor print spooler files needed.

You can read about this specral phenomenon from a plethora of sources including:

BleepingComputer Recent Windows updates make USB printers print random text (March 12)

Windows Forum Windows 11 Printing Glitch (March 13)

PC Gamer Haunted printers turning on by themselves and printing nonsense (March 12)

I’m not the only industry follower who’s picked up on the “ghost in the machine” metaphor, apparently. And you thought Windows was a brute and soulless beast, I’ll bet…NOT! Anybody who works with the OS for any length of time knows full well it’s possessed of a host of spirits that range all the way from the most angelic to the deepest of deviltry. I’ll let you decide how magnificent or malefic this particular haunt might be for yourself.

One more thing: the uber-cutesy graphic that starts off this blog post is Copilot’s response to a prompt that reads “show a PC printer possessed by a ghost.” Another clear case of you get what you pay for, IMO.


Facebooklinkedin
Facebooklinkedin

Installing Build 27802 Throws Memory Error

Here’s a new one on me. Last Friday, as I was installing the latest Canary Channel upgrade, the installer threw an error code that I’d not seen before. That code is 0x8007000e; its output from the Microsoft Error Lookup Tool (err_6.4.5.exe) appears as the lead-in graphic above. That error occurred during the GUI portion of the install. And it occurs to me that while installing Build 27802 throws memory error, it might have been because I was running WinGet in parallel, installing other stuff at the same time. I’m guessing was a self-inflicted thing…let me explain.

Self-Inflicted: Installing Build 27802 Throws Memory Error

The recommendation that comes with this error, is to restart the PC and try again. As soon as I did that — without added activity on the side — the upgrade installed successfully with no further errors along the way. As I look back on what got updated during my first botched attempt, I see that some fairly intense items were involved. Most notably, it included Visual Studio, for which a typical install is usually around 50GB in size. I can see where trying to juggle both on a 2021 vintage laptop (Lenovo ThinkPad X12 Detachable Tablet with 16GB RAM) might cause resource issues.

Anyway, the proof’s in the observation that a second attempt worked. That’s probably because I didn’t try to multi-task while the GUI install was underway. The only reason I haven’t done this to myself before is that you can’t do anything to the PC except let the installer run, during the post-GUI phase!

27802 Takes a While to Complete, Too

I couldn’t help but notice — because I perforce went through the process twice on the X12 — that the upgrade process to this latest build takes some time to complete. Normally, a Canary Channel upgrade finishes in under half an hour. This time around, the whole process — including download, GUI install, and post-GUI install — took about 75 minutes to complete from desktop to desktop.

At least I now know I should leave my PCs (mostly) alone while the GUI phase of a Windows upgrade is underway. I wonder what my next creative abuse of the runtime and installer will teach me? There’s always something new and interesting to learn, here in Windows -World!


Facebooklinkedin
Facebooklinkedin

WU: How Long Is Too Long?

Here’s a Windows road I’ve been down many times. Indeed, it’s the kind of road, as in Robert Earl Keen’s excellent song, that “goes on forever…” It’s the road you walk on when WU hangs during download, GUI install, or post-GUI install. I read with amazement this morning in an ElevenForum thread that some poor soul waited THREE HOURS on a stuck install before asking for help. Ouch! Of course this raises the question with WU: How long is too long when things get stuck?

For me, the TLDR; answer is “10-15 minutes.” I just don’t have the patience to wait much longer. And FWIW, I’ve only seldom seen something that’s been stuck that long succeed after such a delay.

In WU, How Long Is Too Long Depends on You

At some point, the stuckee realizes that nothing is going to change, no matter how much longer one waits. That’s the point at which one must bite the bullet, and restart the stuck PC. Holding down the power button for 10 or more seconds until the PC shuts down will usually do it. Sometimes, however, one must either power off the PSU (desktops) or take more drastic steps (e.g. disconnect battery or wait for it to drain completely on a laptop).

Surprisingly, in the dozens of times I’ve had to do this when stuck in the past 5 years or so, the aftermath has mostly been positive. Often, Windows will simply pick up where the stuck update left off and finish up from there. Sometimes, it will roll back to the pre-install state instead.

Only in a handful of cases has the affected PC refused to boot correctly. When that happens, it’s time to pull out your rescue media and perform an image restore to your last known,good, working image backup. You have one of those, right? I’ve learned the answer to that question had better be “Heck, yeah. Let’ s go!”

Overcoming The Worst Case Scenario

No image backup and no working PC can be problematic. Hopefully, you’ve got at least some important stuff backed up someway, somehow (OneDrive, maybe?). You’ll either find a way to run a repair install (works sometimes) or you’ll have to choose between a clean install or a factory reset. Hopefully, it won’t come to that. I haven’t had to go there but once or twice in the 30-plus years I’ve been running Windows. Hopefully, your odds and experience will be the same. Good luck!

Facebooklinkedin
Facebooklinkedin

Long Hard 27788 Upgrade Road

Whoa! In the realm of Windows Insider Preview upgrades, sometimes you win and sometimes you lose. This time around — starting from Build 27783 — I found myself on a long, hard 27788 upgrade road for this latest Canary Channel version. When I tell you what happened, and how I surmounted the obstacles on that path, you may be able to save yourself some unnecessary time and effort.

To begin with, what I lost on this upgrade road was time. I spent most of yesterday afternoon going through various motions to try to get the Insider Preview for 27788 and a companion KB5053390 (CU for .NET Framework…) up and running. All such attempts, alas, proved fruitless.

Traversing That Long Hard 27788 Upgrade Road

Getting to the state depicted in the lead-in graphic — showing that the Lenovo ThinkPad X12 Hybrid Tablet is up-to-date in WU and running Build 27788 in Winver — took some doing and some time. In fact, it wasn’t until I read about a workaround in an ElevenForum post from Russian user @Dronix that I made any real headway. Along the way, each update/upgrade cycle took about 1:10 (70 minutes) to work through.

I’ll deliver a recitation of what I tried that didn’t help my problems. I am also speculating when I say this, but I believe one can’t upgrade to 27788 until KB5053390 for .NET completes successfully. There may be dependencies in the upgrade that need the previous CU to complete successfully. And indeed, once I did that, the upgrade went through without further issues.

Here’s my list of failed strategies:
1. Simply retry the failed KB or upgrade item.
2. Run Eleven Forum’s Reset_Reregister_Windows_
Update_Components.bat from this Reset WU tutorial
3. Run the built-in WU Troubleshooter

What Worked: DISM-GUI 1.3.1.02

Turns out there’s a German software tool named DISM-GUI that lets one install KB .cab files from failed installations. You have to know the name (a partial name will do) of that file to provide it as a target. The afore-linked Eleven Forum thread identifies it, and it includes the KB number as a sub-string. Using Voidtools Everything, I found it immediately (search string *KB5053390*.cab). For the record, the filename is:

Windows11.0-KB5053390-x64-NDP481.cab

Click on the box in DISM-GUI that reads “CAB Install” (lower left) and the program will prompt for the file location. You can get that from Everything, then left-shift click and use the “Copy as Path” option (you’ll have to delete opening and closing quote marks).

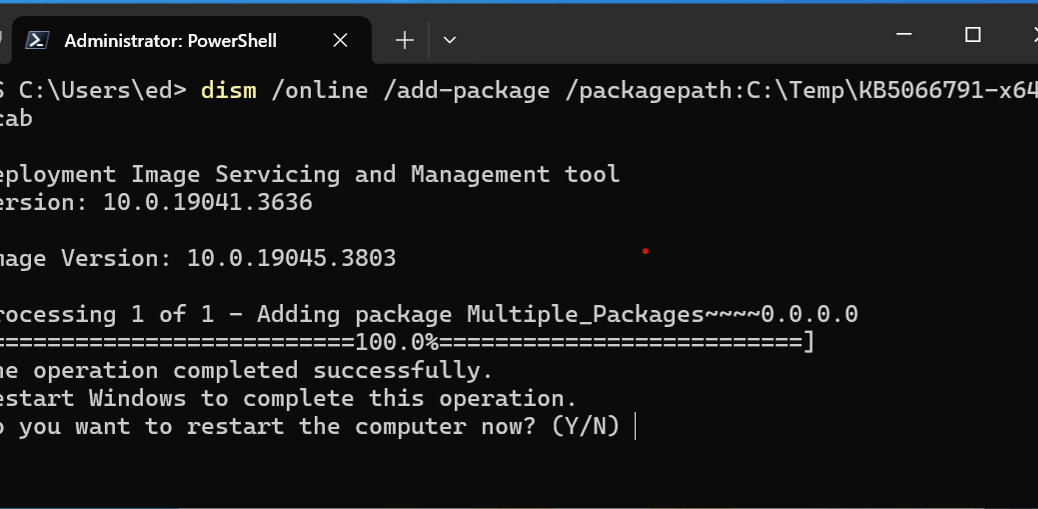
This opens a Command Prompt session and uses DISM to install the package for you. Unlike the WU driver install, this actually works. And it takes less than two minutes to complete. Then, when you’ve got the CU installed, the follow-up upgrade to 27788 works, too.

TLDR: Possible Problems with 27788 Are Fixable

If you read through the whole Eleven Forum thread about 27788, some posters were able to install KB5053390 and the 27788 upgrade without any difficulties. Numerous others — myself included– got exactly nowhere until they used DISM-GUI to get over the KB5053390 hump.

Should you find yourself in the same boat, you can go straight to the workaround using that tool, and avoid the hours and hours of thrashing about I went through yesterday. Why not learn from my experience, instead of repeating that misery?

Providing such info explains why I write this blog. It also explains why I expect lifetime employment doing that kind of thing here in Windows-World. It’s always something…

But Wait! There’s More… (Added Jan 7)

When I logged into the X380 and the X12 this morning, KB5053390 again showed up as needed. And again, a regular WU install failed. So this time, I fired off DISM-GUI taking the left-click “Run as administrator…” option. Apparently that did the trick. Here are some screencaps along the way:

Between the 2nd and 3rd screencap, I ran DISM-GUI again (as admin) and it showed a successful conclusion at the command line, then reboot with successful update there after). Once I rebooted the system and it worked through the rest of the process, I got the 3rd figure above from WU. Gadzooks! I hope it’s finally over…


Facebooklinkedin
Facebooklinkedin

Decoding Builds Requires Keen Attention

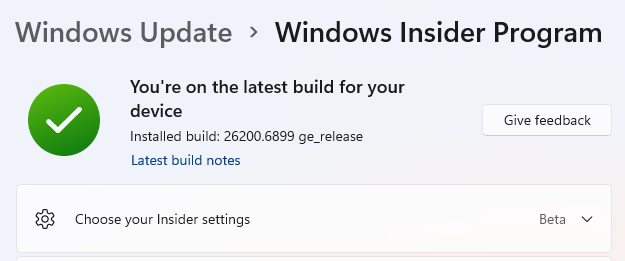
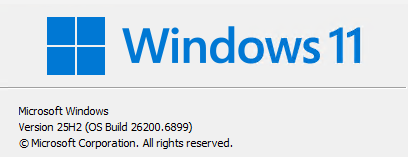
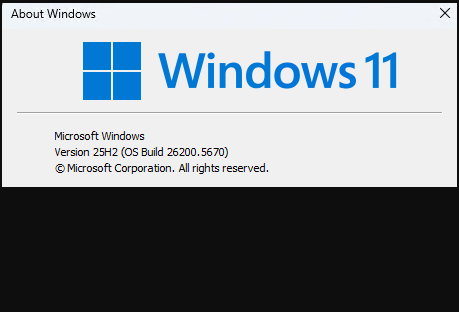
Ha! I have to laugh at myself. I just tried to update my Beta Channel Insider Preview test PC (one of my two aging X380 Yoga laptops) for no good reason. Or, perhaps it was for a bad reason — namely, I read about a new beta with a lesser build number of 4870. It wasn’t until I got further into the story that I figured out the update was for version 23H2. I’m running 24H2 so my minor build number is properly at 3073 right now (as you see in the lead-in screencap). Its higher major number: 26120 vs 22635 reminds me that decoding builds requires keen attention. Oops!

Truly, Decoding Builds Requires Keen Attention

What got me this time was that I looked only at the digits after the period, rather than checking both sides. If I’d really thought about what I was seeing, it would have instantly been clear. Because I’m running 24H2, perforce its major build number (26120) is greater than the same number for 23H2 (22635). Thus, even though the minor build number is higher (4870 vs. 3073) it doesn’t signify to my test PC because it’s not the same thing.

There’s never any shortage of confusion around here at Chez Tittel for all kinds of reasons. Alas, today’s ration was self-induced. But it did give me chuckle and remind me that it’s always important to put news of changes and updates into their complete context. Other-wise, who knows what one might expect or believe? Words to live by, not just here in Windows-World but in the wider world as well.


Facebooklinkedin
Facebooklinkedin

Weird Win10 Insider Mismatch

When I report a Windows puzzle, I usually like to provide a solution. But I just noticed something odd I may not have time to solve today. It looks to me like a weird Win10 Insider mismatch. Let me explain: my production PC is signed up for the Beta Channel, as you can see in the lead-in graphic. But a quick Winver run shows that PC running version 19045.5371 (see below). Alas, the current Beta Channel Insider Preview Build is 19045.5194. And there’s the mismatch in plain sight!

The Build number on this supposed Beta Channel PC corresponds to the current public/production release.

Fixing Weird Win10 Insider Mismatch

Upon closer examination, the Beta build is lower than the current production build. Looks like I want to switch to the Release Preview channel at Build 19045.5435 instead. Let me try that… No joy.

So then, I do some more poking around online, turns out I need to re-select the Beta Channel item (see lead-in graphic) and open its subsidiary window. That lets me switch to the Release Preview channel. Then when I pop back up two levels to re-run an update check, I get what I want:

Turns out my problem is an error in understanding how to switch from Beta to Insider Preview channel: problem solved!

Looks like the download and install are working. I’ll be rebooting soon: installing has reached 100% but not yet flipped over to “Restart pending…” Now it’s installing again … 20% … taking much longer … 45% … 73% … 88% … done. Restarting now… AAAAND winver now shows 19045.5435.

Turns out it wasn’t a channel mismatch: I was on the wrong channel FWIW, Copilot tells me that MS is shutting down Beta Channel, but is continuing to release into the RP (Release Preview) Channel. Hence, my need to change channels to get to the right build level. Apparently, I missed that memo. All fixed now!

As always here in Windows-World, fixing things is easy when one knows what to do. This time, it took me a while — and some new info — to figure out what that was. Go figure!

Facebooklinkedin
Facebooklinkedin