When you evaluate hardware for OEMs, returning loaner units is as routine as unboxing them. But before you seal the box and hand it to FedEx, there’s a discipline worth building: systematically clearing the device from every Microsoft service it touched. I recently returned two Lenovo systems: a ThinkPad P16 Gen 3 Mobile Workstation and a Yoga Slim 7x Gen 11. The cleanup checklist I used is worth walking through step by step. Having learned the hard way that simply sending them back as-is can raise issues later on, I’ve now got a process when readying evals for Lenovo return. Here goes…
What’s Involved in Readying Evals for Lenovo Return?
Skipping any of the upcoming steps leaves your Microsoft account linked to hardware you no longer control. That creates two concrete problems. First, the device continues to count against Store app device limits, potentially blocking installs on other machines. Second, a lightly wiped eval unit could retain enough account metadata to give the next user — or Lenovo’s refurb process — unwanted access to your digital identity. A five-step cleanup eliminates both risks entirely. Those five steps are:
Step 1 — Back Up and Sign Out First
Before touching any Microsoft account settings, make sure anything worth keeping is backed up to OneDrive or an external drive. Next, sign out of OneDrive on the device itself so that the sync relationship is severed cleanly. Finally, if you signed into Lenovo Vantage, Lenovo ID, or any Lenovo warranty and support services, sign out of those as well before the Windows reset.
Step 2 — Reset Windows to Factory Condition
On each laptop, navigate to Settings → System → Recovery → Reset this PC, then choose Remove everything. Select the option that also removes apps and settings — not just personal files — and, if prompted, choose to clean the drive thoroughly rather than just removing files. This ensures that your account credentials, app data, and Windows Hello biometrics are gone before the device leaves your hands.
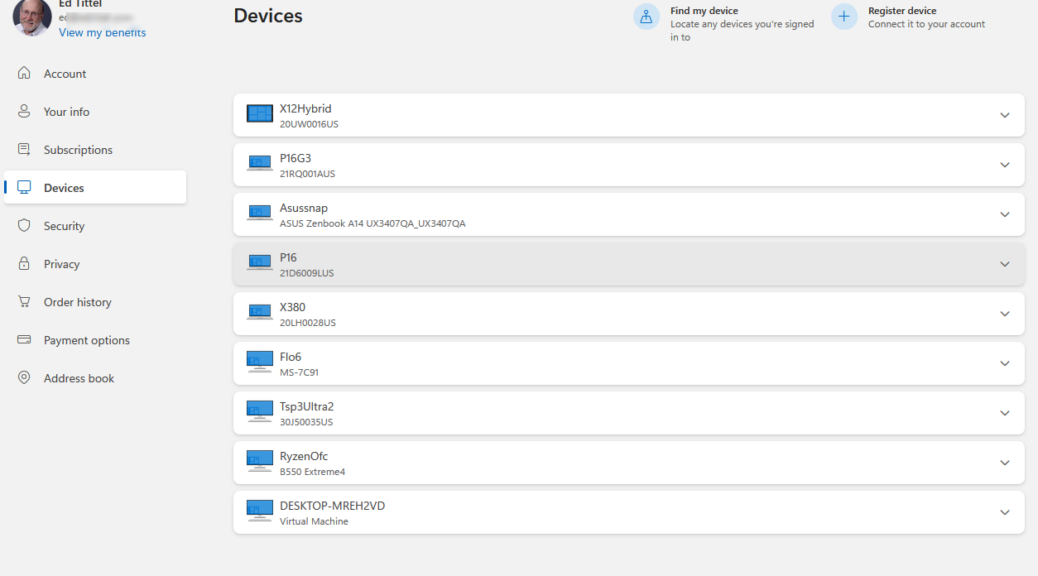
Step 3 — Remove Device from MSA
Head to account.microsoft.com/devices and sign in with the Microsoft account you used on the eval units. Locate the ThinkPad P16 Gen 3 and the Yoga Slim 7x Gen 11 in the device list. For each one, select Remove device and confirm the prompt — Microsoft formally removes the PC from your registered devices list, which tidies your account and eliminates that association permanently.
Step 4 — Unlink from MS Store Device List
The Store maintains a separate device roster that governs app license limits — removing a device from the main account list does not automatically update this list. Go to account.microsoft.com/devices/content, find each Lenovo system, and click Unlink. Once unlinked, neither machine counts against your Store device limits, so your remaining systems can claim those license slots without any manual intervention.
Step 5 — Verify Before You Box & Ship
Refresh both pages — account.microsoft.com/devices and account.microsoft.com/devices/content — and confirm that neither the P16 Gen 3 nor the Yoga Slim 7x appears any longer. Only after both are clear should you box the units up. This verification step takes thirty seconds and removes any doubt that the cleanup completed successfully.
Return Workflow Summary
It’s worth noting that these steps apply any time you intentionally let a Windows PC (or laptop) out of your hands: sale, gift, return. donation, or whatever. It helps you make sure the next recipient gets a clean machine, and keeps your count of registered devices in synch with what you’ve got. Here’s a super-brief list of to-dos:
- Back up everything needed and sign out of OneDrive.
- Sign out of Lenovo Vantage, Lenovo ID, and Lenovo support services.
- Reset Windows: Settings → System → Recovery → Reset this PC → Remove everything.
- Remove device at account.microsoft.com/devices.
- Unlink device at account.microsoft.com/devices/content.
- Verify both pages are clear, then box and ship.
Building this habit pays dividends over time — especially if, like me, you work with a steady stream of hardware. The whole process takes less than an hour per device. And it leaves your Microsoft account in a clean, accurate state that reflects exactly what you actually have and use. Ship with confidence knowing your digital footprint stayed behind. Here in Windows-World, it’s best to tread lightly and carefully when you can.