Category Archives: Windows 11

Windows 11 24H2 = Next Release?

There’s been a lot of flap and guff in the rumor mill about how “Windows vNext” will be labeled. Some have said “Windows 12;” others, “Windows 11 24H2.” Strong evidence that Windows 11 24H2 = next release popped up last Friday. This WindowsLatest story Microsoft document confirms Windows 11 24H2 update includes a link to a Windows App Development support note that uses this very nomenclature. It reads:

Starting in Windows 11 Version 24H2, EnumDeviceDrivers will require SeDebugPrivilege to return valid ImageBase values.

If Windows 11 24H2 = Next Release, Then?

I guess this should ease off the WTF factor that seems to explode whenever Windows 12 comes up. My best guess is that MS still wants to slide as many business users over from Windows 10 to 11 as it can. Thus, it’s always seemed a little whacky for insiders and pundits to freak out over Windows 12. With EOL still more than a year in the offing for Windows 10 (October 14, 2025 is 617 days away as I write this, says TimeandDate.com).

I’m just glad to believe if only for a while that the 4 channels of Windows 11 Insider Previews and a single such channel for Windows 10 will be all I have to follow. Plus the production versions of each OS, of course. It manages to keep me reasonably well-occupied. Who knows how the channel count will change when MS does get into Windows 12 releases? Not me! Stay tuned, though: when I find out, I’ll tell you…

Nomenclature Confirmed

After installing the latest Canary Build 26052 on February 8, here’s what came up in Winver on that test PC (Lenovo ThinkPad X12 Hybrid Tablet). It’s also explicitly stated in the release notes as well [General section] (emphasis in bold is Microsoft’s):

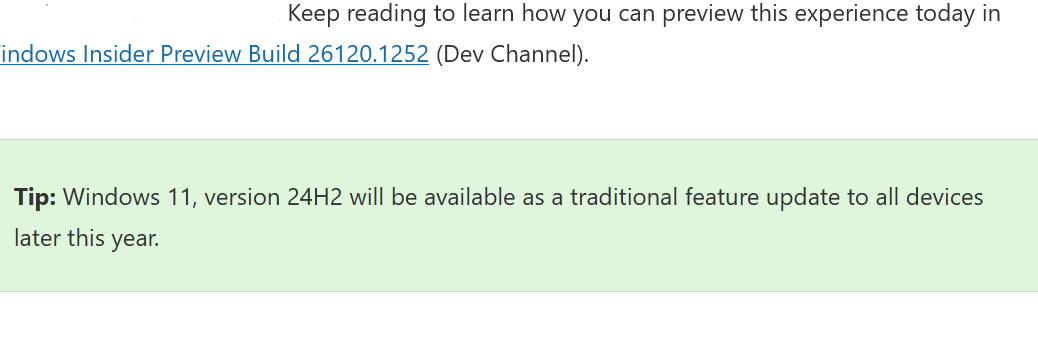
Starting with Build 26-xx today, Windows Insiders in the Canary and Dev Channels will see the versioning updated under Settings > System > About (and winver) to version 24H2. This denotes that Windows 11, version 24H2 will be this year’s annual feature update.


So indeed, Windows 11 24H2 it is for sure, straight from the source

Facebooklinkedin
Facebooklinkedin

Exploring Build 26040 Windows Installer

Well then: here we go! After a couple of hours of trying different things, I’m finally en route to installing a Windows 11 Insider Preview build that features a totally revamped OS install process. You can see the first step as the lead-in graphic. I’m now finally exploring Build 26040 Windows Installer having overcome initial Hyper-V stumbling blocks, as I will explain next.

Stumbling Before Exploring Build 26040 Windows Installer

Unlike earlier Windows 11 VM installs, this one didn’t complete  successfully when I pointed it at the ISO for Build 26040. Instead, it kept citing to issues with virtualization-based security on the host PC. Because this stalwart Lenovo ThinkPad P16 Gen 1 Mobile Workstation had all the virtualization bells and whistles engaged, I was initially stumped. Then I turned on Device Guard in the UEFI and Presto! now everything is working. I’m not quite sure what the deal is, but having read about others who fixed the same problem in this way, I’m glad to simply move ahead instead.

What’s the Deal with the New Installer?

Good question. It’s a break with tradition that goes back to Vista that changes the look and feel substantially. After the initial language/time & currency questions (supplied with answers by default, and correctly), comes Keyboard or input method (US). I’ll skip that and shoot the next screen instead:

Exploring Build 26040 Windows Installer.scr03

Next up (Scr03) you see options to (clean) install Windows 11, repair the current image, or launch the legacy experience.

Bootable Windows images can, by and large, repair a target PC’s installed image or wipe it out and install a different one. This reworked screen underscores those capabilities. Note: you can’t proceed to the next screen with Install Windows 11 selected (a clean install, that is) without also checking the “I agree…” stipulation that everything present will be deleted. Good call.

BTW, if you click “Launch the legacy experience” it reverts to the old familiar installer that has appeared in Windows versions since Vista. I’ll forgo further mention of this going forward except to observe that ESC let me start over from the very beginning with little muss or fuss. Ditto for “Repair my PC,” which proceeds with normal WinRE (Windows Recovery Environment) behavior.

Onward, Into the Bowels of Windows 11

Next up comes a request for a product key. Then comes a license screen (mercifully, it’s a simple one-paragraph agreement rather than the “whole shebang” as MS has presented in the past). Click an Accept button to proceed (Click “Legal” at center left and you get a URL where those inclined can indeed access the license in its awesome entirety).

The the install gets going: in this case, it finds the VHDX I defined for the VM and asks to consume the whole thing. Granted, by clicking “Next:”

Exploring Build 26040 Windows Installer.scr06

Screen 6 shows the virtual disk I set up for this VM. By default it grabs the whole thing.

Finally, we’re “Ready to install” as the next screencap proclaims. Because it’s as simple as Windows installs get (VMs are carefully constructed to push no boundaries by deliberate design). That makes it as safe to click the “Install” button at lower right as it ever gets. Here goes!

Exploring Build 26040 Windows Installer.scr07

With a click on “Install,” the Installer actually gets to installing.

Then, an activity window shows up that reports progress (show just the upper snippet):Exploring Build 26040 Windows Installer.scr08

This counts through the installer’s progress and takes you through a couple of reboots before your get to the OOBE stage.

This takes several minutes to complete and then deposits you into the OOBE (Out of Box Experience) screens. I won’t provide these, but will enumerate them as they are pretty familiar to Windows-heads:
1. Is this the right country or region (US shows by default; click “Yes”).
2. Is the the right keyboard layout or input method (US shows by default, click “Yes”).
3. Want to add a second keyboard or layout (Skip by default, click same).
4. Checking for updates (as a fresh new release, it finds nothing and jumps to …)
5. Let’s set things up for your work or school (enter Microsoft Account, MSA) Note this has to be an AD-connected MSA. If you, like me, lack same use the Domain Join approach instead.
(See this AskWoody article for deets on doing this if you’ve not taken this route before.)
6. Choose privacy settings (Click “Yes” to accept defaults).
7. Checking for updates (Again, none because it’s a fresh preview).
8. Settings things up screen appears as the desktop and so forth are prepped for use (takes a couple of minutes, too).

Next, you’ll be prompted for your password. Then comes the desktop. Good stuff! Overall, those parts of the new installer that are new (screens through 7) are simple, straightforward and easy to understand and use. This is a positive development for Windows 11. Interesting, too, because it comes two years into its lifecycle.

If you want to see the whole setup sequence there are plenty of other places online where you’ll find them. Here are my two current faves:

Paul Thurrot: A Quick Look at Windows Setup in Windows vNext
Albacore (@thebookisclosed): Pics of other screens for those curious [you can scroll through in sequence up to product key].

Facebooklinkedin
Facebooklinkedin

Beta Channel Gets In-Place Upgrade Repair

I’ve been waiting for this to show up for a while. Now it’s finally here. In build 23635.3130, Windows 11 Beta channel finally shows the “Fix problems using Windows Update” button. It appears in Settings → System → Recovery. You can see it in the intro screenshot above. I call this an “in-place upgrade repair” (sometimes, I add “install” to the end of that phrase) because it’s been a known technique for a decade and longer under that name. But when Beta Channel gets in-place upgrade repair, MS describes it as “Reinstall your current version of Windows” — a completely acceptable alternate label. Whatever you call it, it’s great to have it built right into the OS now.

As Beta Channel Gets In-Place Upgrade Repair, Use It!

The idea behind the in-place upgrade repair (install) is to replace all of the current — and suspect, or possibly damaged or deranged — OS files with known, good, working versions. This is a powerful Windows repair technique, and one of my go-tos when more focused troubleshooting tries and fails to fix things. This built-in version has the advantage of grabbing everything it needs from Windows Update and doesn’t require admins or power users to download and build an ISO, mount the image, and then proceed from there. It’s much more hands-off than that (but also more time consuming). No need to build custom ISOs at UUPDump.net, either.

Another Great Way to Fix Windows 11

As long as Windows is still running, this may be the best way to run the in-place upgrade repair install. But don’t pitch out your rescue media, boot drives, and especially not your backups. This tool can’t cover all contingencies. You’ll still need that other stuff when Windows won’t boot or run the setup.exe installer on which this maneuver depends. But even so, it’s a great addition to the Windows repair toolbox.

In fact, I can’t wait to try it out! Thus, I just fired it off on a test machine to see what happens. Here’s an approximate timeline rounded to the nearest 5 seconds:

00:20 Checking for updates
07:15  Downloading install files (“Downloading”)
32:45 Installing replacement OS (“Installing”)
02:20 Time from “Installing – 100%” to “Restart now” button
02:35  Time with “Updates are underway” prior to reboot
03:30  First reboot to second reboot (jumps to 54% after)
05:10  Second reboot to lock screen
02:15  Transition through “Welcome” to Desktop
Total time elapsed: 55:10

Trust me: this takes a LOT longer than mounting an ISO and running setup.exe to handle the repair install. OTOH, all I had to do was push a few buttons along the way. Just be prepared to give it some time.

Facebooklinkedin
Facebooklinkedin

NVIDIA Drops New Driver Batch

As I work through the Windows news each morning, I check X (Twitter), LinkedIn, Facebook and Mastodon by way of social media. I also check in on WinAero, WindowsLatest, MSPowerUser, Ghacks, Thurott and Windows Central as well. Today, most of them told me something like NVIDIA drops new driver batch 551.23. And indeed, I found Game-ready and Studio versions for consumer grade GPUs, as well as Quadro (551.23 aka Release 550) among the pro lines. You can see the Studio version from GeForce Experience in the lead-in graphic above.

Fast facts on this latest version:
1. Target Directory: C:\ProgramData\NVIDIA Corporation\
Downloader…
2. Filename: 551.23-desktop-win10-win11-64bit-
international-nsd-dch-whql-g.exe
3. Download size: 519KB (downloader only)
4. On-disk file size: 1.93 GB (all files downloaded & expanded)
5. Download & install time: ~3:30 (average across 5 PCs)

Why NVIDIA Drops New Driver Batch 551.23

Most often updates follow close on the heels of new games (or game features). Sometimes, they pop up to support new NVIDIA GPU offerings. It’s the latter this time, with the release of the game- and AI-ready RTX 4080 SUPER at CES on January 8, 2024 (also includes 4070 Ti SUPER and 4070 SUPER in that mix).

Heh! I’m not sure I’m ready to fork over the long green needed to buy into the latest NVIDIA generation, but it’s nice to know they’re out there when I build my next desktop. I usually buy either a 4070 or 4070 Ti model because I can’t really justify the price/performance tax that a top-of-the-line model adds to my build costs. But gamers everywhere will probably be fighting off a new case of techno-lust.

Drivers Downloaded and Updated

Amidst my modest fleet of about one dozen PCs (8 laptops and 4 desktops), there are 7 machines with NVIDIA graphics cards of one kind or another. I’ve got the updates running on all of them right now (except for the desktop my son is using away at college, so I’ll mention this to him the next time we talk). By the time you read this, they should all be updated.

If you’ve got an NVIDIA GPU in your neighborhood, now you know there’s a new update out there, too. Three cheers for the 551.23 release!

Facebooklinkedin
Facebooklinkedin

Adding Ancient Dell Printer Gets Interesting

Oho! How the time flies by when I’m not looking. I tried to install my Dell color laser printer — Model 2155cn — on the Toughbook FZ-55 this morning, only to get the “Driver is unavailable” error in Printers & scanners again. “Hmmm…” I wondered: “How old is that thing anyway?” Turns out it made its debut in 2011, and I bought it in 2012. Like the original Apple LaserWriter I bought in the late 1980s (and kept until I bought this one) this is one indestructible beast. Thus, I must observe that for Windows 11, adding ancient Dell printer gets interesting. Simply put: Windows no longer includes these drivers in the OS distribution!

How Adding Ancient Dell Printer Gets Interesting

So now I finally understand why I’m seeing this error in Settings. You can see it, too, in the lead-in graphic. Amusingly enough, it shows up right below the device info for the 2155cn that I just installed minutes ago, courtesy of the Dell 2155 Application for Windows, which I found at the Dell Support pages. Dell calls it the 2155cn/cdn Color MFP Software Suite and Driver.

When I look at the list of supported OSes, 11 is absent — though it does mention 10, 7, Vista and XP. It bears a release date of March 2014, too. This information, along with the settings error message, is what finally clued me into what’s going on here. This darn printer is so OLD that MS doesn’t find it necessary to include its drivers amidst the thousands of newer devices it does support. This explains what was going on for my post from last week Dell Printer MIA.

Here Comes Nothing, Printer-Wise

Interestingly, MS is switching over to the Mopria printing protocol, under the umbrella of Universal Print. It will no longer provide new drivers from printer makers starting next year (2025: see this fascinating PC World item “MS is killing 3rd-party printer drivers in Windows 11“).

So, pretty soon this won’t matter. For older printers — like the Dell 2155 cn — the only option will be downloading from the maker’s website. For newer printers that are Universal Print/mopria-savvy, things should “just work.” Maybe I need to buy a new printer so I can see about that! LOL…

Facebooklinkedin
Facebooklinkedin

Toughbook System Disk Explored

Examination of the disk layout and structure for the Panasonic Toughbook proved both interesting and informative. I used the free version of DiskGenius.  With the Toughbook System Disk explored — it appears as Disk 0 (HD0:) — I observed an interesting and useful disk layout, as you can see for yourself in the lead-in graphic above.

Reporting on Toughbook System Disk Explored

There are five (5) partitions on this disk, as follows:

1. EFI Partition (260 MB)
2. Microsoft Reserved (MSR: 16 MB)
3. WindowsBitLocker Encrypted (NTFS: 450.7 GB)
4. Recovery (WinRE: 990 MB)
5. OEM Recovery (OEMRCV: 25.0 GB)

What makes this disk layout interesting is that Partition 5 is basically a map and a replacement for all partitions. It includes a complete version of Windows 11 (Media.1) . It also uses SWM files (partial WIM files, and something new to me) to offer a variety of install and image files from which to build appropriate replacement images.

This feeds into a BIOS level repair utility from Panasonic that can rebuild the disk from scratch, in much the same way that the WinRE utility typically supports a “Factory reset” capability. This one, however, will work even in the absence of a working Windows image. Indeed, Panasonic also offersRecovery Media to perform the same function without reading anything from Disk 0 (via download, as explained below, or for purchase through the website).

Partitions 1-4 are basically a standard Windows 11 disk layout. Partition adds Panasonic’s own twist to this scheme, and provides an alternate means to reset a Toughbook to factory defaults that include this OEM partition. WinRE will rebuild the disk, but will leave this ultimate partition (5) alone.

Insights from Manuals and More

in a section entitled “About the Partition Structure” the Operating Instructions manual says:

Do not add or delete partitions in Windows 11, as the Windows area and recovery partition must be adjacent to each other in Windows 11.

I also found a link to Panasonic Japan for a Recovery Image Download Service. There I found links to an instruction manual and a recovery disk creation utility. Note: access to a valid model and serial number for a Toughbook PC is required to download and use this tool. Section 3.2  explains the recovery process which drives Panasonic recovery from a BIOS selection “Recovery” that rebuilds all partitions on the system disk.

Good to know!

Facebooklinkedin
Facebooklinkedin

X1 Extreme Graphics Driver Delirium

I guess it just happens every so often. Right now, Lenovo Vantage is nagging me to upgrade graphics drivers — both Intel and NVIDIA — on my 2018 Vintage Thinkpad X1 Extreme. (Internals: i7-8850H CPU, 32 GB DDR4, NVIDIA GeForce GTX 1050 Ti, dual Samsung OEM SSDs.) But Lenovo Vantage wants me to run an Optimus display driver and GeForce Experience wants a GeForce Game Ready Driver. The back-n-forth is leading to some X1 Extreme graphics driver delirium. What’s a body to do?

Surmounting X1 Extreme Graphics Driver Delirium

In a nutshell the problem is this: when I update to the Optimus driver, GeForce tells me to update to the Game Ready Driver, When I go the other way round, that flips so Lenovo Vantage tells me to get back on its track. I don’t do a lot of heavy-duty graphics on this laptop, and I’ll be darned if I can tell any difference.

I asked Copilot: “What’s the difference between running a GeForce Game Ready Driver versus NVIDIA Optimus Display Driver on a GeForce GTX 1050 Ti with Max-Q Design?” It says: battery and easy switching between discrete and integrated GPU for Optimus, versus gaming performance and support for newest games for Game Ready Driver.

Dilemma dehorned: I don’t play games and I do switch back and forth between the Intel UHD 630 and the discrete GPU. But I had to finagle a bit to get the status from Lenovo Vantage you see above, where it tells me “No updates available.” Deets follow next…

Both Intel and Optimus Must Update

Something about the update package from Lenovo was successfully updating the GeForce driver, but failing to do the same for Intel. How could I tell? Two ways:

  1. The Update package did not run all the way to completion.
  2. The driver version for the Nvidia device matched that for the Lenovo update package (31.0.15.3770), while that for the Intel UHD 620 was lower (update version was 27.20.100.9316 but the running version ended in 8967 instead). Oops!

Because the Lenovo installer wasn’t finishing up (and the Intel Driver & Support Assistant was cheerfully oblivious), I exercised the download package’s offer to extract its contents to a folder. Then I went into Device Manager, right-clicked into “Update driver” and turned it loose on the Intel folder in the unzipped file archive that extract created for me. It took a while to complete, but this worked.

So now, I’ve got the latest Optimus drivers for my X1 Extreme and it’s all good. Here in Windows World, if you’re willing to stop and think about what you’re doing, there’s nearly always a way to fix such issues. Done!

Facebooklinkedin
Facebooklinkedin

Panasonic FZ-55 Semi-Rugged PC

OK, then. I got a half-hour+ with a Panasonic team yesterday via Zoom. This group of folks included a couple of engineers, a couple of marketing folks (including the US product manager), and the PR person who put things together for me. The focus of our call:  the Panasonic FZ-55 Semi-Rugged PC shipped out for eval just before Christmas. It was a great call: I learned a lot.

Understanding the Panasonic FZ-55 Semi-Rugged PC

The best info nugget in the call: learning the FZ-55 Toughbook is a “semi-rugged” device. I also learned that the category of “ruggedized PCs” includes a “fully rugged” type as well. I snapped the default desktop background from the FZ-55 for the lead-in graphic: it’s pretty cool.

Semi-rugged PCs use cases invovle “somewhat harsh” conditions. But they’re not completely watertight or dust-proof. That’s what distinguishes them from fully ruggedized PCs (which indeed are water- and dust-proof). That said, as a  semi-rugged PC, the FZ-55 targets  use in field structures (including tents, vehicles, and so on). It’s also great for factory-floor conditions where there’s no airborne water (e.g. rain). Here’s a link to the US specsheet for the FZ-55.

Such PCs can handle wide temperature ranges (at least -25C/-13C to at least 50C/122F). They’re also built to withstand ambient dust and grit (with port doors closed), moderate vibration and shock, short-lived spills or moisture, and more. As one of the Panasonic techs explained “The FZ-55 is intended for use away from the weather, but works well in vehicles, tents, or other temporary strucures.” That’s because it’s semi-rugged: got it!

What About Fully Rugged (Toughbook 40)?

The Toughbook 40 is the FZ-55’s fully rugged counterpart. As you can see in the next image, it’s completely sealed up to make it water- and dust-proof.

Panasonic FZ-55 Semi-Rugged PC.tb40

The Toughbook 40 is fully ruggedized: that makes it bulkier but completely dust- and waterproof.

It’s got the same modular design, with user-removable expansion packs that include various port combinations, storage and memory add-ons, oodles of wireless options, and more. Surprisingly, it costs only around 25% more for similar equipment as compared to the semi-rugged FZ-55.  Peripherals and expansion modules are about 50-60% higher, on average. That said, the Toughbook 40 is an 11th-gen Intel platform not a 13th-gen platform. Thus, it lags somewhat behind the FZ-55 but with good reason, as I explain next.

A Tale of Two Lifecycles

Simply put, the FZ-55 is on a faster lifecycle than the Toughbook 40. In part that’s because fully-ruggedized PCs have a longer design and test cycle. It’ also because fully-ruggedized PCs have to be bigger and bulkier, to seal everything up. They require more expensive and demanding parts, with various related supply chain complications. In large additional part, however, it’s also because fully rugged devices aim more squarely at defense and emergency use (think FEMA, after a hurricane or firestorm). These agencies have hairy, complicated acquisition and purchase models and mechanisms, and don’t like things to change more often than absolutely necessary.

The upshot of all this is that semi-rugged devices run on a 3-5 year lifecycle for enclosures and platforms, with an 18-24 month lifecycle for the innards involved. That explains the FZ-55-3 model number, which indicates this platform (FZ-55) is on its third set of innards (3). On the other hand, the rugged PCs run on a 5-8 year lifecycle for enclosures and platforms, with a 36-48 month lifecycle for those innards. That explains nicely why an 11th-gen intel CPU remains a “current model” (this CPU family made its debut in early 2021, and is still inside the current window for both enclosure and innards).

That’s how things go in Windows-World, where semi-rugged PCs chug along on a faster timetable than fully rugged ones. Cheers!

Facebooklinkedin
Facebooklinkedin

Repair Version Feature Update

Hey! I noticed something new and interesting yesterday. When MS pushed a feature update into the Beta Channel, it included a “(repair version)” label. That’s why I’m representing this as a repair version feature update, based strictly on the MS presentation in WU (see lead-in graphic above). Uncharacteristically, MS says nothing about this in its 22635.2921 announcement. It does say “This update includes a handful of fixes to improve overall reliability” under the General heading, though.

Is Repair Version Feature Update A New Thing?

Hard to say, except by watching to see if this falls into regular usage, or comes and goes without re-use. I think it’s a useful label because it designates the feature upgrade as bug-fix and reliability oriented.

As things played out on my Beta Channel Test PC (2018 vintage Lenovo X380 ThinkPad Yoga), it was a pretty lightweight feature update. The download and GUI install portion finished in 2-3 minutes, and the post-GUI/reboot phase took less than 2 minutes. The changelog is virtually non-existent. The only other item not already quoted reads:

[Input]

  • Fixed a high hitting tabtip.exe crash which was impacting the ability for some Windows Insiders to input text.

It’s always fun to catch MS slipping new terminology into the mix. It’s impossible not to wonder if it’s going to stick. Stay tuned: I’ll keep an eye out and let you know if and when it pops up again.

Facebooklinkedin
Facebooklinkedin

Panasonic Utility Takes Roundabout Path

Heh! I have to chuckle about this one… In learning the ins and outs of the new Panasonic Toughbook FZ-55 I have in hand right now. I’ve been following instructions from the manual and, via e-mail, from the PR team. It’s been interesting. All of these sources have asked or advised me to “run the PC Information Viewer.” Good enough, but more interesting than it needs to be from a find & launch perspective. Indeed, this Panasonic utility takes roundabout path to get to the desktop. Let me explain…

Why I Say: Panasonic Utility Takes Roundabout Path

To begin, the tool is named PC Information Viewer. First, off I looked in the Start menu under “PC” and “Panasonic” (just in case, given its origins). Nada. Nothing under “All apps” matches this value.

Then the very nice and helpful PR person asked me to send output from aforementioned PC Information Viewer so the tech folks could look it over. Still couldn’t find it. But it did finally turn up. Inside the Panasonic PC Settings Utility, there’s a Support tab up top. When you click that tab, lo and behold! As you can see in the next screencap, a “Launch PC Information Viewer” button appears at bottom center. Notice also it’s deliberately low-res with big print and extremely easy to read (good design move, developers!)

Panasonic Utility Takes Roundabout Path.panpcsettings

THERE’s the right launch button!

And sure enough, when you click the button the PC Information Viewer utility opens right up, to wit:

Panasonic Utility Takes Roundabout Path.SetDiag.exe

And finally, here’s the PC Information Viewer application: SetDiag.exe.

By right-clicking its taskbar entry while running I was able to pop up the Properties window, where I learned the name of this program is SetDiag.exe. If only I’d been able to find that somewhere in the docs, I’d have been able to get there eventually using the run box. As it turned out I had to use the voidtools Everything search tool  to see its home folder:  C:\Program Files (x86)\Panasonic\pcinfo. That’s apparently not inserted into the PATH variable, either.

Sigh. Just sigh. But with a little perseverance I got it sorted… That’s the essence of thriving in Windows World: taking the directions as stated, and figuring out how to make them do something useful.

Facebooklinkedin
Facebooklinkedin