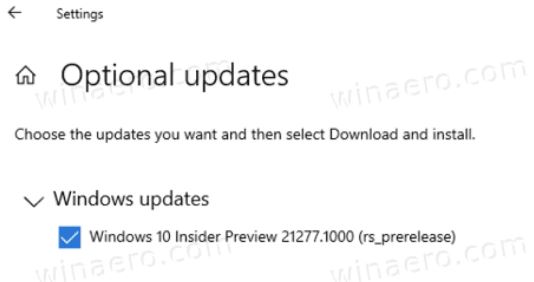
All righty then. MS is changing up the way it introduces new OS features without an out-and-out feature upgrade. At least, that’s how I interpret Bradon LeBlanc’s November 30 post to Windows Insider. Fortunately, Mary Jo Foley at ZDnet provides additional illumination, too. Her same-day story explains “the Feature Experience Pack is a collection of features that can be updated independently of the Windows 10 operating system.” Insiders running Build 19042.662 are eligible. Alas, not all PCs will be offered the relevant KB4578968 update. Even though Beta Channel gets new Feature Experience Pack 120.2212.1070.0, not everybody will see it.
Solution for Beta Channel Gets New Feature Experience Pack 120.2212.1070.0
I firmly believing that where there’s a will, there’s a way. In fact, I found a link to a CAB file to apply KB4578969. It shows up as Post#15 in a TenForums thread entitled KB4592784 Windows Feature Experience Pack 120.2212.1070.0 (20H2). I got the offer on my Surface Pro 3 Beta Channel/Release Preview Channel PC, but not on my Lenovo X380 Yoga. But by downloading the afore-linked CAB file and using DISM (details follow), I did get it installed on the latter PC.
That command is:
DISM /online /add-package /packagepath:<CABpath>
It worked on my X380 Yoga. Thus, it should also work on your qualifying test PCs. Just be sure to shift right click on the CAB file, and use the “Copy as Path” option from the resulting pop-up menu. Then, you too can paste it into a PowerShell or Command Prompt windows (admin level, of course).
I got started building PCs back in the mid-1990s when I hired a talented young man who worked in the PC parts department at Fry’s to come work with me. He showed me the ins and outs of system construction. Along the way I learned that careful parts selection could indeed deliver a faster, more capable system for less than the price of an OEM pre-fab desktop. That’s why, IMO, DIY desktops vs prefab still favor DIY, 25 years on.
Why Assert: DIY Desktops vs Prefab Still Favor DIY
As I write this item, it’s Cyber Monday. We’re in the market for another desktop here at Chez Tittel. As my son’s PC is getting older — i7-6700 and Z170 vintage, now 5 years old — it’s time to start planning a replacement. My findings show DIY still gets more than prefab, as I will illustrate.
Doing the DIY Thing
Given that major deals are available today, I decided to see what I could get for around $2K either pre-fab or DIY. I’ve already got a case and plenty of HDD storage, so what I need is a PC with a capable CPU, 32 GB RAM, a 1 TB NVMe SSD for boot/system drive, and a next-to-top-rung AMD or Nvidia graphics card. I found some motherboard/CPU bundles for about $550, memory for about $115, Nvidia 2070 $600, Samsung 980 Pro 1 TB $230, Seasonic 650 Platinum PSU $130 for a total of $1,625. Even if I price in the case (Antec P8 for $90) and an 8TB drive ($165) total pricing comes in at $1,880.
Looking at Prefab options
Looking around online at Newegg or amazon, with a $1,900 budget (I used a number range of $1,850 to $2,000 for my searches). I mostly came up with 16 GB RAM configurations, 4 to 8 core CPUs, lower-end GPUs (e.g. Nvidia 1060 or 1070X), 512GB – 1 TB NVMe SSDs (at least 1 generation back from the Samsung 980 Pro), and 1 TB HDD storage. That’s quite a bit less oomph than the same DIY budget, as you’d expect. I did see some pretty amazing refurbished deals on one or two generations back (most Intel) CPUs and kit. It still looks like refurb is the way to go if you want to buy an OEM desktop, especially if it comes straight from the OEM with a like-new warranty (no sytem warranties on DIY systems, only component-level warranties apply).
As an example of a killer refurb deal, here’s an HP Z840 workstation with two Xeon 8-core CPUs, 256 GB DDR4 RAM (!), 1TB SSD + 1 TB HDD, and a Quadro K4000 professional graphics card for $1,750. Now that’s pretty tempting…
I’m still sold on DIY
When it’s all said and done, I guess I’m OCD enough that I like picking all my own parts, and putting my own systems together. I do think you get more for your money, but you also have to have the time, the patience and the knowledge to put things together and to troubleshoot and support them for yourself. I realize that puts me in a minority, but I can live with that.
Trolling through Twitter yesterday I found a tweet from Azure CTO Mark Russinovich. I’ll quote the text verbatim “Like I mentioned, Notepad really screams on the Azure 24TB Mega Godzilla Beast VM.” Ultimately this thread leads to an Ignite presentation from October, 2020. Therein, Russinovich showcases monster Azure VMs.
When Russinovich Showcases Monster Azure VMs, What’s the Point?
From left (older) to right (newer), the lead-in graphic shows a historical retrospective what’s been “monster” for memory optimized servers over time. Itty-bitty boxes at far left started out with Intel and AMD Gen7 versions, with 512 GB and 768 GB of RAM respectively. Along came Godzilla after that, with 768 GB or RAM and more cores. Next came the Beast, with 4 TB RAM and 64 cores. After that: Beast V2 with 224 Cores and 12TB RAM. The current king of Azure monsters is Mega-Godzilla-Beast. It has a whopping 448 cores and 24TB RAM. No wonder Notepad really screams. So does everything else, including huge in-memory SAP HANA workloads for which this VM is intended.
I took Russinovich’s “really screams” Notepad remark as tongue-in-cheek when I saw it. Viewing his Ignite video proves that point in spades. What’s fascinating, though, is that some of the highest-end Azure users are already pushing Microsoft for an even bigger monster. They’re ready to tackle even bigger and more demanding workloads than Mega-Godzilla-Beast can handle.
Who Needs Mega-Monster VMs?
This rampant upscaling of resources is no mere idle fancy. Indeed, there are large companies and organizations that need huge aggregations of compute, memory, storage and networking to handle certain specialized workloads.
This also gives me an insight into the ongoing and increasing allure of the cloud. Most datacenters simply couldn’t put the technologies together to create such mega-monster VMs for themselves. The only way place to find them is in the cloud. Further, the only way to afford them is to use them when you need them, and turn them off right way when the workload is done.
OK, then: I get it. When you run Windows 10 20H2 the OS does something different when Edge is running. Thus, when I say “20H2 alters Alt+Tab experience,” I mean that it goes through all open Edge tabs as you keep repeating that key combination. This is a little disconcerting, but something I guess I can get used to.
Exactly How 20H2 Alters Alt+Tab Experience
Prior to 20H2 if you had three applications open, striking Alt+Tab once would take you from the current application to whichever is next in the Windows sequence of open apps. Strike it again to get the third app, and again to cycle back to the start.
In 20H2, if one of the open apps is Edge, and it has multiple tabs open, things change. When you get to Edge you’ll transition from the first (or currently) open tab, to the next tab in sequence. This continues until you’d cycle back to the first tab you visited in this sequence. Whatever comes up next will be the next app in the Windows sequence, at which point things continue as always.
A Possible Alt+Tab Gotcha?
Mayank Parmar, of Windows Latest, reports that some 20H2 users may find the Alt+Tab sequence disarranged after they upgrade to this new version. He doesn’t say if it applies to upgrades only, or if clean installs qualify as well. Either way, the symptoms are that the order of apps (and tabs) is inconsistent. In addition, stopping the Alt+Tab sequence on App 2 in a 1-2-3-4 sequence may drop the user into App 3, instead of App 2 as users expect it to do.
I haven’t been able to replicate this error on any of my 20H2 machines. But if you visit Feedback Hub and search on “Alt+Tab 20H2” you’ll see the top three resulting problem reports all talk their way around this issue. MS claims this has been addressed in Beta and Release Preview channel versions already. It’s not yet clear when that fix will make it to Windows Update, but it should be “coming soon.” Stay tuned, and I’ll let you know when that happens.
I’ve been raving about the SFF Dell Optiplex 7080 Micro a fair amount lately. I remain convinced it’s a good purchase and will be a great machine for long-term use. That said, there is the proverbial “one thing” that lets me know for all its glories, it’s still a Windows PC. I’ve been dealing with an RDP mystery — as shown in the lead-in graphic for this story — that actually affects RDP traffic in both directions. Its 20H2 RDP mystery remains unsolved, as all my troubleshooting efforts so far have failed.
Read on, though: I did eventually figure this out, and get RDP working. It turned out to be a basic and obvious oversight on my part. Sigh.
What Do You Mean: 20H2 RDP Mystery Remains Unsolved?
Despite chasing down a large laundry list of things to check and set, I get password related errors when trying to RDP into or out of the 7080 micro. The lead-in graphic shows what happens when I try to RDP into the box. When I try to RDP out of the box, I get an out-and-out invalid password (“may be expired” error) instead.
Obviously, something funky is up with authentication on this Win10 install, because when I try to access the device through the File Explorer network connection, I get a request for network credentials, too. Again, presenting valid credentials doesn’t work. I see a “not accessible” error message instead:
Here’s the list of what I’ve tried so far:
Double-checked Remote Access is enabled.
Relaxed all relevant settings in Advanced Network Sharing for Private, Guest/Public, and All Networks categories.
Enabled all Remote Access checkboxes in Defender Firewall settings.
After noodling about with this for a couple of hours I realized that I had defined a local acount as admin. Worse yet, I had not promoted my Microsoft Account on the Optiplex 7080 Micro from ordinary user to administrator.
Because I was using my MS account credentials to attempt network login and access, I didn’t have permission to do the password lookups in LSASS needed to make the process work. Once I promoted that account to admin level, everything started working.
Sheesh! Talk about an obvious mistake. As with many problems with Windows 10, this one turns out to be entirely self-inflicted. At least, I know who to blame!
Well, shut the front door, please! Just for grins I started running some of my desultory benchmarks and speed tests on the Dell Micro 7080 I just bought to replace the old mini-ITX box. When you see the numbers and screencaps I’ll be sharing in the following ‘graphs, you’ll understand why my title for this item is “Dell 7080 Micro Performance Amazes.”
Why say: Dell 7080 Micro Performance Amazes?
The numbers do not lie. They’re all pretty incredible, too. Here are some start/boot numbers, with the 7080 left and the (much more expensive) P-5550 numbers right:
Table 1: Shutdown, cold Boot, Restart Times
Description
Action
7080 Micro
P-5550
Desktop to machine off
Shutdown
7.92 sec
13.02 sec
Turned off to desktop
Cold boot
10.46 sec
16.01 sec
Desktop to desktop
Restart
21.26 sec
30.01 sec
Across the board, then, the $1,200 7080 Micro is significantly faster than the $4K-plus Precision 5550 Workstation. Of course, this takes no account of the more expensive unit’s Radeon Pro GPU. The 7080 Micro simply relies on its built-in Intel UHD Graphics 630 circuitry to render bits on its Dell 2717D UltraSharp monitor, and does so reasonably well. But this comparison is unfair to the P-5550 because UHD 630 is not like a dedicated GPU, especially a professional-grade one like the P-5550’s Nvidia Quadro T2000.
But Wait, There’s More…
The CrystalDiskMark results are also mostly faster than those from the P-5550. The lead-in screenshot shows the 7080 Micro’s CDM results. Compare those for the P-5550 and you get the following, where I’ve bolded the best times in each category so you can see that the 7080 Micro beats the P-5550 in 6 out of 8 categories.
Table 2: CrystalDiskMark Comparisons
CDM Label
Action
7080 Micro
P-5550
SEQ1M/Q8T1
Read
3364.8
3373.64
Write
2790.49
2334.67
SEQ1M/Q1T1
Read
2147.04
1716.39
Write
2800.90
2056.88
RND4K/Q32T16
Read
1972.38
630.64
Write
2152.12
358.26
RND4K/Q1T1
Read
60.54
41.21
Write
108.21
119.34
I’m particularly impressed with the 4K Random write numbers with queue depth of 32 and thread count of 16, at which the 7080 Micro kills the P-5550 (read is more than 3 times faster; write is more than 6 times faster). With a queue depth and thread counts of 1 each, it’s a split decision: the 7080 Micro is almost 50% faster at reads, and the P-5550 is about 10% faster at writes. Even when the P-5550 comes out ahead it’s by less than 10% in both cases. To me, that puts the 7080 Micro way, way ahead of the P-5550, especially considering the price differential.
Am I happy with my 7080 Micro purchase? So far, heck yes! More to come as I have more time to do benchmarking. This week is jammed up, but maybe Thanksgiving week I’ll find more time. Stay tuned.
OK, then. Just yesterday, I noticed that Windows Update offered the Dell review unit I’ve got the 20H2 upgrade/enablement package. What happened next surely qualifies as an astonishing Dell Precision 5550 Workstation encounter. Bottom line: it took less than TWO MINUTES to download, install and process the enablement package for 20H2. This is easily 3 times faster than on any other machine on which I’ve run that package, including my brand-new Dell 7080 Micro PC. I knew this machine was fast and capable, but this takes the cake. Really.
It’s odd to see 16 hyperthreads/8 cores show up on a laptop. Apparently, they’re all ready (if not actually thirsty) for work.
[Image is shown 2x actual size for readability. CPU Meter Gadget.]
After Astonishing Dell Precision 5550 Workstation Encounter, Then What?
Good question! I need to run a bunch of benchmarks on this system, then gather up those results for publication here. But in the meantime, this system has taken everything I’ve thrown at it, and simply KILLED it. As you can see from the preceding CPU Meter gadget screencap, this machine comes equipped with an i7-10875H CPU and 32 GB of RAM. So far, I haven’t been able to slow it down much, if at all, by throwing work at it. Desultory benchmarks, like CrystalDiskMark, are frankly breathtaking (this is far and away the fastest system in my house right now). Even CrystalDiskMark turns in some pretty impressive read/write numbers:
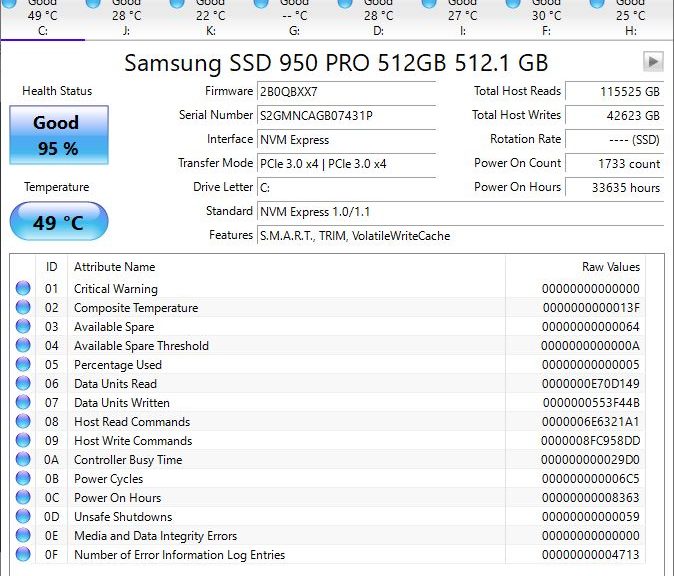
By comparison, CrystalDiskMark results from my production desktop with its i7-6700, Asrock Z170 Extreme7+, and a Samsung 950 Pro 512GB SSD, are mostly lower. The top line reads: 1954 (read) and 1459 (write): 58% and 62%, respectively. The second line reads 1550 (read) and 855 (write): 90% and 41%, respectively. This changes in line 3 which reads: 1230 (read) and 391 (write): 194% and 109%, respectively. The two bottom lines are nearly identical, with a 42.49 (read) and 98.99 (write): 103% and 83%, respectively. There’s no question that newer-generation M.2 PCIe technology is faster on bulk reads and writes. And as you’d expect, random reads and writes being shorter and scattered about, those metrics don’t vary overmuch.
Performance Theory, As Usual, Beats Practice
According to its specifications, The P-5550’s SSD is an SK Hynix PC601A 1TB SSD. It’s a PCIe Gen3 x4 NVMe device with theoretical maximum of 958 MB/sec per lane, or 3,832 MB/sec for all four lanes. The actual performance is always slower, as the top-line numbers from the preceding CrystalDiskMark output show. But it’s not half-bad and is, in fact, the best-performing NVMe SSD currently at my disposal. At over US$4K for this laptop as configured, it’s pretty pricey: but you do get a lot for the money.
The Cold Boot/Restart Numbers
Here’s a set of average times, taken across three sets of measurements for typical PC on/off maneuvers:
+ From desktop to machine turned off (shutdown): 13.02 sec
+ From turned off to desktop prompt (cold boot): 16.01 sec
+ From desktop to desktop (restart): 30.01 sec
Across the rest of my stable of PCs, these times are at least 50% faster than anything else I’ve got. I still have don’t these measurements for the Dell 7080 Micro PCs, though. Given that they’re also brand-new and have similar CPUs and NVMe drives, i’m expecting numbers more like than unlike the preceding ones. Stay tuned! I’ll report that soon in another post.
For the moment, suffice it to say that the “Workstation” in the Precision 5550 product name is not just wishful thinking. This system delivers speed, graphics and compute power, in a beautiful, compact package.
On November 10, Microsoft rolled out KB4589212. That support note is entitled “Intel microcode updates for Windows 10, version 2004 and 20H2, and Windows Server, version 2004 and 20H2.” It is currently available only from the Microsoft Update Catalog, where a search on KB4589212 provides links to related downloads. As you can see from the following screencap, KB4589212 offers Intel microcode updates as downloads that apply to Windows Server and Windows 10 for X64 and X86 systems, versions 20H2 and 2004.
If you read the note, you’ll see this update applies to all Intel processors back to Ivy Bridge (circa 2011-2012).
[Click image for full-sized view.]
If KB4589212 Offers Intel Microcode Updates, What’s Covered?
In addition to covering most Intel processors still in use back to Ivy Bridge (which is as old as anything I’ve got, from the 2012 mini-ITX box), this microcode update covers 7 different CVE items (3 from 2018, 2 from 2019, 3 from 2020). Here’s that table of items, plucked verbatim from the Microsoft Support note:
I’ve run this on half-a-dozen different 20H2 PCs of all vintages from 2012 to 2019 with no ill effects. This one’s definitely worth downloading and installing sooner, rather than later. That said, note that microcode vulernabilities do require physical access to PCs to foist. Once foisted, though. they’re mostly indetectible and difficult to remove, too. Take no chances: schedule this update for your next maintenance window. You can access the CVE links in the preceding table to learn more about the vulnerabilities involved. In fact, the most recent CVE is fascinating: it decrypts data based on detailed voltage consumption over time simply by carefully monitoring and plotting CPU power usage. Zounds!
Suddenly, the usual login prompt from my Credit Union, where my wife and I both bank, has become inaccessible on my local network. No PC, no browser, no nothing will open the login URL. Errors proliferate like mushrooms after the rain instead. What gives?
I’ve been working in and around IP networks professionally since 1988, and with IP networks since 1979. I’ve seen many weird things, and now have another to add to that list. From my LAN right now, no PCs can login to our credit union on the web. Nobody, that is, unless I go through a VPN link. Otherwise, when we (my wife and I bank together) try to access the login page, a raft of error messages presents. Only the VPN works around weird credit union access issue, which throws up beacoup HTTP error codes. (Explanatory text verbatim from Wikipedia.):
400 Bad Request: The server cannot or will not process the request due to an apparent client error (e.g., malformed request syntax, size too large, invalid request message framing, or deceptive request routing).
401 Unauthorized: Similar to 403 Forbidden, but specifically for use when authentication is required and has failed or has not yet been provided.
403 Forbidden: The request contained valid data and was understood by the server, but the server is refusing action.
404 Not Found: The requested resource could not be found [(aka “File not found/Page not found”)].
501 Not Implemented: Server either does not recognize the request method, or it lacks the ability to fulfill the request.
502 Bad Gateway: The server was acting as a gateway or proxy and received an invalid response from the upstream server
How VPN Works Around Weird Credit Union Access Issue
I can only assume that the address resolution for the specific login URL is somehow malformed or invalid. Changing DNS server assignments at the Windows 10 clients (in the TCP v4 Interface properties) does not help. When I switch to VPN, though, that bypasses the local DNS infrastructure. That connection uses the VPN provider’s DNS infrastructure instead. Then, we have no problems accessing the bank URL.
Now, here’s where things get interesting. I can’t remember the login credentials for the Spectrum device that acts as a Wi-Fi AP and router at the network boundary. Thus, I can’t check the DNS situation on that device, which is where DHCP tells all my Windows 10 machines to get their DNS information from. I’ve got a call into Spectrum to see if they can help me break into my router without having to do a factory reset. In the meantime, we’re using the VPN to access the credit union stuff, and plain-vanilla networking for everything else. It’s strange and unfathomable, but at least there’s a workaround.
For Want of a Nail…
Last night, I drove to the nearby Spectrum outlet and swapped my Technicolor cable modem/VoIP device for an identical replacement unit. The theory was that something about this device was behind the issue. It was sheer hell trying to get back online because Spectrum’s activation drill requires providing account, password, and other identity characteristics. I keep all that stuff in Norton Password Vault, and I couldn’t get access to that info through my iPhone nor did I have another path onto the Internet to grab the necessary data. I eventually had to spend another 45 minutes on the phone with tech support as they FINALLY activated our Internet service, TV, and VoIP phone. Reminded me too much of Catch-22 “How can you see you’ve got flies in your eyes when you’ve got flies in your eyes?” Last night, I couldn’t see much of anything for far too long!
Because our son attends school online, doing without Internet is impossible. Thus, I ordered a 5G hotspot from Verizon last night, so we have a medium performing fallback. They tell me the hotspot I ordered delivers about 200 Mbps downstream and 25 Mbps upstream in our neighborhood. I’ll be finding out — and making sure the fallback works — when it shows up via USPS early next week. Sigh.
Router Reset Solves Resolution Hiccup [Added 1 Day Later]
With a little more time to think about what could cause my problem, I formulated a hypothesis about the cause — and a likely fix — for my troubles. All nodes on my LAN had an issue with that one specific URL. But neither the site operator nor my ISP could replicate that problem. Thus it had to be on the boundary between my LAN and the ISP’s aggregation network. That means only one possible culprit: the Spectrum router. It sits at my network boundary. It also provides DHCP to the nodes on the LAN and acts as the DNS server for all internal nodes.
“Aha” I thought, “I bet resetting the router will fix this issue because it reloads — or repopulates, rather — the DNS cache.” I was right. After powering off the router, letting it sit for a minute or two, then powering it back on, our name resolution issue was gone. Glad to have it fixed because it was deucedly inconvenient without credit union account access. Ultimately, it was the “VPN trick” that led me to the solution. Sigh again.
This morning, I noticed something different just after 9 AM. That’s when the usual scheduled backup job on my production desktop fires off, and about 2 minutes later the drive starts clunking away. Check the timestamps for the Macrium Image (mrimg) files in the lead-in graphic in File Explorer. Except for today — November 10 — all the other jobs show a stamp in a range from 9:02 – 9:21 AM. What was different this morning? No drive clunking provided audible clues when 8TB backup drive goes south. And sure enough, when I checked Explorer at first, the drive was MIA. In fact, Disk Management showed a drive with neither GPT nor MBR disk layout.
After Audible Clues When 8TB Backup Drive Goes South, Time for Repairs
Luckily, I’ve got a commercial license for MiniTool Partition Wizard (MTPW). It includes both Data Recovery and Partition Recovery capabilities. So first, I let MTPW define the drive layout as GPT (as it must for a drive bigger than 2TB). Next, I ran the program’s Partition Recovery capability. About 30 seconds later, the drive’s contents were visible in the MTPW Partition Explorer. But I still had to assign a drive letter before repairs were complete. Immediately thereafter, I ran a manual image backup using Macrium Reflect to make up for the backup I’d missed along with the 8TB drive. As you can see from the most recent timestamp for the top file in the lead-in graphic, today’s belated backup is stored with all its predecessors.
A Bit of Insurance Against Recurrence
I also finally switched in my brand-new Wavlink USB 3.0 docking station (Model: ML-ST3334U) for the old Intatek unit I’d been using. Turns out the Inatek couldn’t handle even a 4 TB and and 8TB drive. Given that I’ve had problems with this dock before, I’d been waiting for the “next fault” to force the swap. I think that’s what happened this morning. I also think the Inatek can’t really handle ONE 8TB drive without power issues. The Wavlink, OTOH, is rated to handle 2 8TB drives. That’s why I bought it, and why I hope this means I won’t see my big backup drive go bye-bye again soon.
But weirder things have happened on my production PC, and may happen again. As we all know, that’s just the way things sometimes go (or go south) in Windows World. Count on me to keep you posted as and when such weirdness happens.