Category Archives: Win7View

Notes on Windows 7, Win7 compatible software and hardware, reviews, tips and more.

Bringing Offline Printers Back Online

Something odd is still fiddling with my local switch domain. Fortunately, it only affects my office here at Chez Tittel. The usual symptom is that my LAN-attached Samsung ML-2850 shows up in Devices and Printers. But it is grayed out and shows status as offline (see lead-in graphic, middle right and bottom). When that happens bringing offline printers back online requires a specific drill.

How-to: Bringing Offline Printers Back Online

I use Nir Sofer’s great little NetBScanner tool to confirm or establish the IPv4 address the Samsung uses. (Lately, it uses192.168.1.133.) I right-click the offline printer (labeled Samsung ML-2850 in the lead-in graphic). Then I select “Remove device” from the resulting pop-up menu. After that, I must confirm that removal by responding “Yes” to a prompt window that reads “Are you sure you want to remove this device.” Done!

Next, what has been removed gets reinstated. This means clicking “Add a printer” from the top-line menu, then clicking “The printer that I want isn’t listed” when the automated search fails to find the Samsung ML-2850. Next, I click the radio button next to “Add a printer using a TCP/IP address or hostname.” Then I double-check NetBScanner to confirm that the ML-2850’s IP address remains unchanged (aha! It’s moved to …134, so that’s what I enter).

I leave the default “use currently installed driver” option selected and click “Next” again. Then I shorten the printer name  to SamML-2850. Because the printer is network-attached, there’s no need to share it (this is required only for USB or other purely device-specific printer connections).

And when I print a test page, Presto! The printer is once again back online. Good stuff!

Bringing Offline Printers Back Online.restored

After removing and re-installing (after double-checking IP address) the Samsung networked printer is back online. Goody!
[Click image for full-sized view]

Facebooklinkedin
Facebooklinkedin

Dell Display Manager Pops Outta Nowhere

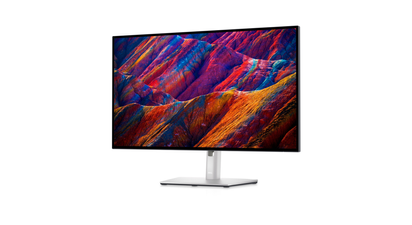
OK, then. Yesterday, I fired up a local account on my production PC while investigating the new Firefox Store app’s behavior. When I did so, that account asked me if I wanted to install Dell Display Manager. That explains this story’s title: Dell Display Manager pops outta nowhere. I’d never heard of it before, nor seen it mentioned in other Dell apps. (For example, Dell Update Control or Dell Support Assistant, both familiar because the Dell Optiplex 7080 Micro that’s a family daily driver PC at our house.)

Good News When Dell Display Manager Pops Outta Nowhere

“OK,” I said to myself, “let’s give this a shot.” That turned out to be a good move. It’s kind of a pain to use the monitor’s own built-in control buttons to manage brightness, contrast, color profiles and so forth. The Dell Display Manager (which I’ll call DDM going forward) does all this on the Windows desktop. Much, much easier and more user-friendly.

My only question is: Why hadn’t I heard of this tool sooner? As a regular at TenForums and ElevenForum, people talk about monitors a lot. And some of those folks are also MVP-equivalent on the Dell forums as well. Yet I managed to remain not-so-blissfully unaware of the tool until now. And to think I’ve been buying Dell monitors since the mid-to-late 1990s!

If You’ve Got Dell Monitors, Use DDM

The home page for the utility includes  a download link for the tool. It’s entitled “What is Dell Display Manager?” and provides a useful and informative overview of its capabilities. As the page says, the tool is for standalone monitors only and “is not applicable to laptops.” Indeed, they have different display management tools. But since we currently have 4 Dell monitors here at Chez Tittel, this ends up being a useful and valuable item for my admin’s toolbox. If you’ve got Dell monitors, but didn’t already know about (or use) DDM, do yourself a favor and grab a copy today. You won’t be disappointed. Good stuff!

Facebooklinkedin
Facebooklinkedin

Windows Wallpapers Live Elsewhere

Here’s something I didn’t know, that you may not have known, either. Wallpaper images for both Windows 10 and 11 live in a separate folder hierarchy under C:\Windows\Web. That hierarchy appears as the lead-in graphic for this story. The parent folder spec is C:\Windows\Web. In Windows 11 each of the four subsidiary folder contains 2 or more images, all suitable for wallpaper use. When I say Windows wallpapers live elsewhere, I mean they live in their own private directory, as indicated.

If Windows Wallpapers Live Elsewhere, Visit Them

I spelunked around the four-folder hierarchy and found 37 images therein. Many of them are based on those twisting laminar surfaces that have come to stand for Windows 11. I copied all of them into a single directory so I could find them all in one place. The next screencap shows a listing of those images by filename. You’ll probably want to set a similar view to Extra Large or Large icons, so you can identify them by visual content (I did it this way for compactness).

WWindows Wallpapers Live Elsewhere.details

What to do With Windows Wallpapers

Overall, they’re an astonishing collection of images and graphics. Microsoft operates an image service named Spotlight, that curates over 4,000 high-quality professional images of nature, cities, objects, and more. All of these work well for desktop backgrounds and lockscreen images. I have an older app from Timo Partl (no longer in the Store, alas) that does a great job of visiting the Spotlight connection and downloading anything I don’t already have locally to a target directory. For those of you who, like me, like lots of variety in your lockscreens and backgrounds, this provides a trove of beautiful eye-candy of amazing variety and great quality.

I’m adding these wallpapers to that collection. I assume that means they’ll show up occasionally, as the forces of random selection dictate. Check out the 11 wallpapers and feel free view them as and when you like. Cheers!

Note Added Nov 4

I got a great tip from my fellow WIMVPs about this–namely Shawn Keene. He observes that if you open the Run box (WinKey+R) and type “web” into the box, then hit OK, it will open a fresh instance of File Explorer to that directory. Very handy!

Facebooklinkedin
Facebooklinkedin

Kill These Windows 11 tw*.tmp Folders

Here’s an interesting bit of news. After seeing reports about folders that end with a .tmp extension (!) in Windows 11, i found some on every machine I checked running that OS. These folders are invariably empty, and may be safely deleted. When I say: Kill these Windows 11 tw*.tmp folders, you shouldn’t suffer any adverse effects if you take that advice.

See a representative list in the lead-in graphic for this story. The folder spec is clearly spelled out therein. For the record, it is:

C:\Windows\System32\config\systemprofile\AppData\Local

Why Kill These Windows 11 tw*.tmp Folders?

Because they’re empty. Because you don’t need them. And because they can swamp the other, valid data in that folder. I read reports of “hundreds” to “tens of thousands” of such empty folders at WinAero and Ghacks.net. The largest number I found on any of my Windows 11 PC  was 94. Ironically, it was the one running Build 22000.258, a recent production 21H2 version. My other Beta and Dev Channel PCs had between 40 and 50 such folders in the same directory, by way of comparison.

After cleanup, here’s  what’s left in that folder on my i7-8850H X1 Extreme laptop:

Kill These Windows 11 tw*.tmp Folders.post-cleanup

Not much left after cleanup: 5 folders and a lone .tmp file
[Click image for full-sized view.]

Over at Ghacks, Martin Brinkmann correctly observes as follows. “Empty folders don’t take up much disk space and they don’t interfere with the operation of the system.” It’s not mandatory to clean them out yourself. But OCD inclined Windows users (like me) will nevertheless delight in doing so!

Note: According to Brinkmann’s in-story reference to Woody Leonhard (AskWoody) this issue appears in 2019 versions of Windows 10, through current versions, too. And right now, I count a whopping 1,115 of them on my production desktop as I send them to the Recycle Bin. Woo hoo!

Facebooklinkedin
Facebooklinkedin

PowerToys v0.49.0 Gets Video Conference Mute

Clint Rutkas and his team have been talking about it for months. I’ve been waiting to check it out myself. That’s right: in its latest release, PowerToys v0.49.0 gets video conference mute capability. Right now it’s available through GitHub, though I expect it’s just a matter of time before it comes via the Microsoft Store. The new control page in settings serves as the lead-in graphic for this story.

What PowerToys v0.49.0 Gets Video Conference Mute Means

I run at least 4 different video conferencing platforms regularly: Zoom, Teams, Blue Jeans, and Google Meet. From time to time, I’ll get invited to another, similar platform for online meetings. Each of them offers a mute capability, but each one uses a different control in a different place in its app window.

What I like about Video Conference Mute in PowerToys is that it offers one single set of controls for mike and camera, for all such apps. Here’s the set of keystrokes it uses:

PowerToys v0.49.0 Gets Video Conference Mute.keys

Keys to toggle the mike and video together, or separately. Good stuff! (Source: PowerToys built-in Welcome docs)

For those already using PowerToys, an update is in order. For those not already using the tool, you can simply run the installer and it will set you up. Then, right-click the PowerToys icon in the notification area to open its UI, and go to the VCM pane. There you simply need to move the slider labeled “Enable Video Conference Mute” to on (as shown in the lead-in graphic if you exercise the option to view it on its own web page). It’s just that easy. I already liked PowerToys a lot, but this latest and long-anticipated addition just made me like it a whole bunch more. Check it out.

Facebooklinkedin
Facebooklinkedin

Windows 11 Says Sayonara WMIC

Because it was announced in Windows 10 21H1, it was just a matter of time. The Windows Management Interface Command-Line utility, aka WMIC, is deprecated. No longer simply slated for oblivion, WMIC is missing from the Dev Channel version of Windows 11. The lead-in graphic shows what (doesn’t) come up in cmd.exe for Build 22483 and higher. Hence my title: Windows 11 says Sayonara WMIC. For the record, it’s still in production Windows 11 versions but reads “WMIC is deprecated.” in red.

Windows 11 Says Sayonara WMIC.Win11-prod

Notice the red text at top of help response. It’s MIA In Dev Channel versions now.[Click image for full-sized view.]

Though Windows 11 Says Sayonara WMIC, WMI Remains Around

Microsoft has good advice for would-be WMIC users. They should  use PowerShell replacement cmdlets instead. Turns out that the Windows Management Interface (WMI) remains alive and well. In a story about this change-over, WinAero.com suggests using a specific PowerShell command to learn more:

Get-Command -Noun WMI*

For the record, that string produces the following output that shows this is just the beginning of a sizable set of cmdlet documentation.Windows 11 Says Sayonara WMIC.ps-info

The 5 cmdlet WMI facilities: Get, Invoke, Register, Remove and Set.
[Click image for full-sized view.]

Each of these five facilities has its own muti-level help files. Looks like the switch-over is supported. That said, it requires climbing a new learning curve to bring users under the PowerShell umbrella.
Cheers!

Facebooklinkedin
Facebooklinkedin

Win10 Rollback Works But Thunderbolt Issues Continue

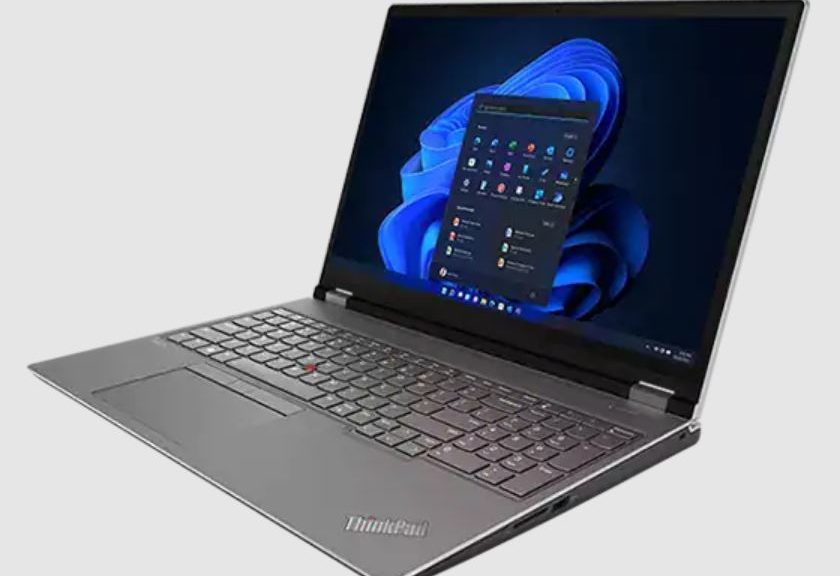
Big Sigh. I’ve been trying to get the Thunderbolt 4 firmware updated on the snazzy new Lenovo ThinkPad X1 Carbon Gen 9 they sent me, but to no avail. Today, I observed that Win10 rollback works but Thunderbolt issues continue. Something gets weird when the PC reboots to do the firmware install. I see a short (and tiny) error message long enough to know it’s there, but definitely not long enough to read it, or interpret its significance.

When Win10 Rollback Works But Thunderbolt Issues Continue, Then What?

First, the good news. I elected to roll back my Windows 11 update on this machine and it not only went well, it finished in under 3 minutes. That’s amazing! It also confirmed that the Windows.old snapshot is of whatever vintage and state the OS was at the time of upgrade. All my account stuff remained clear and workable, thank goodness.

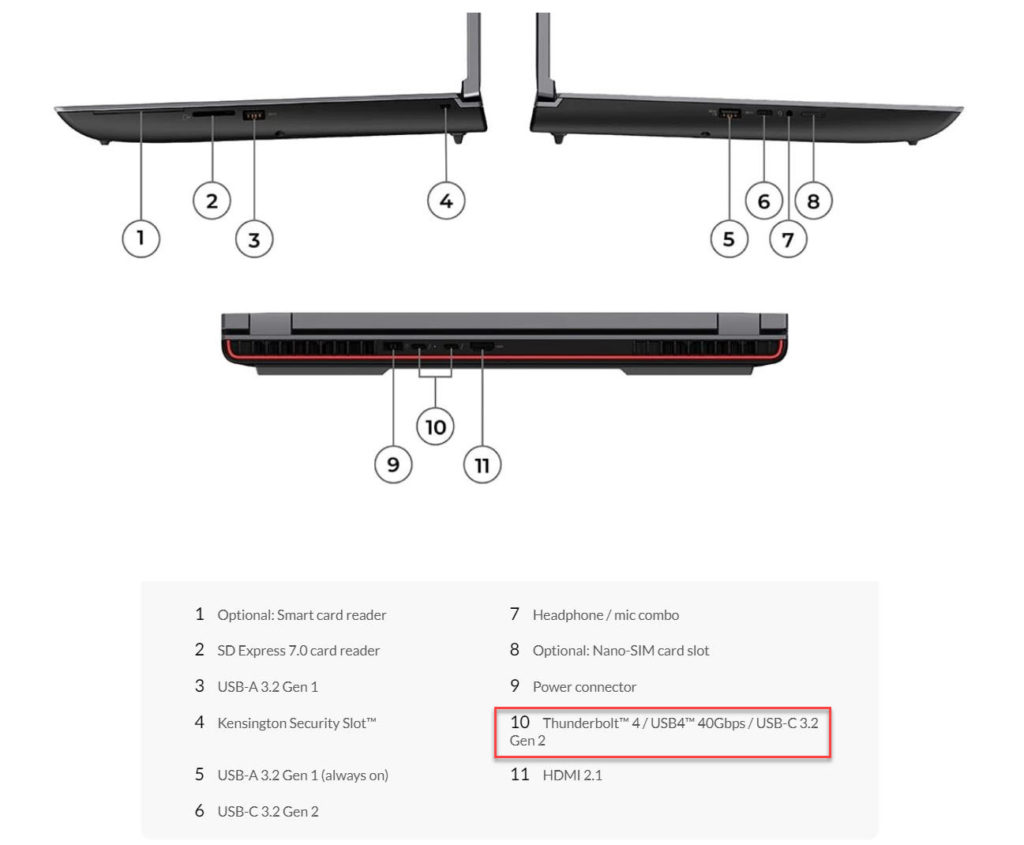
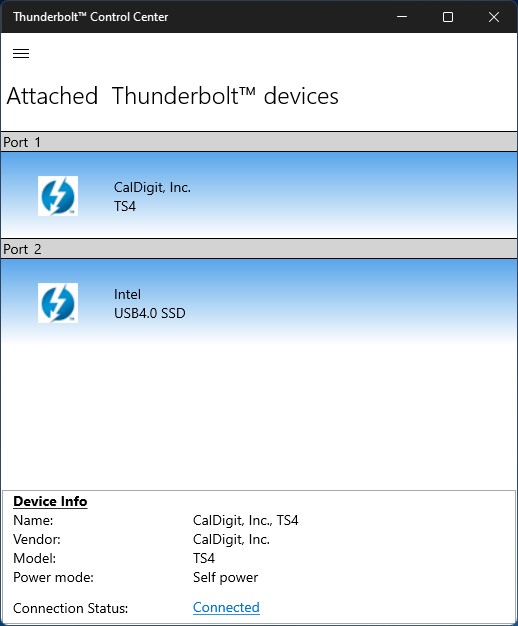
Now, the bad news. I remain unable to complete the firmware update successfully. That means Thunderbolt sees no devices on either of the PC’s two USB-C/Thunderbolt 4 ports. Bummer! It also means I’m sending this fish back to the pond (Lenovo, that is) with a request to return it when THEY can fix this driver issue. For me, Thunderbolt 4 is a big deal. I don’t think I can review this system without a working and capable Thunderbolt 4 connection for me to test performance, throughput, and so forth.

That said, the USB-3 Type A port is remarkably fast. I get better performance out of my old, tired mSATA drives on this machine (Samsung EVO SSDs in Sabrent mSATA enclosures) than I’ve ever seen before.

Do All Things Come to He Who Waits?

I guess I’ll be finding out. Tomorrow, I’ll fire off an email to the reviews coordinator, explain my situation, and let them know I’m sending the laptop back. It will be absolutely fascinating to see how they respond. I’m hopeful I’ll get a fixed (or replacement) laptop soon. If and when I do, I’ll start posting madly about what I see and learn. Right now, I just can’t go forward with a major subsystem on the fritz. Hope that makes sense…

Facebooklinkedin
Facebooklinkedin

Loaner Laptop Poses Weird USB Situation

I took delivery of a nifty new laptop here at Chez Tittel late last week. Among the zillions of other things going on around here, I’ve been fooling with this machine since it arrived. This loaner laptop poses weird USB situation, though: I get faster throughput from its USB-A 3.2 Gen1 port than either of its USB4 Type-C/Thunderbolt 4 ports. Throughput is about 10X faster on the USB-A port than on USB-C. That’s not how it’s supposed to work. Go figure!

Driver Issues Explain How Loaner Laptop Poses Weird USB Situation

Once I realized what was going on. I jumped into Device Manager. Sure enough there’s an issue with the ThinkPad Thunderbolt Retimer Firmware. Whaddya bet this could impact USB-C/Thunderbolt 4 timing?

And then, things get more interesting. Lenovo Vantage thinks the firmware update is already installed. Device Manager shows “Firmware update was unsuccessful.” Attempts to uninstall/reinstall don’t work, and manual installation of the downloaded firmware package N32TT02W.exe from Lenovo Support don’t work either.

I need some firmware juju. So I’m contacting Lenovo Support to see what they can tell me. I’ll admit I got fooled when Vantage told me the update was installed (and didn’t check DevMgr until later). Now, it looks like I’ll have to roll the machine back to Windows 10 so I can make sure the update gets properly applied. And then, I’ll roll forward again to Windows 11. Just another day in the life, here in Windows-World!

Checking Updates, Post Install

It hasn’t eluded me that checking the firmware install before upgrading to 11 would have been a peachy idea. I’m not one to rush into such things normally. But I wanted to see how the new PC would work with the new OS. I guess I’m  starting to understand there’s at least one good reason why Lenovo didn’t send me the device with Windows 11 already installed.

As I look around the Lenovo site, I see they have Thunderbolt drivers for Windows 11 aplenty. It’s just that they don’t have one for my X1 Carbon Gen 9 laptop just yet. Live and learn, dear readers: that’s why I’m going to try to do.

Facebooklinkedin
Facebooklinkedin

Bad Move: Opening MSA in Default Admin Account

I admit it. I screwed up, and then I paid the price. Yesterday I got a new review PC delivered. It came from Lenovo: a new X1 Carbon Gen 9 PC. That unit feature an i7 4core CPU, 16 GB RAM, and 512 GB NVMe SSD with Thunderbolt 4 support. Typical for review units, it opens into a local admin account. Inside that account I made a bad move: opening MSA in default admin account. Alas, this caused all kinds of problems.  Let me explain… (I’ll add that MSA is a common acronym for “MS account” aka “Microsoft account.”)

What Happens After Bad Move: Opening MSA in Default Admin Account

My MSA picture got associated with the local account. That was my first cluethat something was off. On other loaner units, I’ve always been careful to set up a second account for my MSA. Then I give it admin privileges and work from there after that. This time, I logged into the Microsoft Store inside the local account. Big mistake.

As soon as I set up my MSA as a separate account, the Store quit working. The associated error code clearly explained it was an MSA login problem. Apparently, the MS Store decided that if it couldn’t distinguish a local account from an MSA, it wouldn’t open for either account on that machine. None of the usual repairs (uninstall/reinstall Store) did any good, either.

Cleaning Up the Mess

Forunately, I had to take a break to go see the “Friday Night Lights.” It was homecoming night at my son’s high school, and the Boss and I wanted to drink in the pageantry and celebration. While I was away from the munged review unit, I realized what I needed to do:

1. Set up another local account
2. Give that local account admin privileges
3. Delete the problem default account

This took a while to orchestrate and set up. I had to be reminded that the “Family account” sub-menus is where one sets up local accounts on Windows 10 and 11. After making sure my MSA and the other local account were properly privileged, I deleted the problem account. And immediately, the MS Store returned to working order. Self-inflicted wounds smart a little extra when one realizes who’s to blame for the hoopla.

Stay tuned: I’ll have a lot to say about this new loaner unit in an upcoming “First Looks” piece early next week. I’ll tease some planned topics to whet your interest, though:

1. Thunderbolt 4/USB-C proves surprisingly speedy
2. Interesting issues with Secure Boot and clean install attempts
3. Unit shows up with Windows 10 installed, not Windows 11
4. Timing and experience in upgrading to Windows 11
5. Interesting issues with Windows Hello

Be sure to check back in when that “First Looks” item appears. Cheers!


Facebooklinkedin
Facebooklinkedin

Windows 11 ADK Is Now Available

If you know where to look, the Windows Assessment and Deployment Kit (ADK) is now out for Windows 11. Indeed, you can find it in MS Docs at Download and install the Windows ADK. That’s why I assert that the Windows 11 ADK is now available in this item’s title. What does this buy you and your organization? I’ll explain…

If Windows 11 ADK Is Now Available, Then What?

The ADK includes collection of potentially useful and valuable tools designed for at-scale Windows deployments. These include access to:

  • WinPE, the Windows Preinstallation Environment that provides runtime support before an OS has loaded. It’s used to support Windows installation and also provides the foundation for WinRE (Windows Recovery Environment). Basically, it’s a stripped-down and self-supporting portable version of Windows (11 in this case). Note: WinPE is a separate add-on to download and install after installing the ADK.
  • Volume Activation Management Tool (VAMT): works with Windows Office and other Microsoft products for volume and retail activation using Multiple Activation Keys (MAKs) or the Windows Key Management Service (KMS). Works as an MMC snap-in with the Microsoft Management Console (MMC).
  • User State Migration Tool (USMT) delivers a customizable user-profile migration capability that can capture user settings for Microsoft office versions 2003, 2007, 2010, and 2013 (separate tool for 2016 also available). The tool covers a broad range of migration scenarios (described here).
  • App-V (Application Virtualization) is still supported, but MS calls out EOL for April 2026, and now recommends using Azure Virtual Desktop with MSIX app attach instead.

From a different perspective, the ADK includes support to assess, plan for and execute large-scale Windows deployments. Assessment comes from the Windows Assessment and Windows Performance toolkits. Deployment tools include WinPE, Sysprep, and other items that can customize and distribute Windows images.

It’s Early in the Lifecycle…

Organizations are mostly still considering Windows 11 deployments, though some pilots are underway. Grab yourself a copy of the new ADK and you can get to know it, as your organization starts pondering and investigating its Windows 11 options and timetables. Cheers!


Facebooklinkedin
Facebooklinkedin