Category Archives: Hardware Reviews

We are constantly getting a wide variety of hardware and software to test and exercise under a range of conditions. As you might expect, some work better than others, some play nicely with others (or not), and a few are genuinely pleasant surprises. Here you’ll find a collection of reviews on a range of products. We’ll be updating this section frequently as we run across new stuff, so come back soon and often!

Unboxing Toughbook Then Updating Same

I just got the kind of Christmas present that delights me. Even though I won’t get to keep it, I’m having a total gas unboxing, updating and setting up the Toughbook 55 PC that Panasonic sent Friday week. It’s a “ruggedized PC” designed for field use in hazardous duty situations (military, first responders, hostile environments, and so forth). In some surprising ways, tho, unboxing Toughbook then updating same has posed some interesting challenges and roadblocks. But it’s been fun!

And I totally lucked into this situation. At the end of November, my TechTarget story “The 6 best rugged computers for business use cases” went live. Shortly after, Panasonic contacted me to share more information about their latest Toughbook model. My response: if you can, please send me one to review. It took a while, but now I’ve got one in my hot little hands. Read on for more info, in what I plan as a series of descriptions and discussions. This one covers unboxing and initial setup and impressions. Others will go into more detail.

FZ55-3 Toughbook Specs

Here’s what came with the particular model FZ55-3 I received:

  • i7-1370P (14 Cores, 20 logical processors)
  • 32 GB DDR4-3200 Samsung M471A2G43CB2-CWE
  • Integrated Iris Xe Graphics Raptor Lake-P/U  GT2
  • 512 GB NVMe SSD Kioxia KBGBAZNV512G
    (PCIe 4.0, 1.4x OPAL)
  • 14″ InfoVision Display 1920×1080 (Full HD)
  • 1 or 2 GbE Ethernet adapters (I219-LM)
  • Wi-Fi 802.11ax (Intel AX211)
  • USB 3.2 (USB-C) & 3.1 (USB Type A) ports
  • Multiple Serial ports (Com 1, 3, 4 & 6)
  • LG-BU40N Blu ray player/burner
  • Plug-ins for (1) fingerprint reader, (2) smart card reader, (3) 2 serial ports (D-9 & D-15) + PS/2 Keyboard port

As you’d expect from a MIL-STD-810H compliant device, it’s tough, all buttoned up and ready for some harsh, demanding action.

Gotchas While Unboxing Toughbook, Then Updating Same

I did run into a series of little gotchas while bringing up the Toughbook (TB), then applying WU updates, and adding some some software to put it through its paces. Here’s the current list:

1. The TB wouldn’t connect to my Asus WAP right next store to my desk on a butcher’s rack. It would, however, happily connect to the Spectrum Arris box in the master closet (25′ away).

2. As an experiment, I elected to synch my local apps, settings and so forth with those on another PC (P16 Mobile workstation) during OOBE. This quit at some point with a generic and unhelpful “Something went wrong” error message. That said, this functionality returned on a later reboot and completed successfully. Go figure!

3. Updating and downloading took longer than I’m used to (possibly because of the more distant Arris Wi-Fi connection). I eventually switched over to wired Ethernet (GbE). It still took longer to download and update stuff than I expected it to: stiffer security built-in perhaps? That would make sense for certain kinds of “digital hostility” that this unit is built to withstand. A subsequent check (LAN file transfer for an iso Win11 image) showed it could well be the NVMe SSD that’s the bottleneck. More testing will resolve this.

4. Among my various usual post-install/acquisition software items, I installed Piriform Speccy. It immediately crashed the TB as soon as it ran. Sigh. BSOD with an out-of-bounds memory error. I’ve seen this on other PCs before, it’s from unauthorized access to the PCI bus. I’m using HWinfo instead (it works fine).

Seems pretty normal for bringing up a new PC in general, especially one that’s been deliberately hardened.

First Impressions

NVMe access speeds aside, this is a fast, capable laptop. I like the display (it’s bright and easy to read). The keyboard is immediately usable with tangible key travel and good key placement. It switches between Wi-Fi and GbE with ease and aplomb. Switching from a 14″ built-in display to a remote 27″ monitor means I have to pay attention to where I leave apps I close (or leave open) — otherwise, they show up off-screen on the smaller built-in display.

A unit configured like mine costs somewhere between US$3,600 and $4,000, as far as I can tell (from online shopping comparisons). This is the kind of system that costs more, but is designed to withstand grueling and rigorous situations and uses well outside the range of usual home or office environments. So far, color me impressed…

Stay tuned! I’ll be writing more about this unit over the next month. I’m especially impressed with the TB’s swappable modules and keen attention to protecting itself from schmutz and dust. I’ll explain more later — I promise!


Facebooklinkedin
Facebooklinkedin

P1 Mobile Workstation Uptake & Intake

OK then: the day before we left on vacation, the Boss looked out the door and asked me: “Are you expecting something?” I hadn’t been exactly, but Jeff Witt from Lenovo had indeed promised to ship me another business laptop. So here ’tis: a ThinkPad P1 Gen 6. Its Lenovo Commercial Vantage info serves as the lead-in graphic. I’ll now share some details from the P1 Mobile Workstation uptake & intake here at Chez Tittel.

More About P1 Mobile Workstation Uptake & Intake

When you fire a review unit up from Lenovo, it goes automatically into a predefined account. So usually, the first thing I do is to check for OS and Vantage updates. Next, I add my MSA as a second, password-protected admin account. Then, I set up Remote Access. That lets me use my dual-monitor production desktop PC for some serious rooting around.

I find myself occasionally re-learning how to set up Remote Access on the LAN. To begin, enable Remote Desktop. I also have to make sure the LAN is designated a private network. Next — at least temporarily — Discovery for Public Networks and All Networks gets turned on. Otherwise, the first remote desktop connection attempt just doesn’t work. Go figure!

Other Set-up and Configuration Tasks

It always comes as a shock to me on a new install that I have to download and install the latest PowerShell version (7.3.6 as I write this). Then I have to change the default profile to that version in PowerShell Settings/Startup. Finally, leading-edge PS comes up instead of the built-in version (5.1.22621.1778). No thanks!

Next, I install Winfetch, OhMyPosh, import nerd fonts, edit my OMP profile and get PowerShell where I want it to be. The new approach to ZIP files in Windows 11 hides their true nature, so I also had to remember to unblock the ZIP file, extract its contents, and then copy the nerd font files into C:\Windows\Fonts. Sigh: it’s always the little things… That will get corrected in the next phase (see below) when I actually install 7Zip and let its default behaviors take over…

After that, I download PatchMyPC Home Updater to grab all the apps and tools I like to have installed on my PCs. That list of 12 items appears in this next screencap, following installation (takes about 3 minutes altogether, much faster than I could do on a one-off basis). Notice it comes from SUMo (Software Update Monitor) and shows 18 items (OneDrive, Edge, GeForce, and X-Rite came pre-installed; CrystalDiskInfo and CrystalDiskMark get counted for 32- and 64-bit versions separately: go figure!)

P1 Mobile Workstation Uptake & Intake.sumo

4 items pre-installed, and CrystalDisk stuff counts double, for 12 actual items added.

Initial Observations

This is my first exposure to Gen13 (Alder Lake) Intel CPUs. This CPU is a smoker with 14 physical cores, of which 10 run dual threads (i7-13800H). The 2800MHz DDR5 RAM (32 GB, single module) ain’t bad, either. I’m not familiar with Raptor Lake-P/PX Integrated graphics (Raptor Lake-P GT2) but it seems pretty snappy as well. This laptop even comes equipped with an NVIDIA GeForce RTC 4060 GPU which is likewise robust when run locally. The KXG8AZNV1T02 LA KIOXIA 1TB PCIe x4 NVMe SSD speeds along quite handily, too. All in all, it specs out — and acts — like a pretty formidable laptop.

I’m going to have to spend more time with this system but I’ve liked everything it’s shown me about itself so far. As equipped, this unit lists for around US$2,750 on the Lenovo website. All I can say for now is: So far, so good — I like it! Stay tuned, I’ll report back with more info later this week.

Facebooklinkedin
Facebooklinkedin

Failing Backup Signals Regime Change

OK, I think that’ll do it for my current production PC. I noticed this morning what when my scheduled backup started,  it failed almost immediately thereafter. Further investigation into the Macrium Reflect logs shows me it has failed since last Friday. That’s because on the weekends I’m not usually at my desk at 9AM when the scheduled job runs. Upon further investigation, the N: drive where I target my backups had gone missing (it came back after a  restart, though). Nevertheless, this tells me it’s time to start acquiring parts to build a replacement PC. That’s why I aver that a failing backup signals regime change. My 2016 vintage i7 Skylake needs to go.

Why Failing Backup Signals Regime Change

It’s just not right that a drive attached to one of the SATA ports on my Asrock Z170 motherboard should drop off the map over the weekend. And now, dear readers, you know why I schedule my backups to occur while I’m working at the PC: it’s the best way to get timely notification that “something aint’ right.” That’s what happened this morning, and that’s what tells me:

  • I’ll need to keep a close eye on this daily until I transition to a new PC, to make sure scheduled backups run to completion
  • It really, really is time for me to transition over to a new primary production PC

For sure, 7 years isn’t a bad lifetime for a heavily used, major storage PC. Indeed, I’ve got a nominal 17.1 GiB, or approximately 15GB of storage on this beast. Of that total, about 40% (6GB) is occupied, so I’ll throw a couple of new 8 GB SATA drives into my new BOM for the build, along with 2 2TB NVMe PCI-e x4 or x5 SSDs.

It’s Now Official: I’m Transitioning

I’ll wait until August 1 or thereabouts to start pulling parts together for the new build. I’ve already got an Nvidia 3070 Ti GPU and a Seasonic Focus PX-750 PSU I can use. I’ll need a new case, a CPU, 64 GB RAM, the aforementioned SSDs and HDDs, and a motherboard. That will give me something to think about — and report on here in my blog — as the month winds down.

I think I’ll call my old buddy Tom Soderstrom, who still reviews motherboards and CPUs for Tom’s Hardware, to ask for his recommendation on a new build. I need to decide on AMD vs. Intel, after which the rest will follow pretty naturally. Stay tuned: I’ll keep you posted.

Facebooklinkedin
Facebooklinkedin

SFF Upgrade Opportunities Maximize Value

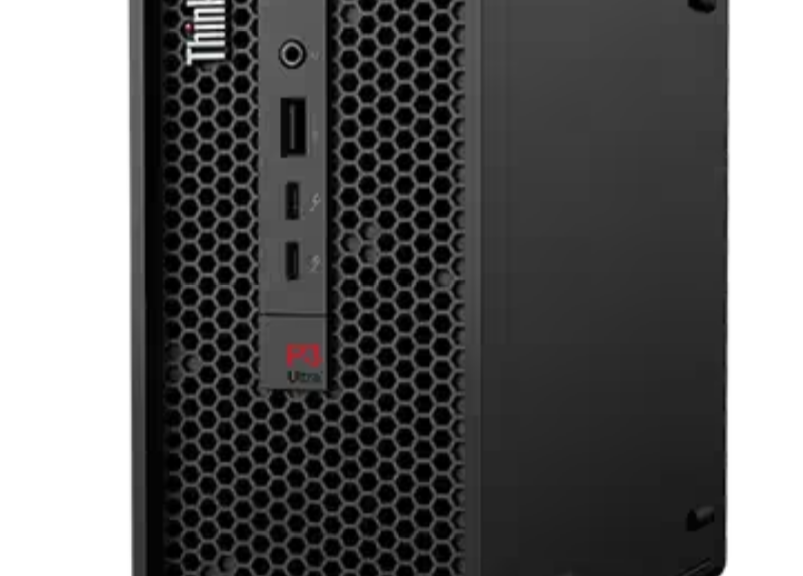
Last October, I wrote a review of a tiny and terrific SFF PC entitled “P360 Ultra Is Beautiful Inside.” This morning, I’ve been thinking about that review while reading about best of breed small form-factor (SFF) PCs across a broad range of vendors. My conclusion: SFF upgrade opportunities maximize value in a chassis that’s easy to open, access and upgrade. Let me explain…

Buy Low-end So SFF Upgrade Opportunities Maximize Value

In the P360 Ultra, for those who aren’t disinclined to swap out parts, I suggest purchasing a model with the highest-end CPU one can afford (the CPU is not listed as a field-replaceable unit, or FRU — see Manual). Then, one can hold the initial cost down by purchasing minimal memory and storage, and swapping out components purchased separately.

Thus, for example, a minimally configured unit with i7-12700K CPU costs ~US$1,500, while one with an i9-12900 goes for US$1,675. This comes with built-in GPU, 8 GB RAM, and a 512 GB PCIe X4 SSD. Generally, you can purchase additional memory and storage for less than half what the vendor charges (e.g. Amazon sells compatible 2 x 32 GB memory modules for US$260-280, where Lenovo charges US$700). Similarly, you can purchase an excellent 2 TB top-of-the line SSD from Newegg for about US$229, where Lenovo charges US$30 more for a “high-performance” 1 TB SSD.

Things Get Dicier with Graphics Cards

The P360 Ultra uses a special, compact interface to host graphics cards such as the Nvidia T400 4 GB GDDR6, the Nvidia RTX A2000 12 GB GDDR6, and Nvidia RTX A5000 mobile 16GB GDDR6. You can buy the first two of these three on the open market (I can’t find the mobile version of the third for sale anywhere). Lenovo sells the T400 more cheaply than I can find it online, and you may be able to save a little on the A2000 on the open market.

All this said, buying down and self-upgrading remains a good way to buy into an SFF machine. You can decide how much oomph you want to add vs. how much you want to spend, and save vis-a-vis preinstalled prices. Think about it for upcoming desktop/workstation purchases, please.

Facebooklinkedin
Facebooklinkedin

Thunderbolt Docks Add Helpful Future-Proofing

I’m thinking about what kinds of hardware experiments I’ve conducted over the past couple of years. Especially this year (2022). Along the way, I’ve learned that Thunderbolt docks add helpful future-proofing for home and office users. Let me explain…

How Thunderbolt Docks Add Helpful Future-Proofing

Right now, Lenovo offers what can only be called a “Best Buy” in the arena of Thunderbolt 4 docks. Or maybe a couple of them, as I’ll recount shortly. Called the Universal TB4 Dock, it currently retails for just under US$290. This is about US$110 cheaper than its nearest competitors (e.g. Belkin and CalDigit, among others).

On December 8, I also wrote here about the Lenovo P27-u20 monitor, which includes a built-in TB4 dock. At US$527, with a 4K monitor included in the mix, it too, qualifies as a “Best Buy” IMO.

There is one thing, though: to make proper use of TB4, you also need TB4 peripherals. They will be no more than two years old (TB4 made its debut in H2’2020). There’s a lot of expense involved in climbing this technology bump. But if you’ve got newer peripherals, a TB4 dock is a great way to mate them up to PCs and laptops back to 8th Gen Intel (and equivalent AMD) CPUs. I’ve done that, and it works great.

Try TB3 for a Lower-Budget Approach

For readers who want to extend the life of a Windows 11 capable PC or laptop, it may make sense to invest in Thunderbolt 3 (TB3) instead. Such docks cost as little as US$40 (e.g. Dell refurb), and are readily available new for around or just under US$100. If you’ve already bought into USB-C (3.1 or 3.2 capability) or TB3 peripherals, this is a less expensive way to dock up. Worth researching anyway: I see lots of attractive options at Amazon and other online outlets.

Thanks, Lenovo!

While I’ve got your eye, I’d like to thank the laptop and peripherals teams at Lenovo for their outstanding support. They’ve sent me half-a-dozen different laptops (and one great SFF workstation), multiple docks and the aforementioned monitor this year to review.

It’s been incredibly educational and lots of fun to put different TB4 scenarios together. This lets me understand and measure how they work, and how to make them work best. A special shout-out to Jeff Witt and Amanda Heater for their great help and quick assistance this year (and beforehand). Happy holidays to one and all.

Facebooklinkedin
Facebooklinkedin

Thunderbolt Monitor Makes Life Easy

OK, then. Lenovo sent me a terrific Thunderbolt 4 4K ThinkVision P27-u20 monitor. It actually showed up the day before Thanksgiving. It’s been sitting on my office floor since then, waiting patiently for me to get around to it. I’m working with the company to get a better sense of how Thunderbolt 4 works in an office environment. And indeed, now I can say from experience that a Thunderbolt monitor makes life easy for properly-equipped PCs and laptops.

Extremely narrow side and top bezels make for a compelling and nicely stackable monitor. [Click image for full-size view.]

Why Thunderbolt Monitor Makes Life Easy

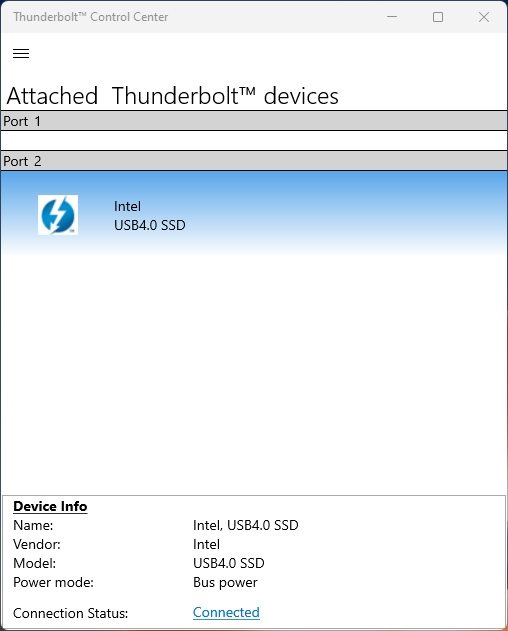
Simple: plug it it, turn it on, set the device for dual displays and extend the desktop on a laptop. You can see how this looks in the Thunderbolt Control Center on the X12 Hybrid Tablet in the top graphic.

On the P360 Ultra, it fired up on its own when plugged into the front Thunderbolt 4 port. Colors are crisp, and the monitor appears to work as fast using TB4 as it does under either HDMI or DisplayPort. Better yet, the Thunderbolt-accessible ports on the monitor include TB4 in/out, 2xHDMI 2.0, DP 1.2, GbE (RJ-45), an audio mini-jack, and 2xUSB3.1 (1 USB-Type B, and USB-C is TB4 capable). It’s also got integrated speakers (3W each, so not really major, but adequate). It runs a 60Hz refresh rate with a response time of 4 -6 ms so it’s not really a gaming monitor by any stretch. That said, it’s nice for productivity and static creation work.

Resolution is nominal 4K (3840 x 2160), and it supports DCI-PC3 and Adobe RGB. It’s also DisplayHDR 400 certified (that means 10-bit color). See the product page for complete tech specs.

Built-in TB4 Hub Makes For a Killer Price

Yes, that’s right: the monitor includes an entirely capable, built-in Thunderbolt 4 hub as part of its equipage. Very cool, for a device with an MSRP of under US$550. Indeed, even the cheapest TB4 hubs, similarly equipped, cost over US$300 nowadays. It also includes a DP cable, a TB 4 cable, and a USB TypeB2A cable to hook an external USB 3.1 device up to its Type B port. Note: I just happened to hook the monitor up through a Lenovo TB4 Dock because I have one, but it will act as a dock by itself. That’s why two devices (dock and monitor) show up in the Thunderbolt Control Center up top.

To me, this functionality makes the price of the monitor easy to justify given that it comes ready to support Thunderbolt 4 based audio, video, networking and peripherals right out of the box. If you need another monitor and you can also benefit from TB4 connectivity and access, this could be too good to pass up.

Upon first exposure and short-term use, I’m wowed. I’ll follow up with more details after I’ve had a chance to spend some time with this puppy.

Notes Added December 7

A few more noteworthy things have occurred to me as I ponder this new peripheral and its inner workings. The USB C port delivers up to 100 W of power, so it should be able to handle most laptops without a separate AC connection for juice. The on-screen menus do take some fooling with to figure out. It is kind of heavy (28 lbs/12.7 Kg) but easy to assemble, move around and adjust. Here’s an interesting technical review from PC Magazine for your consideration, too.


Facebooklinkedin
Facebooklinkedin

USB4 Delivers Consistent NVMe Performance

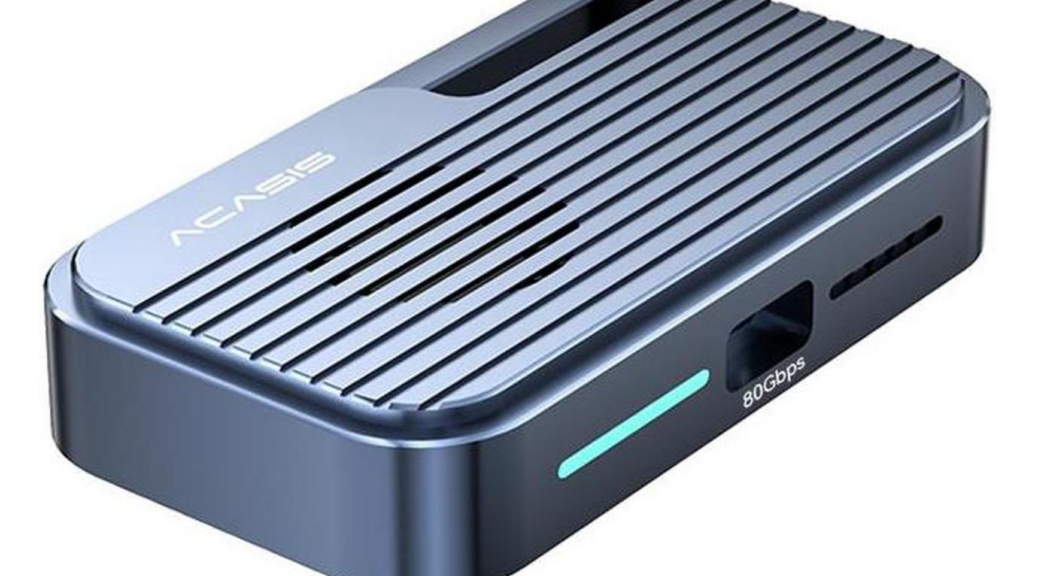
OK, then. I finally laid hands on my second USB4 NVMe SSD enclosure yesterday. I deliberately sought out the cheapest one I could find so I could compare it to a more expensive alternative already on hand. When I say that USB4 delivers consistent NVMe performance here’s what that means:

1. The same SSD, cable, and host PC are used for comparison. Both drives have the “cache tweak” applied (this Oct 14 post has deets). Same tests performed, too (CrystalDiskMark and a Macrium Reflect backup).
2. The only thing that changes is the enclosure itself.

In short, I wanted to see if spending more on hardware returned a noticeable performance advantage (I’ll talk more about this below). Long story short: it doesn’t seem to make much, if any, difference. Let me explain…

Why Say: USB4 Delivers Consistent NVMe Performance?

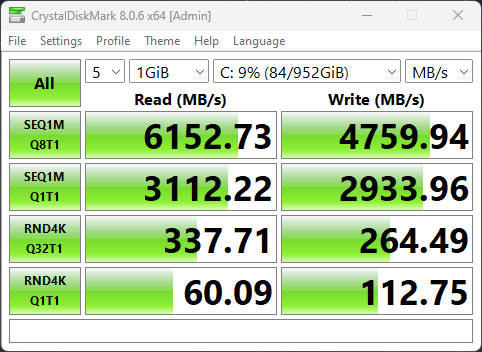
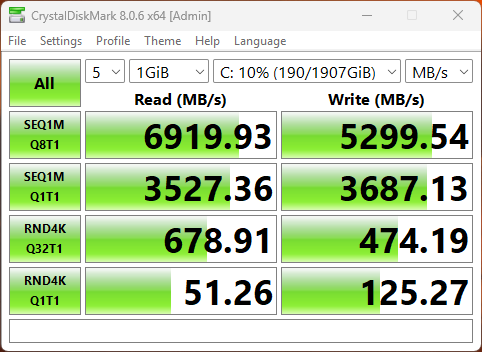
The lead-in graphic shows the results from the cheap enclosure on the left, and the more expensive one on the right. The average difference in CrystalDiskMark performance shows 2 wins for el cheapo, 5 wins for the higher priced item, and 1 tie. On first blush, that gives the more expensive device an advantage. So the next question is: how much advantage?

This is where a little delta analysis can help. I calculate that the average performance difference between devices varies from a high of 6.2% to a low of 0.03% (not including the tie). That said, the average performance difference across all cells is merely 1.54%. (Calculated by taking absolute value for each delta, then dividing by the number of cells.) That’s not much difference, especially given the prices of the two devices: $128.82 and $140.71. That delta is 8.4% (~5.5 times the average performance delta).

I will also argue that comparing CystalDiskMark results is interesting, but not much of a real-world metric. Thus, I’ll compare completion times for a Macrium Reflect image backup on the same PC, same OS image. The expensive device took 2:25, the cheap one 2:44. That’s an 11.5% difference, greater than the price delta but not amazingly so.

Deciding What’s Worthwhile

I can actually see some differences between the two enclosures I bought. One thing to ponder is that NVMe drives tend to heat up when run full out for any length of time (as when handling large data sets, making backups, and so forth). I’ve seen temps (as reported in CrystalDiskInfo, reading SMART data) go as high as 60° C while M.2 SSDs are busy in these enclosures. At idle, they usually run at around 28° C. The more expensive NVMe enclosures tend to offer more surface area to radiate heat while active, so that’s worth factoring into the analysis.

But here’s the deal: I can buy a decent USB3.1 NVMe enclosure for around US$33 right now. The cheapest USB4 NVMe enclosure I could find cost almost US$96 more. That’s a multiplier of just under 4X in price for a device that delivers less than 2X in improved performance. Let me also observe that there are several such enclosures that cost US$160 and up also on the market. I still have trouble justifying the added expense for everyday use, including backup.

There will be some high-end users — especially those working with huge datasets — who might be able to justify the incremental cost because of their workloads and the incremental value of higher throughput. But for most business users, especially SOHO types like me, the ouch factor exceeds the wow value too much to make it worthwhile. ‘Nuff said.

Facebooklinkedin
Facebooklinkedin

HDDs Still Have Their Uses

Hmmmm. Just saw a fascinating story at Neowin.net. It provides links to some low-cost deals for hard disk drives (HDDs) that range in size from 3 to 14 TB, with prices from US$60 (3TB) to US$210 (14 TB). I’m not endorsing the brand (WD) or the deals (listed from Amazon and — in some instances — Newegg). But I am amazed at just how cheap conventional hard disks can be today. And because HDDs still have their uses — particularly for archiving and spare backups — buying may make sense.

Economics Also Verify That HDDs Still Have Their Uses

I’m struck by the contrast between HDD and NVMe prices, especially for 4 and 8 TB devices. Looking at Amazon, I see that 4TB NVMe drives go for US$460 and up, with most top-end devices just below or over US$600. When you can find them (not easy), 8TB devices cost from just under US$1,200 to around US$1,500 or so.

The comparison to HDD is pretty stark. The Neowin story cites prices of US$70 for 4, and US$130 for 8 TB. Do the math to figure out the ratios. The 4TB NVMes cost between 6.57 and 8.57 times as much as their HDD counterparts. 8TB models run between 9.23 and 11.53 times as much.

Of course, denser solid-state devices are much more expensive to make. Though higher-capacity HDDs have more platters, achieving denser storage doesn’t magnify costs anywhere near as much. In fact, the HDD cost increment for going from 8TB to 10TB is US$30, and from 8TB to 14TB US$80. That clearly shows the incremental cost of storage is much, much cheaper for HDDs than SSDs.

But given the mind-blowing costs for higher capacity NVMe devices, they’re not going to replace HDDs completely any time soon. They simply cost too much to justify wholesale switchovers. Nobody’s going to use HDDs for serious, real-time workloads any more. They have no place as system drives, either. But for other applications where high capacity trumps I/O performance, they still have a vital role to play. And that explains why I still have over 40TB of spinning storage myself, much of it idle as “backups for my backups.”

Facebooklinkedin
Facebooklinkedin

ThinkPad Universal Thunderbolt4 Dock

It must be because I asked Lenovo for gear to test Thunderbolt4 and USB4. Last week another unexpected and unnanounced device showed up at the door. This time, it was a brand-new ThinkPad Universal Thunderbolt4 Dock. From what I’ve seen so far it has a lot going for it — especially price (relatively speaking, that is).

Why Is TB4/USB4 Gear So Costly?

Before I dig into the details on the mostly excellent ThinkPad Universal Thunderbolt4 dock, I must rant a bit. I’ve got 3 TB4 docks here at the house right now. The Lenovo unit is the cheapest by US$70-plus (that’s a good thing). But all of them cost over US$300, and two of them are at or over the US$400 mark. That stings!

I’ve been looking at a lot of NVMe enclosures that support USB4 lately, too (they work with TB4 controllers, BTW). These puppies cost even more. That means US$80 – 100 more than the cost of decent-to-high quality USB3.1 NVMe enclosures. I’m talking US$30-50 versus US$130-160. That’s a big difference!

One usually pays a premium to climb onto the bleeding edge of technology. And right now, TB4/USB4 is as fast as external devices get. Given a PC that supports these interfaces, I still don’t understand why climbing aboard this latest technology wave incurs such a hefty buy-in. Sigh.

More About ThinkPad Universal Thunderbolt4 Dock

Now that I’ve set the stage for describing and exploring this device, more of what I have to say should make sense. Indeed, this Lenovo dock is a relative bargain among all the TB4 docks I’ve tested so far. That is, with an MSRP of US$322, it costs US$77 less than the Belkin Pro Thunderbolt 4 dock. It enjoys the same price differential when compared to the CalDigit TS4 dock but that device keeps selling out, and is only immediately obtained on eBay for US$500-600!

Thus, the Lenovo Device has a definite price advantage in this very narrow product niche. See this Amazon Search for a fairly good list of the whole product range right now. From what I can tell, Lenovo offers the best price currently available for these kinds of devices.

Here’s a short list of ThinkPad Universal TB4 Dock features and functions (see product page for complete specs):

  • Handles up to 4 external monitors, up to 8K total resolution (1x8K display @ 30Hz or 4x4K display @ 60 Hz via 2xfull-size DP 1.4, 1xfull-size HDMI 2.1, 1xUSB-C)
  • 2 40Gbps Thunderbolt4 ports (one for computer in, one for other uses)
  • 4xUSB-A 3.1 ports and 1xUSB-C (may be used for video, as already indicated)
  • 135W external power brick, up to 100W available for charging
  • RJ-45 GbE (Intel I225-LMvP circuitry)
  • Audio mini-jack for headphones or external audio hookup
  • Universal computer lock port for attaching locked cable
  • Dimensions 220x80x30 mm (8.66×3.15×1.18″)

The Lenovo dock even downloads and handles its own Windows drivers with reasonable aplomb and dispatch. I found it loaded up its own USB Audio driver (under Sound, video and game controllers). It also updated the local Thunderbolt controller driver to a newer version after hook-up.

Stacking Up the Hubs

My testing so far puts all 3 docks — Lenovo, CalDigit, and Belkin — into the same overall performance range for USB4 and Thunderbolt 4 devices. That said, the CalDigit device offers 18 ports including GbE and 2.5 GbE RJ-45 networking hook-ups and SD flash device slots. If you can find one and need that extra functionality, that may make it worth the extra cost. Likewise, the Belkin device also supports a full-size SD slot and dual USB-A 2.0 slots, which may or may not make a different.

By comparison, I’d give the Lenovo device a “Best Buy” rating right now. If you don’t need SD support or lots of (different) USB-A ports, it can handle what you need. I have no difficulty using it as a docking station for a Lenovo X12 hybrid laptop with external mouse, keyboard, and two or three external storage devices. It also works well with HDMI or DP to drive an external Dell U2717 monitor.


Facebooklinkedin
Facebooklinkedin

P360 Ultra Gets Second NVMe

A couple of days ago, I praised the interior design of the Lenovo P360 Ultra SFF PC (link). I just had to remove the GPU to access the second NVMe slot on an Asrock B500 Extreme4 motherboard last week. Let’s just say it wasn’t incredibly easy (and some expletives were involved). That really made me appreciate an install that required less than two minutes all the way around. But now that the P360 Ultra gets second NVMe, I want to report on the results.

When P360 Ultra Gets Second NVMe, Speed Abounds

What you see as the lead graphic for this story is a pair of CrystalDiskMark results. To the left, the internal C: furnished with the PC (a Samsung 1TB OEM drive: MSVL21T0HCLR). To the right, the internal D: I installed (WD Black SN850).

First, let’s look at those results. The Samsung drive enjoys an 18% edge on the sequential read (queue depth 32, single thread) and a  33% gain on random read (queue depth 1, single thread). The WD Black comes out ahead on all other readings.

That’s not surprising, given that the WD Black SN850 is a newer, more capable drive. But those results also speak to the notion that one should definitely populate open NVMe slots if speedy storage is helpful to the workloads a PC must handle.

P360 Ultra Gets Second NVMe.external

Same WD Black drive in a USB4 external NVMe enclosure: much slower.

Internal vs. External NVMe

The preceding screengrab shows CrystalDiskMark results for the same drive, but housed in an external NVMe enclosure. It happens to be a USB4 enclosure, and represents as much speed as I’ve been able to get from an external NVMe drive. It’s significantly slower across the board, but still not bad.

If I drop the same drive down to a USB 3.1 enclosure, it runs at standard UASP speeds (at or under 1000 in the top 4 cells). Interestingly the bottom four cells don’t change much for either USB4 or USB3.1. Backup speeds don’t change that much, either. That’s why I’m not convinced the USB4 enclosure is worth a $100 premium (it improves backup speeds by 30 seconds, give or take).

One More Thing…

If you’re buying an NVMe drive for an external enclosure, there’s no need to spend big on a fast, capable storage device. It won’t be able to run full out because the USB link (either 3 or 4) can’t keep up with top-end NVMe speeds. As the preceding CrystalDiskMark chart shows, you can’t come near the 6-7 GBps or so performance that top-end NVMes deliver these days.

On the other hand, if you’re going to put that device into an M.2 slot INSIDE the PC or laptop, that’s a whole ‘nother story. Then, you should buy as fast as you can stand to pay for — assuming, that is, that the PC or laptop can make full use of those capabilities.

Facebooklinkedin
Facebooklinkedin