Category Archives: WED Blog

WinGet Boosts Chrome Update Capability

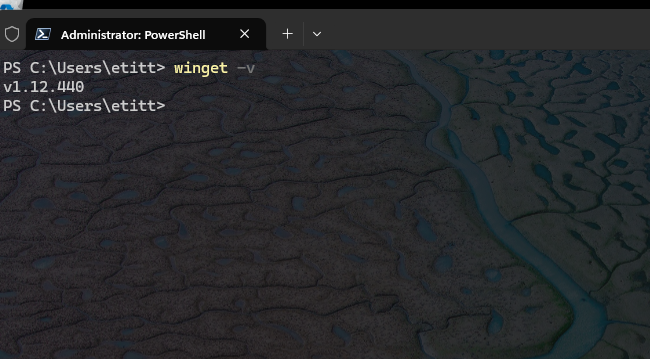
Here’s an interesting item. Previously, WinGet wouldn’t update Chrome on Windows PCs where it was running. Now it will, because WinGet boosts Chrome update capability. It now runs the installer with admin privileges to overcome the maxim “don’t mess with running processes.” You can see it working in the lead-in graphic, where the text reads (in yellow):

The installer will request to run as administrator, expect a prompt.

If WinGet Boosts Chrome Update Capability, Users Benefit

This means users must still Relaunch Chrome to get the update to take, though WinGet applies the update. Previously, WinGet would just skip the whole thing. Now, the next time users open that browser, the new update will take over (or, they can manually use the Relaunch button themselves).

After WinGet does its thing, Relaunch remains required to leave running processes undisturbed.

Will Other Browser Makers Follow Suit?

Here’s a shout out to the dev teams for Edge, Mozilla/Firefox (and variations), Opera, and others. Take heed of this Chrome action and do likewise. Your users — including your truly, most fervently — will thank you.

It’s just another small step for WinGet. But it translates into a big boost for the Windows user base. Keep up the good work, people!

New PowerShell Version Out, Too…

While I’ve got your eye, a new PowerShell version — v7.5.0 — is out. It’s still new enough that WinGet won’t install it yet. If you, like me, are OCD enough to want to run it before it gets into the pipeline, download it from the assets on the Release v7.5.0 page.

Note added 15 minutes later: Nevermind, it’s already showing up in WinGet. I should’ve known @Denelon and the team wouldn’t sit on their hands here. Another attaboy for that group and the PowerShell team. Good-oh.

Here, you can see the old 7.4.6 windows left, and a new 7.5.0 window right. God: I *LOVE* Windows Terminal.

Facebooklinkedin
Facebooklinkedin

Unexpected BIOS UEFI Update Adventures

When Lenovo Vantage popped up a notification yesterday that the ThinkStation P3 Ultra needed a BIOS/UEFI update, I thought nothing of it. But as the process dragged on … and on …. and on some more, I started to get a little concerned. Indeed, I found myself enmeshed in unexpected BIOS UEFI update adventures as what I thought might take 10-15 minutes took about an hour, all told.

But there is a happy ending. Though it took much longer than it ever has before, the update complete successfully. And the machine continues humming along, happily doing what I ask it to. That’s a relief!

Describing Unexpected BIOS UEFI Update Adventures

This may be the third such update I’ve gone through with this machine. Across all my many Lenovos over the years, loaners and review units included, I’ve probably performed over 200 such updates. That’s a big reason why this particular one took me somewhat by suprise.

Here’s a list of symptoms:
1. After the BIOS update completed, the PC rebooted yet one more time. It usually comes back up in no more than 30 seconds. This time, it took between 1 and 2 minutes.
2. Upon restarting the machine showed a black screen — no Lenovo logo for the boot splash screen showed up for at least another 30 seconds. Normally, this pops right up.
3. After the Logo showed up center screen, it took longer than usual for the “Energy Star” and “TCO certified” logos to show up bottom right. Again, this added another 30 seconds or so to the delay.
4. During that first reboot cycle, the PC rebooted itself again (never seen this before). This time the screen stayed black even though the monitor power indicator stayed on. I had to cold start the PC (turn off the power, wait 30 seconds, turn the power back on) to resume start-up.
5. After this second unexpected restart, the P3 took well over a minute to get to the splash screen. Getting to the spinning circle took longer than usual as well, but it booted into Windows 11. It’s now showing 24H2 Build 26100.3894 (current).

Post-update, the P3 takes about 10 seconds from the Lenovo boot splash to show TCO and Energy Star logos. Another 10 seconds to get to the spinning circle. Another 15 seconds before the lock/login screen appears. Thus, total boot time is now around 35 seconds or so. That’s not too bad, actually.

Why the Kerfluffle?

Copilot tells me extended boot delays after UEFI update can arise from compatibility issues, switching all settings to their defaults, “re-learning” of hardware  (I’ve seen this with memory on the P16 but that posts an on-screen message and nothing like that showed up on the P3), and “additional error checking or diagnostics during boot.” I’m guessing this update included a bigger change delta than older ones, and that some of the final category (diagnostics and error checks) also got thrown in.

As for the cold start, Copilot says it happens when the system needs to “properly recognize all components” after a UEFI update. I can see that, particularly if related aspects in the UEFI have changed since the preceding version. That would absolutely force a complete, new device enumeration, which may have been needed in this case.

At any rate, it turned into more of an adventure than I expected. And I learned a few things along the way. Glad the machine is running now, and appears to be working well. Fun, fun, fun here in Windows-World these days!

Facebooklinkedin
Facebooklinkedin

UniGetUI Beta Previews Advanced Features

Yesterday, Marti Climent — the lead developer for UniGetUI (formerly known as WinGetUI) — dropped a new beta version (3.1.6-Beta2) of the program into GitHub. This UniGetUI Beta previews advanced features planned for the next official release, when it transitions into production. Right now, it may be worth downloading and playing with to see what it can do (IMO). But the developer’s “Caution” on this release reads “Prerelease builds can be unstable and should not be used on a production environment.” There: you’ve been warned.

Exploring UniGetUI Beta Previews Advanced Features

A good way to understand what’s in 3.1.6-beta2 is to visit its release page at GitHub. There you’ll see that info listed under “General Changes.” Minutae appear in the detailed changelog (summarized under “What’s Changed” on the GitHub page). Highlights:

  • Downloads provide more detailed status info, including download and install phases
  • Multiple downloads can now proceed in parallel
  • Immediate package download triggers upon right-click of any item in the update list

I’m especially intrigued to see that UniGetUI will soon gain parallel download capability. It already launches a separate process for each download/install session but does them in series. In the next release, it will do them in bunches, instead of one at a time. Good-oh!

Production Release 3.1.5 Also Worth Trying

For those seeking a good alternative to WinGet (and 9 other package managers, including Scoop, Chocolatey, NPM, PIP, and more) UniGetUI is worth checking out in its own right. The lead-in graphic shows a recent download session on my production Windows 10 PC. There, it’s ready to download and install 6 packages (Dropbox, Chrome, Java SE SDK, PS 5.x and 7.x PSGalleries, and Snagit 2024). The whole process takes less than 10 minutes to complete.

UniGetUI should be of especial interest to organizations and development teams that use sources not available to WinGet but readily available to some or all of the other package managers mentioned in the preceding paragraph). Indeed, UniGetUI finds and updates items that WinGet at the command line does not, because of that wider range of available update sources, even on plain-vanilla Windows 10 or 11 PCs.

If you like what you see in version 3.1.15, keep your eyes out for the final cut of 3.1.16. It promises to be faster and more capable than the current production version. One more thing: if you’d rather let UniGetUI do its thing without bothering you try this super-silent command line invocation:

UniGetUI.exe /VERYSILENT /SUPPRESSMSGBOXES /NORESTART /NoAutoStart

This suppresses interactions and messages, and puts off any restarts that might otherwise be initiated if working UniGetUI through its actual UI. Works like a charm, in total stealth mode. Good stuff!


Facebooklinkedin
Facebooklinkedin

Further Intel DSA Follies

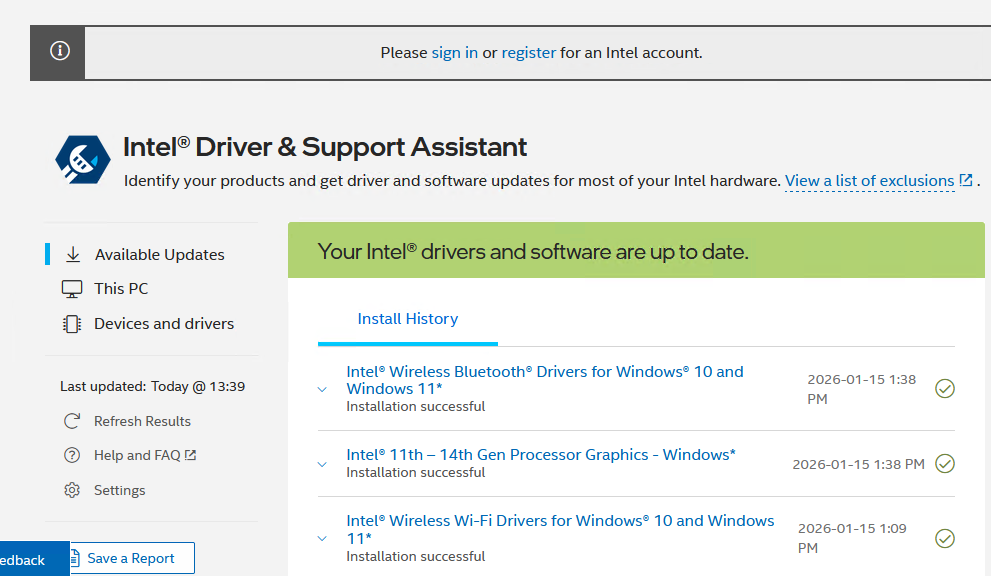
So I’m working on the new loaner unit here at Chez Tittel: a Lenovo ThinkCentre M90a Gen5. As part of my management process, I routinely install the Intel Driver and Support Assistant — aka DSA — on PCs with Intel CPUs. That includes the M90a because it sports a beefy i7-14700. In catching up the device on the latest Bluetooth, Wi-Fi and GbE drivers this morning, I found myself engaged in further Intel DSA follies following (and during) installation. Let me explain…

Fostering Further Intel DSA Follies

My first folly occurred as DSA was getting installed. Even though it wasn’t quite done, it popped up a notification of available updates. I’d never seen this before, so I bit on that offer. It got me downloading the aforementioned communications drivers, and I started that sequence with Bluetooth. Imagine my surprise when the install refused to run because “another installation is underway.” For me, then, Folly #1 is “Don’t start on updates until DSA install is finished.”

Folly #2 reflects a recent UI change in DSA. Once it completes any driver install, it shows installation history. Because one is installing drivers in sequence, that means one must click the “Refresh” button to see any and all remaining drivers that still need to be installed. Repeat until all desired drivers are updated. I’ll summarize Folly #2 as “Remember to click ‘Refresh’ as each install completes, to see remaining pending installs.”

Folly#3 is extreme user engagement in the various driver installers. I counted from 7 to 10 mouse clicks per driver install to get through that process. This bothers me enough that I’ve already blogged about this (April 2023: Achieving Intel Update Driver Silence). Given that Intel has documented this capability for most of its drivers, I’m apparently not the only DSA user to find this irksome.

Done and Dusted: Follies Behind Me

The M90a is now caught up with all of the Intel drivers I choose to update. Even though it’s not supposed to matter, that brings me to Folly #4: The Intel Arc & Iris Xe Graphics warning (appears as the lead-in graphic above, in fact). Intel says elsewhere that since 2022 or thereabouts, its drivers do NOT trample upon OEM customizations. Yet it continues to flash this warning and require user opt-in before enabling install. Sheesh.

Here in Windows World, it’s always something. Today, it’s Intel DSA follies. Who knows what tomorrow will bring? Wait til then, and I’ll let you know…

Facebooklinkedin
Facebooklinkedin

Weird Win10 Insider Mismatch

When I report a Windows puzzle, I usually like to provide a solution. But I just noticed something odd I may not have time to solve today. It looks to me like a weird Win10 Insider mismatch. Let me explain: my production PC is signed up for the Beta Channel, as you can see in the lead-in graphic. But a quick Winver run shows that PC running version 19045.5371 (see below). Alas, the current Beta Channel Insider Preview Build is 19045.5194. And there’s the mismatch in plain sight!

The Build number on this supposed Beta Channel PC corresponds to the current public/production release.

Fixing Weird Win10 Insider Mismatch

Upon closer examination, the Beta build is lower than the current production build. Looks like I want to switch to the Release Preview channel at Build 19045.5435 instead. Let me try that… No joy.

So then, I do some more poking around online, turns out I need to re-select the Beta Channel item (see lead-in graphic) and open its subsidiary window. That lets me switch to the Release Preview channel. Then when I pop back up two levels to re-run an update check, I get what I want:

Turns out my problem is an error in understanding how to switch from Beta to Insider Preview channel: problem solved!

Looks like the download and install are working. I’ll be rebooting soon: installing has reached 100% but not yet flipped over to “Restart pending…” Now it’s installing again … 20% … taking much longer … 45% … 73% … 88% … done. Restarting now… AAAAND winver now shows 19045.5435.

Turns out it wasn’t a channel mismatch: I was on the wrong channel FWIW, Copilot tells me that MS is shutting down Beta Channel, but is continuing to release into the RP (Release Preview) Channel. Hence, my need to change channels to get to the right build level. Apparently, I missed that memo. All fixed now!

As always here in Windows-World, fixing things is easy when one knows what to do. This time, it took me a while — and some new info — to figure out what that was. Go figure!

Facebooklinkedin
Facebooklinkedin

Overcoming KB5050009 Update Errors

I’ve seen it before. And I’m grimly resigned to seeing it again. Every now and then, a Windows PC has issues with some Windows Update (WU) item. Mostly, though, I’ve seen this with Cumulative Updates (CUs) rather than security, MSRT, or servicing stack items. Indeed, this very situation popped up on a brand-new review unit from Lenovo following Patch Tuesday this week which brought KB5050009 to Windows 11 24H2. On all four of my other production level 24H2 PCs, no problem. On the ThinkCentre M90a (see yesterday’s intake review) however, I spent some time overcoming KB5050009 update errors. Let me explain…

Escalating Steps When Overcoming KB5050009 Update Errors

I’ve been through this kind of thing often enough that I’ve got a series of steps I follow when a WU update fails and throws an error. Here it is:

1. Write down the error string ( 0X800F081F in this case)
2. Run the WU update again (helpfully, it offers a “Retry” button)
3. If it fails, note the error message. Record only if different from 1.
4. Download and run the batch file from Eleven Forums Reset Windows Update tutorial (Batch file named Reset_Reregister_ Windows_Update_Components_for_Windows11 .zip).
5. Try again. It it fails. note the error message if different from 1.
6. Download the self-installing update file (.msu) from the Microsoft Update Catalog, then install.
7. If it fails, note the error message. Record only if different from 1.
8. Visit UUPdump.net. Create an ISO file for the target Build (26100.2894, as per KB5050009 support note).
9. Perform an in-place upgrade repair install on the affected PC. This applies the already-integrated CU as part of that process.
10. If that fails, perform a clean Windows install using the UUPdump ISO.

I’ve only had to beyond step 5 in a small number of instances in the 30-plus years I’ve been using Windows. This was one of those cases. To my surprise the catalog download failed the the same error message as before. Next, it took an hour and half to download and build the 26100.2894 ISO, and another 50 minutes or so to install that image on the ThinkCentre. Ouch!

One Step Short of Clean Install Works

But when the PC rebooted, it came up with no errors. Interestingly, the Update History does not show KB5050009, even though it must be present for the build number to reach 26100.2894. You can see this in the lead-in graphic, which shows that very build number, but not the CU entry for KB5050009. That’s because it was part of the install image when the upgrade repair install occurred, not added separately via WU.

But it does go to show that here in Windows-World, when WU won’t work, there may sometimes be a way to work around its failings. This is such a tale…

PostScript: About the 0X800F081F Message

Here’s what Copilot says about this error message, thanks to info from answers.microsoft.com:

The error code 0x800F081F typically occurs when the Deployment Image Servicing and Management (DISM) tool is unable to find the necessary source files to repair the Windows image. This can happen during Windows updates or when running the DISM /Online /Cleanup-Image /RestoreHealth command.

To me that indicates there was some WU issue with the files included in the update package that got downloaded from the WU servers. Curiously it also seems to have affected the Catalog item. I’ve never had that happen to me before. Go figure!

Facebooklinkedin
Facebooklinkedin

Strange But Lovable Lenovo AIO

An AIO is an “all-in-one” — namely, a monitor with a mini-PC slung on its back, usually built from laptop parts. It’s got everything you need to compute except mouse and keyboard (and Lenovo sent those, too, along with the unit and power cord). I’ve owned and enjoyed numerous AIOs over the years. Thus, I was intrigued to learn more about what Lenovo might offer me in that line. They sent me the ThinkCentre M90a Gen 5 in December, but I’m only now writing about this strange but lovable Lenovo AIO .

Digging Into a Strange But Lovable Lenovo AlO

Let me tell you more about this beast: it combines numerous odd or even anachronistic features with a capable CPU, lots of ports, and a surprisingly vibrant and good-looking screen. Here’s a list of what was present on the review unit Lenovo sent me:

CPU: Core i7-14700 (8 P cores, 12 E cores, 28 threads total)
RAM: 2x DDR5-5600 16 GB (32 GB total)
Graphics: Integrated Intel UHD Graphics 770
Disk: 1x 1 TB SK Hynix HFS001TEJ9X164N NVMe SSD Gen4
Display: 23.8″ color calibrated touch display (1920×1080 HD)
Networking: Intel AX211 Wi-Fi 6E and RJ-45 for GbE
Ports: 3x 10 Gbps USB-A, 3x 5 Gbps USB-A, 1x 10 Gbps USB-C
Camera: 5 MP RGBIR (Windows Hello ready) [accessory]
OS: Windows 11 Pro 24H2
Mouse & Keyboard included (very basic house brand)

As configured, this unit goes for US$2,133.00 at the Lenovo Store. Prices go up and down there, and at resellers, so use this as a guidepost rather than a “must-pay” number. If you shop around you may find a better price.

Strange (Anachronistic) vs. Lovable

What makes the M90s strange — IMO anyway — is its inclusion of an optical (DVD only, not Blu-ray) drive, no add-in GPU support, and only USB 3.2 5 and 10 Gbps ports (no USB4 or TB4 ports at all). The unit refused to recognize a USB4 NVMe enclosure when I plugged it in (across all ports). That’s strange, and a bit frustrating, on a business-oriented (says Lenovo) AIO. The unit does support a second SSD slot (M.2 2080 module replaces the DVD drive). One could also insert a SATA SSD into the currently unoccupied hard disk slot inside the case.

What makes this unit lovable is its bitchin’ fast performance (the i7-14700 is wicked fast) and its eminently viewable display. I plugged an Acer 38″ monitor into DisplayPort on the back and easily drove the built-in 23.8″ (1920×1080) and the external 38″ (3840×2160) for an enormous desktop. Great fun!

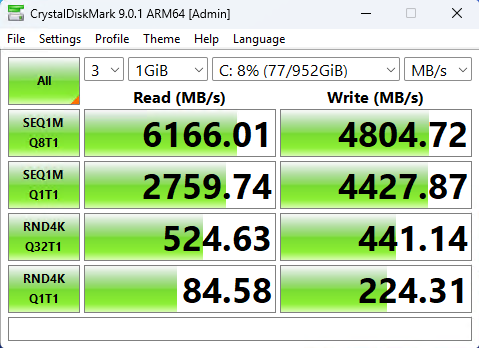
There are plenty of ports available (albeit slower ones) and I was able to accommodate SSDs (mSATA and NVMe) and various hard disks in their respective enclosures. The internal SSD topped out at ~5 GiB read and 4+GiB write speeds (via CrystalDiskMark 8.0.6 x64 version). Because of port speed limits, 500 Mbps is about as fast as external media will run (on par with a SATA SSD, in fact).

Intended and Possible Uses for M90a Gen 5

Personally, I see this kind of PC as an ideal choice for a dorm room PC, or for office workers in typical productivity jobs (not developers or creatives, but most everybody else). It offers good value for the money if you let Lenovo emplace the parts. That value jumps if you buy minimally configured units and upgrade them yourself (e.g. RAM and storage, including a 2nd internal SSD and a SATA SSD in the HD slot). It’s a pretty solid workhorse if somewhat long in the tooth…


Facebooklinkedin
Facebooklinkedin

Dead CMOS Mungs Boot Behavior

It’s one thing to know something in the abstract. It’s entirely another to have it hit you in the face. Today, I went to log in to my son’s PC to update the BIOS to wake on LAN (WoL). No dice. I couldn’t get anything to get me into UEFI, not System > Recovery > Advanced Startup; not the Asrock Restart to UEFI utility, not even shutdown /r /fw /t 00. Then it hit me: could the CMOS battery be dead? Sure enough, a new CR2032 lithium coin battery fixed the problem. And I was forcibly reminded that a dead CMOS mungs boot behavior.

New Battery Fixes Dead CMOS Mungs Boot Behavior

I happened to have 7 of the 10 (now 6) CR2032s I bought via Amazon in 2023 still on hand. With an expiration date in the 2nd half of 2027, I felt comfortable swapping in this newer battery in place of the dead one. As soon as I’d done that, then recabled everything — alas I had to unseat the GPU to reach the battery receptacle — the system resumed proper, normal boot behavior.

Take this lesson from me: if you ever find yourself unable to get to UEFI, WinRE, or other boot menus and displays, check the CMOS battery. If you’re as lucky as I was today, replacing same will fix your issue(s) as it did mine. Cheers!

And ain’t that just the way things go sometimes, here in Windows-World? You betcha… There is an upside though: with the BIOS/UEFI change I was finally able to make, I can now remote into the upstairs Ryzen PC thanks to Wake on LAN (WoL). All’s well that ends the same way.

Facebooklinkedin
Facebooklinkedin

OhMyPosh Auto Update Hangover Fixed

Here’s an interesting one. Indeed one can configure or enable the excellent OhMyPosh prompt tweaking tool  (aka OMP) to update itself. But there’s a trick involved in getting WinGet to recognize an update has occurred. I call it an “update hangover.” Apparently the local copy of the WinGet source list itself needs a reset before it catches up with what’s happened. (That list provides the basis from which it decides what’s fresh and what needs updating.) Let me explain — and show — how I got this OhMyPosh auto update hangover fixed.

Getting OhMyPosh Auto Update Hangover Fixed

Take a look at the screencap in the lead-in graphic. Before this sequence occurred, OMP told me as the PowerShell session started up that it was updating itself to version 24.18.1. You’ll notice that selfsame “Available” version according to WinGet upgrade output right at the head of that PowerShell command sequence.

Keep reading. Note that the output for oh-my-posh –version also reads 24.18.1. Thus, OMP is already upgraded and already current. But after I complete the valid remaining upgrade manually (for Microsoft.WindowsADK), another simple upgrade check shows that WinGet thinks OMP still needs that upgrade.

What to do? I try basic winget source reset — which attempts a reset for the winget and msstore sources — but the command output tells me the directive requires the –force option to work. So that’s what I try next:

winget source reset –name winget –force

As you can see when I do the next upgrade check after that, WinGet now reports “No installed package found matching input criteria.” That means it no longer sees OMP as a legit update target. Fixed!

Now, I wonder if Jan DeDobbeleer can figure out a way to reset the local list of packages for comparison to the WinGet source as part of his auto-update function. Probably not: knowing his thorough and deliberate approach to this package, he’d have done it already were that possible.


Facebooklinkedin
Facebooklinkedin

Copilot+ PCs Lack Fast I/O

So I’ve been doing some homework. I’ve checked on the MS Copilot+ PC hardware requirements. I’ve also looked at related announcements from Qualcomm, Intel and AMD regarding reference designs for such PCs. So far, nobody’s talking about Thunderbolt 5/USB 5 (aka USB4 v2) support on such PCs. That’s kind of a shame, because supporting gear is becoming available for purchase right now (see last week’s post First TB5 NVMe Enclosures Drop for more info). Be that as it may, so far Copilot+ PCs lack fast I/O support via USB-C attached devices. That’s a shame!

If Copilot+ PCs Lack Fast I/O, Then What?

To be fair, USB4 with some degree of TB4 support is baked into the existing specfiications and reference architectures. And, FWIW, the Qualcomm SoC implementation is pretty darn good — not quite as fast as Intel’s but entirely acceptable. That tells me support for TB5/USB5 is probably coming “real soon now” (to resurrect Jerry Pournelle’s famous phrase from his Chaos Manor column).

My best guess is we’ll see a revision to Copilot+ PC specifications some time later this year (the original set emerged in May 2024). I’m thinking sometime around or shortly after the first anniversary seems pretty likely.

In the meantime, Copilot+ PC users will have to live with 3-3,500 Mbps read/write speeds typical of USB4/TB4 device chains for NVMe storage devices. The new spec should double those numbers, and make those who use external NVMe storage for videos, backups and other high-volume, high-traffic I/O applications happy.

You’ll Pay for That Pleasure, Though

If what I’m seeing for NVMe enclosure costs is any indication  — namely US$200 and up — users who buy into faster I/O sooner rather than later will pay a premium for those speeds. The Acasis 40 Gbps enclosures run US$90 (fanless) or US$110 (with fan). The same vendor’s TB5 model has an MSRP of US$299 (and is available on sale at Newegg right now for US$239). Yikes!

Note, Intel unveiled its specs and controllers for Barlow Ridge TB5 on January 9 (last Thursday) so it’s no wonder that PCs with such circuitry built in are hard to find right now. Go figure! Hopefully, licensees will ante up soon. I’m curious to see if once again Qualcomm will reverse engineer this stuff… The comparison slide vis-a-vis TB4, USB4 and USB3/DP from Intel’s Jan 9 announcement serves as the lead-in graphic for this very blog post, in fact.

Facebooklinkedin
Facebooklinkedin