Category Archives: Troubleshooting

No Details Means Reset Reliability Monitor

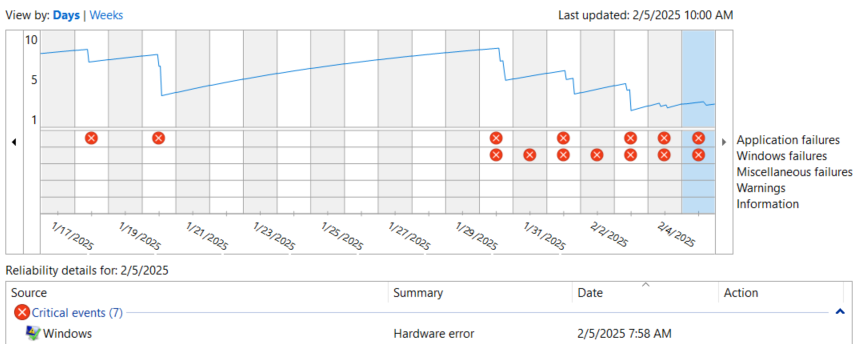
Here’s an interesting one. Sometimes when I have to grope for a blog topic, I check Reliability Monitor on one or more of my Windows PCs. In an ironic twist, this itself produced my topic when the data in my Windows 10 production PC turned up missing in ReliMon (as I like to call it). In fact, a quick web search told me that no details means reset Reliability Monitor is a good fix. And there are numerous batch files to do that job. Ultimately, the one I used appears in the ElevenForum tutorial “View Reliability History in Windows 11.”

Why No Details Means Reset Reliability Monitor

Behind the scenes reliability monitor itself relies on scheduled tasks and a data collection service. These combine to sweep up all the data it tracks into an XML file at regular intervals. If any of those elements hang up or fail, data neither gets collected or stored. With no data to show, ReliMon can’t put on much display, either.

WindowsClub published a story entitled “How to Reset Reliability Monitor in Windows 10/11” in September 2023. It’s mentioned in the afore-cited ElevenForum tutorial in Post#11. As a usually reliable source for fixes and info, I gave the batch file a go. And indeed it cleared Reliability Monitor completely (see next image).

No Details Means Reset Reliability Monitor.blank

Nothing to see hear: the report history is completely cleared.”

By design, I must  wait 24 hours before reported data starts showing up. I’ll report back here if it works — or not. But in the meantime, please chuckle with me that in looking for something to blog about, the very tool I sometimes use to help me zero in on topics itself provided my topic for today.

And is that how things often go in Windows World? You bet!

Note Added Next Day (Feb 2)

And …. yes! …. ReliMon is back at work on the affected PC. Doesn’t have much to show for itself yet, but you can see events and data are being collected and reported.

Happy to show that ReliMon is again gathering and reporting errors, warnings, info events, and so on.
[Click image for full-size view]

The reset appears to have had the intended outcome: Reliabiity Monitor is back at work.

Facebooklinkedin
Facebooklinkedin

Adding Ancient Dell Printer Gets Interesting

Oho! How the time flies by when I’m not looking. I tried to install my Dell color laser printer — Model 2155cn — on the Toughbook FZ-55 this morning, only to get the “Driver is unavailable” error in Printers & scanners again. “Hmmm…” I wondered: “How old is that thing anyway?” Turns out it made its debut in 2011, and I bought it in 2012. Like the original Apple LaserWriter I bought in the late 1980s (and kept until I bought this one) this is one indestructible beast. Thus, I must observe that for Windows 11, adding ancient Dell printer gets interesting. Simply put: Windows no longer includes these drivers in the OS distribution!

How Adding Ancient Dell Printer Gets Interesting

So now I finally understand why I’m seeing this error in Settings. You can see it, too, in the lead-in graphic. Amusingly enough, it shows up right below the device info for the 2155cn that I just installed minutes ago, courtesy of the Dell 2155 Application for Windows, which I found at the Dell Support pages. Dell calls it the 2155cn/cdn Color MFP Software Suite and Driver.

When I look at the list of supported OSes, 11 is absent — though it does mention 10, 7, Vista and XP. It bears a release date of March 2014, too. This information, along with the settings error message, is what finally clued me into what’s going on here. This darn printer is so OLD that MS doesn’t find it necessary to include its drivers amidst the thousands of newer devices it does support. This explains what was going on for my post from last week Dell Printer MIA.

Here Comes Nothing, Printer-Wise

Interestingly, MS is switching over to the Mopria printing protocol, under the umbrella of Universal Print. It will no longer provide new drivers from printer makers starting next year (2025: see this fascinating PC World item “MS is killing 3rd-party printer drivers in Windows 11“).

So, pretty soon this won’t matter. For older printers — like the Dell 2155 cn — the only option will be downloading from the maker’s website. For newer printers that are Universal Print/mopria-savvy, things should “just work.” Maybe I need to buy a new printer so I can see about that! LOL…

Facebooklinkedin
Facebooklinkedin

Dell Printer Driver MIA

Just as we were ready to call it a night, “the Boss” came downstairs from her office cubby. Said she “I can’t print like I usually do.” Upon investigation, Word showed her default printer as: Microsoft Print to PDF, instead of the Dell 2155cn printer right next to her desk. “Uh oh,” I thought: “That can’t be good…” And sure enough, when I went into System → Bluetooth & Devices → Printers & Scanners, I saw the tell-tale status “Driver unavailable.” Yikes, the Dell Printer Driver was MIA. What to do?

Return to Action When Dell Printer MIA

Fortunately, I’ve been down this road before. When my quick attempts to access the device showed me only the link between the Boss’s Dell OmniPlex D7080 PC and the 2155 was affected, I knew what to do.

Yep: just as the status line showed, the driver had crashed and burned. Hence: unavailable. So I removed the printer from the lineup. Then I used the “Add a Printer or scanner” facility to bring it back onto the D7080. Fortunately, that worked without my having to visit the Dell website to grab a new driver download. With its associated software and tools, that takes longer to install and set-up.

Device Manager was apparently able to locate and install a working replacement driver without any extra help (or effort) from me. After printing a test page to make sure things were working once again, I printed the red velvet cake recipe that the Boss was trying to output. Sounds — and looks — yummy.

Remove & Replace to the Rescue — Again!

Just yesterday morning, I blogged about using uninstall/reinstall to fix an issue with the brand-new PowerToys “Command Not Found” facility. Last night, I used the same approach to take a broken device driver out of play, and bring in a new and working replacement.

Hmmm. Seems like this R&R strategy is one that comes in handy for all kinds of interesting Windows issues. Let’s keep that in mind, shall we?


Facebooklinkedin
Facebooklinkedin

PowerPoint Goes Poof!

Working through my to-do list for yesterday, I found myself trying to open a PowerPoint PPTX file. Nothing doing: no file association, even. Worse still, neither Windows Search nor Everything turned up the executable I knew had to be there, somewhere. But after PowerPoint goes poof and disappears from view on my production PC, it took a little detective work to set things back to rights. An important clue shows up in the PowerPoint Properties window above.

When PowerPoint Goes Poof, I Fix It…

Because Word and Excel were working fine on this PC, I knew the whole Office edifice hadn’t evaporated. Obviously, it was just something with PowerPoint itself. Turns out there is no “Powerpoint.exe” as you might expect. As you can see in the Properties page above, the name of the executable is actually “POWERPNT.EXE.”

How did I find it? I checked the Properties page for Word by right-clicking its Start menu entry to check its location. BTW, that program is named “WINWORD.EXE.” It lives in the folder named:

C:\Program Files (x86)\Microsoft Office\root\Office16\

on my production PC. And sure enough, that’s where I found the PowerPoint executable, too. Double-clicking the afore-shown filename, the application opened. Then I was able to use the File → Open dialog to get into the Presentation I had to review for the HPE project outline I was writing. Apparently, opening and using the application was enough to bring it back to the Start menu and to re-establish the missing file association.

Which Version of PowerPoint Is It, Really?

The directory structure obviously hearkens back to an earlier Office version (Office 2016 in fact). But because I’m using Microsoft 365 Apps for Enterprise I had to check About info in PowerPoint itself. And indeed, the version inside PowerPoint itself shows Microsoft 365 MSO Build 16.0.17126.20132).  The Release Notes for Current Channel page also shows version 2312 was released on January 9, 2024. Definitely the most recent update is in place. What a relief!

Gosh! I have no idea what trashed my file association info for PowerPoint, or why I had to dig so long to bring that application up. But hey! Isn’t that just the way things sometimes go, here in Windows-World? At least, it’s working now…

Facebooklinkedin
Facebooklinkedin

Fixing Windows 11 Boot Loop

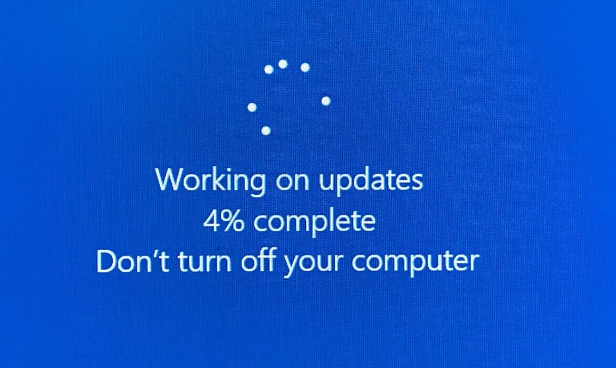
Last Friday, we picked son Gregory up at the airport: he’s home for the holidays from college. That evening, he mentioned his laptop — a 2019 vintage Lenovo ThinkPad X390 Yoga — was “stuck on updates.” Boy, was he ever right: i found myself fixing Windows 11 boot loop as the machine hung after the post-GUI reboot in attempting to get through the 23H2 feature upgrade. Stuck, stuck, stuck indeed.

Fixing Windows 11 Boot Loop Takes Thought & Recall

As soon as I turned the PC on, I could tell it was cycling on processing updates. It just couldn’t seem to get past the spinning circle stage after the initial reboot. Multiple tries later — 3 of them, to be exact — the Windows bootstrap facility presented me with the recovery menu. “Aha!” I though “now I’m getting somewhere…”

Of course, then I had to remember to turn off secure boot in the UEFI so I could actually transfer control to a bootable WinRE environment on a flash drive (UFD). Startup repairs didn’t do it. The Macrium Reflect Rescue Media’s “fix boot problems” didn’t do it, either. But when I stuck the DaRT (Diagnostics and Recovery Toolset) UFD into the machine it finally got through a boot-up to alternate media.

On the next reboot, Windows recognized it was stuck in the middle of a failed update. It then commenced rollback to the previous 11 version and reached the desktop. At that point, I was able to run another Reflect backup (I did), and then start rolling forward again.

All’s Well That Ends Well

The pending Cumulative Update completed successfully, and rebooted correctly. I then fired off the 23H2 upgrade and crossed my fingers. This time, it completed without a hitch. The X390 is now fully caught up, cleaned up and has been backed up one more time.

I’m not sure what caused the first 23H2 attempt to hang in a boot loop, but it didn’t fall prey to that again. I think it may have been the attempt to apply the CU, then the 23H2 upgrade, in a single go. This time around, I made sure to reboot after the CU, before attempting the 23H2 upgrade.  By the time I worked through all the steps, the whole shebang took about 2 hours to fix. We were all glad when it was done — me, especially.

Facebooklinkedin
Facebooklinkedin

Key Combo Kills Screen Toggle

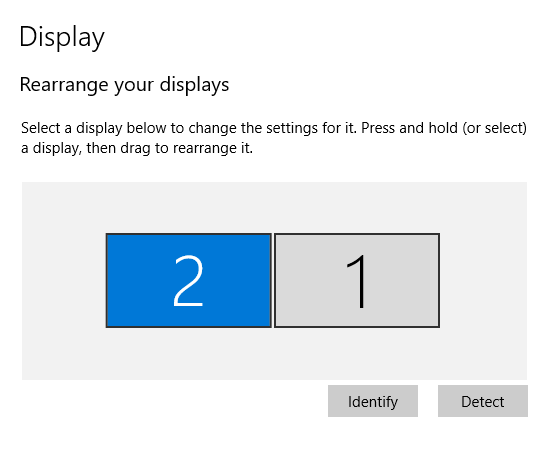
I’ve been here too many times before. Part of my morning routine is a the daily challenge at the Microsoft Solitaire Connection. Occasionally my right hand screen (my playing field, so to speak) will flicker on and off while I’m playing. If it persists more than a few times, I know I need a fix. Over time, Ive learned that a certain key combo kills screen toggle (on-off) effects. For the record that combo is WinKey+Ctrl+Shift+B. Sometimes it works, sometimes it doesn’t. This morning, it did the trick quite nicely.

Which Key Combo Kills Screen Toggle?

Interestingly enough, Mayank Parmar wrote a story about the Winkey+Ctrl+Shift+B key combo at Windows Latest this morning. I suppose since I was running Windows 10 (not 11 as in the title of that item) I should observe that this trick works there, too. In fact, as he reports there correctly, this combo has been part of Windows since Vista made the scene in 2006.

I’ve been in situations like the one I described above (e.g playing MS Solitaire and the screen starts blinking on and off) when the key combo does NOT fix things. Oddly enough when that has happened in the past, it’s been readily rectified by running GeForce Experience to determine that a new graphics driver is available. And so far, when those two things are true (screen is toggling; new driver is ready to download) switching from the old to a new driver has fixed the problem.

For More Serious Graphics Issues…

If neither the WinKey+Ctrl+Shift+B combo, nor a new driver, fixes things life suddenly gets more interesting. Trying the driver version prior to the one that was running will sometimes work (and sometimes not). After that, it usually requires checking the GPU and making sure it’s seated properly, checking and possibly swapping graphics cables from GPU to monitor, and checking the monitor itself. On a laptop that all happens internally (and for many folks, may require a trip to the repair shop or an OEM depot).

For all our sakes, I hope things don’t go that far if the display starts acting a little flaky. FWIW, the key combo almost always works for me. May it do the same for you!

Facebooklinkedin
Facebooklinkedin

Bringing Up 2TB NVMe Proves Challenging

About a week ago, I picked up an on-sale SSD, mostly so I could do some off-the-cuff price/performance testing. I’ve got plenty of 1TB models here at Chez Tittel. Suprisingly, bringing up 2TB NVMe proves challenging as I fight with cables, connections and ports to get it recognized and formatted in Windows. Let me explain…

Why Bringing Up 2TB NVMe Proves Challenging

From the get-go, I had problems getting the SSD recognized in Disk Management. There could have been numerous factors involved:

  • Power draw from a big NVMe
  • My attempt to start in a CalDigit TS4 hub
  • The el-cheapo NVMe enclosure I used
  • The USB-C cable between enclosure and port

By the time I did get things working, I had changed all of those things (except the first, which comes from the SSD itself). I ended up working from a USB 3.0 port in my desktop PC instead of a TB4/USB4 port on a CalDigit TS4 hub. Then, I switched from a US$18 Fideco to a US$70 Sabrent EC-NVMe SSD enclosure (I have two, and both work quite reliably). I went from a TB3 rated USB-C cable to a TB4 rated one.

Though it took me the better part of an hour to work through all those changes, I finally got to the point where I could see and set up the NVMe drive inside Windows. Once that was done, I plugged it into my Lenovo ThinkPad P16 Mobile Workstation.

The Price/Performance Story

There’s still something hincky with this set-up or with the SSD itself. I didn’t get very good numbers out of CrystalDiskMark (lower numbers than many HDDs, in fact). But when I ran a full backup in Macrium Reflect, it created a 62GB image file in 06:33.

Bringing Up 2TB NVMe Proves Challenging.cdm

These numbers are about 20% of what I get from Gen4 (PCIe x4) NVMes in this same enclosure.

That’s a data rate of around 9.45 GB per minute (161.5 MBps or 1292 Mbps by my reckoning). It’s about one-third the speed of an image backup to a fast NVMe in the same enclosure. But faster NVMes cost more (a Crucial T700 goes for US$340; a Teamgroup Z540 for US$260; a Samsung 990 Pro for US$150), too.

One more thing…

On the theory that even the Sabrent enclosure is old enough to be overwhelmed by a 2TB NVMe drive, I swapped it into a 2022=vintage Acasis TB4 NVMe enclosure. And whereas the drive had been unrecognizable in a TB4 port before this switch, it now came up. Then look at the difference in the CDM numbers it now produces (funny thing: the other enclosure produces better random R/W numbers, this one is emphatically the other ‘way round). And in this enclosure Macrium Reflect finished in 02:21 rather than 06:33 (that’s on par with other, faster NVMes in the same enclosure).

Emphatic block block differences in the Acasis enclosure!!!

One lesson I take away from this is that it’s important to remember that bigger capacity means a bigger power draw. Therefore, older and slower enclosures are less likely to provide the handling that bigger, newer NVMe SSDs need. I confirmed this by loading up the Sabrent Rocket 4 Plus that had been in the Acasis enclosure into the Sabrent enclosure: results were typical for a UASP NVMe (just over 1 Gbps for bulk transfers; better overall random R/W). That’s good to know!

All in all, I’m fine with what I’m getting from my US$84 outlay. I am looking for a capable enclosure that’s cheaper than the Acasis TB-401U (still costs US$140 on Amazon). This US $23 Sabrent USB-C 3.2 10Gbps model looks pretty good. I’ll follow up with its results when it shows up later this week…

Facebooklinkedin
Facebooklinkedin

Working Reclaimable Packages Mystery

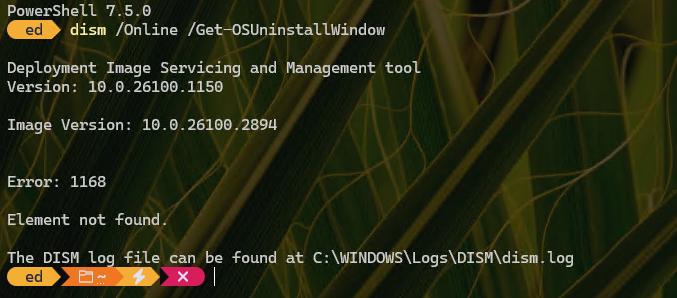
For months now, one of my test PCs has claimed something remarkable. It’s a Lenovo ThinkPad X380 Yoga (8th-gen i7, 16 GB RAM, 1 TB NVMe SSD). It’s a working reclaimable packages mystery, as you can see in the lead-in graphic. Note please: it shows 13 (!) reclaimable packages in the component store. But they never go away…

Why Is There a Working Reclaimable Packages Mystery?

Gosh, I wish I knew. But it’s got me learning more about DISM and the Windows Component Store (WinSxS) than I’ve known before. In particular, I’ve been digging into DISM’s /Get-Packages capability, to look into the contents of WinSxS to see what is — and apparently isn’t — going on in there.

Reading about the output of the /format:table directive, I see that the state column can produce a range of values. These include the following, as mined from Learn.Microsoft.Com by Copilot (quoted verbatim):

  • NotPresent: The package is not present in the image. It has not been installed or added to the image.

  • UninstallPending: The package has been marked for uninstallation, but the process is not complete. There are some additional steps that need to be performed before the package is fully removed from the image.

  • Staged: The package has been added to the image, but it is not active. It can be activated by using the /Enable-Feature option.

  • Removed: The package has been removed from the image, but some metadata about it remains. This allows the package to be reinstalled if needed.

  • Installed: The package is installed and active in the image. It can be deactivated by using the /Disable-Feature option.

  • InstallPending: The package has been marked for installation, but the process is not complete. There are some additional steps that need to be performed before the package is fully installed and activated in the image.

  • Superseded: The package has been replaced by a newer version of the same package or a different package that provides the same functionality. The superseded package is still present in the image, but it is not active.

  • PartiallyInstalled: The package has been partially installed in the image, but some components or files are missing or corrupted. This may cause errors or malfunctions in the package or its dependencies.

Digging Deeper Into the Mystery…

As I understand it, the dism /online /cleanup-image /startcomponentcleanup command will remove at least some of the packages in the “Superseded” state from the WinSxS. So I fired up the following command to look into the component store on another test machine. It reports 4 reclaimable packages via DISM, and inspection of the /format:tables output from that PC via Notepad++ reports 106 instances of the term “Superseded” in that text file.

Next, I run the afore-cited “cleanup” command. This takes a few minutes to complete. When I run /analyzecomponentstore again, the number of reclaimable packages is zero (0). So I generate new /format:table output, and open it in Notepad++ again. This time, a search on “Superseded” produces 0 hits. My theory is that the cleanup flushes these items out of the WinSxS, and this data seems to confirm that.

And Now, Back to the X380 Yoga

Here’s where things get interesting. Even though /analyzecomponentstore is reporting 13 reclaimable packages, the /format:table output from that PC includes no instances of “Superseded” in its contents. Somehow, DISM is seeing something that I can’t see via this lens into the WinSxS contents. Therein lies the mystery.

I’ll keep digging and see what else I can learn. Stay tuned! This could get interesting — at least if you, like me, find this kind of thing engaging.

Facebooklinkedin
Facebooklinkedin

Mouse Goes AWOL: Panic Ensues

I have to laugh — and mostly at myself. I confess: I was playing MS Solitaire this morning when my mouse quit working. It was a timed event so I wanted to get back at it ASAP. Because of that as my mouse goes AWOL, panic ensues as I try to get it working again. Long story short: I keep a backup, replacement mouse around just for occasions like these. It’s now in place, doing the job of the old one. Time to order another pair of replacements!

When Goes AWOL Panic Ensues Because of Timing

The lead-in graphic shows a picture from Amazon of my likely replacement mouse. It’s a Microsoft Mobile Mouse 4000, instead of the 3500 model that just quit working. They cost the same, so I figure why not get a newer model if I can at no extra charge? My only problem right now is that the best price is for delivery from China (!): $19.95 vs. $28.95 from US outlets, including the MS Store itself.

Let me be clear about one thing, too: I don’t blame MS for my mouse fail. Meese are consumables and I use them enough that I wear one out every 18-24 months or so. This comes as no surprise — except for today’s timing — and is a cost of doing business for me. Indeed, that’s why I always order them in pairs rather than singletons. I know it’s just a matter of time before another one drops out of service. My wife’s and son’s desktops also have external wireless meese, too. One or more of those will probably crap out before 2023 is over.

The Proper Stocking of Spare Parts

So, here’s a short list of the spares I keep around the house knowing that I’m going to need them sometime (preferably later, rather than sooner):

  • Mice, both wireless and wired (mostly MS wireless, but also Logitech Bluetooth and Unifying Receiver models)
  • Keyboards: mostly MS Comfort Curve 4000s, but a couple of Logitech wireless models, and a couple of wired el-cheapo chiclet types
  • GbE switches: I like the NetGear unmanaged 8-port models, but I also have 5-port and an 8-port models (house brand from Fry’s).
  • Cables of all kinds: RJ-45 Ethernet in lengths from 6″ to 100ft, USB: 2.0 and 3.0 (Type A), USB-C 3.1-2, Thunderbolt 3 and 4, plus other miscellany; and video cables including HDMI 1-3 and DisplayPort 1.2-1.4 (also in various lengths and models).

This lets me deal quickly with predictable troubles as they happen. And when they do, I always order replacements plus at least one extra as things happen. That way, I’m already prepared for next time.

Facebooklinkedin
Facebooklinkedin

X12 Upgrade Quit Halfway

Yesterday morning, I tried to remote into my Lenovo ThinkPad X12 Hybrid tablet. No go. I got the familiar error “Remote Desktop can’t find the computer…” Interestingly, when I went to restart that PC, nothing happened. Eventually I had to disconnect all cables, then hold the power button down for a full 60 seconds to force it to reboot. Then I remembered: I hadn’t touched the machine since the 25967 upgrade hit on Tuesday. That means the X12 Upgrade quit halfway through the process and didn’t come back up after the reboot.

If the X12 Upgrade Quit Halfway, Then What?

Poking around on the Lenovo website, I found an evocative forum post. It was entitled “Laptop suddenly shuts down, won’t turn on.” It confirmed something odd was up, and prevented the PC from restarting. And indeed, my approach (disconnecting all cables, holding down the power button for 60 seconds) is just what the forum rep recommended to the poster, too.

When all else fails, this is one way to get a Lenovo PC to restart normally. And sure enough, once the PC did get far enough along to tell me what it was doing, it showed the spinning circle and progress that goes along with finishing up an upgrade or update install.

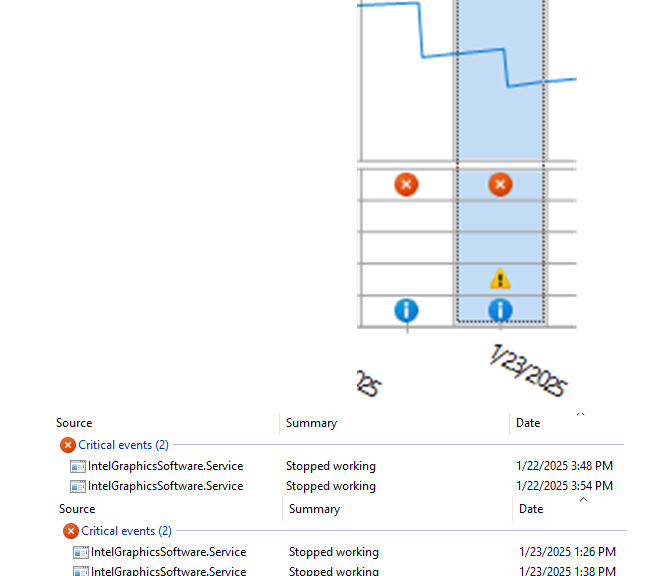
Just for grins, I opened up Reliability Monitor on the X12. I found a shutdown error staring me in the face. The detail reads: “The previous system shutdown at 5:55:00 PM on 10/10/2023 was unexpected.” Last Tuesday, at the end of the working day, just when I wouldn’t notice that the X12 failed to come back from the pending reboot during the update process. Go figure!

There’s proof that the PC shutdown when it shouldn’t have.

Speculating on Causes…

This device is attached to a CalDigit TS4 hub for power, GbE, video and storage. I’m wondering if something about that kind of complex USB-C/Thunderbolt 4 connection might not complicate boot-up. OTOH, I’ve upgraded plenty of times before on the same overall rig without difficulty. That’s what keeps things interesting, here in Windows-World.

Facebooklinkedin
Facebooklinkedin