Category Archives: Troubleshooting

RDP Goes MIA Following KB4014650 Update

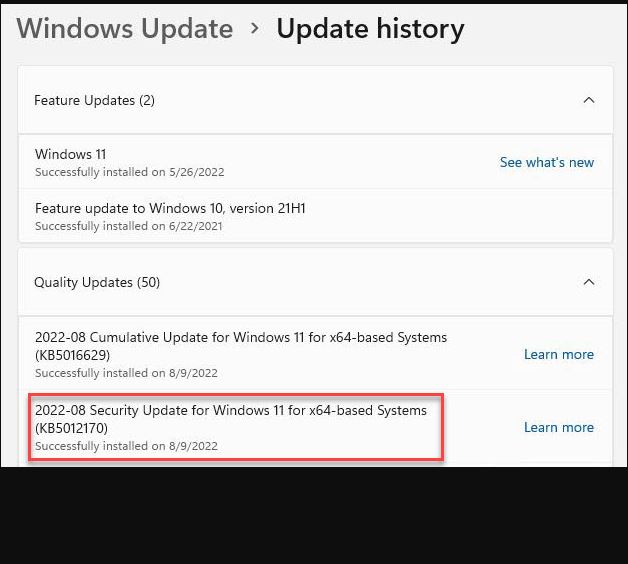
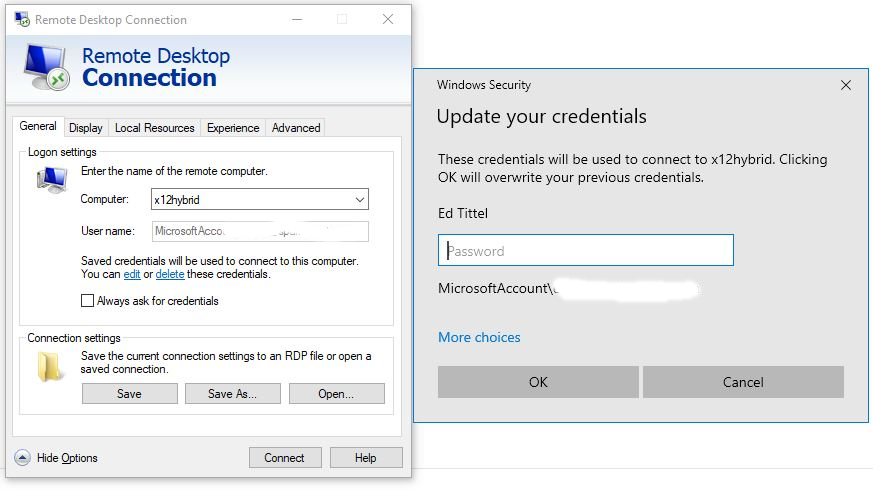
Yesterday (May 10) was Patch Tuesday. A plethora of updates hit for Windows 10 and 11 across most versions. Right now, various Windows news outlets are reporting issues with some of the updates just released. Naturally, I wanted to check to see if any of my PCs were affected, In reaching out to my various systems, I noticed RDP goes MIA following KB4014650 update to at least one of my Windows 11 Dev Channel PCs.

FWIW, that’s different from issues reported elsewhere (see this WindowsLatest story for an example). Most revolve around issues related to .NET Framework 3.5 problems.

Fixing RDP Goes MIA Following KB4014650 Update

On my Lenovo X12 Hybrid, the symptoms of trouble were easy to spot. Even though the Belkin Thunderbolt 3 dock remained plugged in, the system saw neither its GbE connection, nor the nominal 5TB HDD plugged into one of its USB-C ports. Thus I knew something was up with peripheral connections. Fortunately, an unplug/re-plug operation brought both the dock and the drive back into service.

One of my X380 Yogas was unaffected by the update, and RDP kept working as always. Amusingly, the second instance (both machines are identical except that one has a Toshiba/Kioxa SSD, while the other has a Samsung, of which both are OEM varieties) did not come up right away. A visit to Settings → System → Remote Desktop to turn Remote Desktop off, then turn it back on, did the trick for this machine.

Neither fix was a big deal: each was obvious and thus easily identified, and likewise easy to fix. I can only wish all my Windows problems were this lacking in subtlety and amenable to repair. Long experience teaches me otherwise.

Shades of Other Days & Other Fixes

I can remember days when Windows 10 updates would routinely mess with my Network and Sharing Center settings. Advanced sharing settings for Private, Guest or Public, and All Network elements would routinely revert to their defaults. So then, I would have to re-set them to the way I wanted them to be. This latest set of issues strikes me as something in that vein. Hopefully, it will be just a one-time blip rather than a new continuing gotcha. Time will tell: I’ll keep watching, and report what I find. Stay tuned!

Facebooklinkedin
Facebooklinkedin

Easy Start Menu Search Repair

Although I use Stardock’s alternative menu programs on Windows 10 and 11, I also use the built-in Start menu, too. it’s especially good at taking me straight to Windows 10 apps through its search box. That’s true, however, only as long as that search function is working. This weekend, I ran into a situation where it quit doing its thing. Fortunately, I found an easy Start menu search repair technique. Let me share it with you…

What’s the Easy Start Menu Search Repair Technique?

Once again, it’s a matter of jumping into Task Manager to restart Windows Explorer. Note: this also means a restart works equally well (though it takes longer). Why? Because it, too, automatically resets Explorer as part of that overall process.

Here are the steps involved:
1. Open Task Manager (on Windows 10, you can right-click the taskbar and select the Task Manager entry or use CTRL-SHIFT-ESC key combo; on Windows 11, only the latter works).

2. Look for Windows Explorer on the Processes tab. If absent, open an instance from the Taskbar (or your favorite other means). Right-click the entry, then select Restart from the pop-up menu.

That’s it. It won’t work 100% of the time, but it does work most of the time. If it fails, then it’s time to start considering other, more serious windows repairs. These include using DISM and SFC, running the Windows Troubleshooter, an in-place upgrade repair install, and other tried and true repairs.

Fortunately, none of those proved necessary for me this weekend. AND I was able to resume my Solitaire session without having to find the App alphabetically instead. (Note: even when search was munged, that still worked…)

Facebooklinkedin
Facebooklinkedin

Yoga 7 BIOS Confusion

Looking over Windows news this morning, I was concerned to read reports regarding BIOS problems on some Lenovo Legion laptops. For many such devices, the Lenovo Vantage app is the tool of choice for BIOS, firmware, driver and other system updates. Even though I own no Legion-labeled Lenovos, I’ve got 5 other Lenovo laptops in my office right now. Indeed, I found my own small issue amidst that pack: let me call it Yoga 7 BIOS confusion, so I can explain what’s up.

If you look at the lead-in image above, you’ll see that Vantage wants to update the BIOS. However, upon closer inspection the version of BIOS it wants to install (box at center right, from Vantage Device details) is the version already in place (Speccy info at bottom right). What gives?

Explaining Yoga 7 BIOS Confusion

If  I click on the details that Lenovo provides with the Vantage update recommendation, I get this pop-up message: Oho! It’s not because the wrong version is installed; it’s because the tool can’t detect the version info. But Speccy cheerfully — and accurately — found that data (see lead-in graphic). Thus, I have to conclude there are unknown but obvious issues with BIOS update functions in Lenovo Vantage. I’m reporting this to Lenovo through their bug reporting channels.

Just for grins, I checked the Store to see if a Vantage update might be available. It was. And upon running the tool again, it also upgraded its underlying services. Another check for updates took some time to complete, but eventually produced the same recommendation shown above.

Knowing Why Helps, But Not Enough…

It’s great to understand why the tool is recommending a spurious update. It saves from spending the same to apply same unnecessarily. On the whole, I’d rather it were fixed by the most recent update to version 10.2204.14.0. But that’s the way things sometimes go here in Windows-World. I hope my little exercise can help to shed a little light on how to check if the updates that Vantage recommends are really needed.

I won’t be updating my BIOS until a version comes along that’s different from the one that’s currently installed. FWIW, I recommend you do likewise. Cheers!

Facebooklinkedin
Facebooklinkedin

KB5012643 Safe Mode Bug Gets KIR

What on earth does this article title mean? Glad you asked! KIR stands for Known Issue Rollback. Once a Windows 11 PC gets the cited KB installed, it may not run properly if booted into Safe Mode (no networking). MS suggests in its Known Issues discussion  that users boot into Safe Mode with Networking. This avoids looping Explorer crashes that otherwise cause screen flickering. Hopefully, the title now makes sense. KB5012643 Safe Mode bug gets KIR means MS will automatically apply a rollback of the offending feature to PCs that tag WU servers. A reboot is required for the fix to do its thing.

When KB5012643 Safe Mode Bug Gets KIR, What Happens?

You can learn more about Known Issue Rollback in a Windows IT Pro Blog post from March 2021. It’s entitled “Known Issue Rollback: Helping you keep Windows devices protected and productive.” Here’s what this item states.  KIR “… is an important Windows servicing improvement to support non-security bug fixes, enabling us to quickly revert a single, targeted fix to a previously released behavior if a critical regression is discovered.” In simpler terms, MS can tell WU to back out individual update package components.

Behind the scenes, policy settings either enable or disable code paths for “before” or “after” versions of code. If the “after” version is enabled, the update applies; if the “before” version is enabled, it reverts to the previous version.

Here’s how it works, quoted from the afore-linked post:

When Microsoft decides to rollback a bug fix in an update because of a known issue, we make a configuration change in the cloud. Devices connected to Windows Update or Windows Update for Business are notified of this change and it takes effect with the next reboot.

This is depicted in the lead-in graphic for this story.

Read the Post for More Deets…

There’s lots of great discussion in the Known Issue Rollback blog post. If you remain curious about its workings and capabilities, check it out. There’s also a much more technical exploration of KIRs from annoopcnair.com available for those who really want to get into the weeds. It covers details about managing and filtering group policies, and working with the KIR Policy Definitions Setup Wizard.  I didn’t know you could do that, so that makes this good stuff!

Facebooklinkedin
Facebooklinkedin

Overlapping Taskbars Get Easy Fix

Here’s an interesting one. In running RDP sessions on my Windows 10 (Build 19044.1682) desktop, the local taskbar suddenly started covering the remote session taskbar. This happened immediately after I installed the latest Preview CU (KB5011831), and proved mildly bothersome. Once I figured out how to properly describe the problem, such overlapping taskbars get easy fix. This is another case where restarting Explorer in the host session’s Task Manager does the trick.

As often happens, finding a solution requires a proper problem statement. I used the search string “taskbar from windows 10 host session covers RDP session taskbar.” It was close enough for me to find numerous discussions, and to find a fix posted in January 2017.

How-to: Overlapping Taskbars Get Easy Fix

For those not already in the know, here’s  a step-by-step recitation of the “Restart Explorer” drill:

1. Open the Taskbar on the host PC (on Windows 10, right-clicking the taskbar produces a pop-up menu that includes Task manager; on Windows 10 or 11, CTRL-Shift-ESC opens it right up).

2. On the Processes pane find an instance of Windows Explorer. Right-click the item and Restart appears in the resulting pop-up menu. Click Restart to shut down and restart the Explorer process.

3. Wait a while: the taskbar will disappear. Then, its contents will reappear, sometimes rapidly, sometimes more slowly (never takes more than 20 seconds on any of my PCs, though).

When that process is complete, the host taskbar should obligingly disappear when you work in the RDP session window. At least, that’s how it works on my Windows 10 production desktop now. If the problem recurs, repeat the foregoing steps.

Not much to it, really. But good to know, should you ever find yourself in that situation. Cheers!

Facebooklinkedin
Facebooklinkedin

Fighting Camera Frame Server Crashes

OK, then. I just installed optional/preview update KB5012643 on my Windows 11 X1 Extreme laptop yesterday. This morning, I’ve been fighting camera frame server crashes. You can see the traces of this contest from Reliability Monitor in the following graphic.

Fighting Camera Frame Server Crashes.reli-errors

You can see an ongoing sequence of repeated “Windows Camera Frame Server” errors at semi-regular intervals. Each one follows a “test reboot.” [Click image for full-sized view.]

Registry Hack Aids Fighting Camera Frame Server Crashes

In researching this error, I came across a registry hack in the HKLM/SOFTWARE/Microsoft/Windows Media Foundation/Platform key. It required creating a DWORD value named “Enable Frame Server Mode.” When that value was set to 1, the Frame Server crash ceased. Instead, I got a crash on Windows Biometrics. And when I restored my camera’s and fingerprint scanner’s ability to support Windows Hello, the Frame Server error popped back up again. I had to laugh!

Choosing the Lesser of Two Weevils

Dispelling the Frame Server error not only turned off the PC’s webcam, it apparently also messed with Windows Biometrics in general. Given a choice between a non-fatal (and only mildly annoying) Frame Server error at startup versus being unable to use Windows Hello, I choose the latter. I’m reporting the error to Feedback Hub, and hoping for a fix. But I’m continuing to use my camera and fingerprint scanner for login/authentication purposes.

Go figure! In Windows-World one must sometimes trade off one thing against another. This time around (and in most cases) easier security via biometrics won the toss…

Facebooklinkedin
Facebooklinkedin

Three Windows Update Repair Tips

Recent reporting on the latest Patch Tuesday (April 13) includes mention of issues with completing Cumulative Updates (CUs). Thus, for example, check out this WindowsLatest item dated April 22. Entitled Watch out for these issues in Windows 11 KB5012592 & Windows 10 KB5012599 it mentions various errors would-be updaters could encounter. It also mentions two tried-and-true recovery/repair techniques, to which I’ll add a suggestion of my own. Thus, I provide three Windows Update repair tips for your consideration and use.

Here Are Three Windows Update Repair Tips

Note: all these tips work equally well for both Windows 10 and Windows 11. Use ’em with my blessing in the order provided. In my personal experience they’ll cover most update issues people are likely to encounter.

Tip1: Simple Reboot

That’s right. If a CU update fails to complete, the first strategy is to reboot the PC, and try again. Believe it or not, that is sometimes all that’s needed to get things working.

Tip2: Shift-Shutdown

If you hold down the Shift key while you select the Shutdown option in Windows 10 or 11, it forces what’s sometimes called a “full shutdown.” This forces Windows to close all opened apps and applications. It also logs out any logged-in accounts. At the same time, a full shutdown performs neither a hybrid shutdown nor will it hibernate your PC.

Hibernation saves open documents and running applications to the %systemdrive% and copies them back into RAM upon restart, to speed that process along and let you pick up where you left off. That’s NOT desirable when fixing WU issues.

A hybrid shutdown hibernates the kernel session (what the OS is doing) and shuts down everything else. This supports Fast Boot capabilities on the subsequent reboot process to speed it up. It’s enough like hibernation that it too, is NOT desirable when fixing WU issues.

Tip3: Reset WU

Although the tutorial “Reset Windows Update…” appears on TenForums, it works equally well for Windows 11. Basically, it involves running a batch file that stops all update related services, resets all the update related registry keys, then restarts all the update related services it stopped. Surprisingly, it works like a charm. I routinely keep this batch file on many of my Windows 10 and 11 desktops. As it has worked for me both long and well, so it can also do for you.

If None of the Above Works, Then What?

Alas, in some cases, none of the aforementioned fixes will work. Next thing I’d consider would be an in-place repair install (covered in this equally handy tutorial). After that, more dire measures including a clean install and/or a trip to the shop might be warranted. In my 30-plus years of “messing with Windows” that has happened to me exactly twice. One of these occurrences happened less than two weeks ago (see this post for details). Odds are, therefore, it shouldn’t happen to you. Fingers crossed!  One of them was pretty recent, after all…

Facebooklinkedin
Facebooklinkedin

Blinking Monitor Requires Nvidia Studio Driver

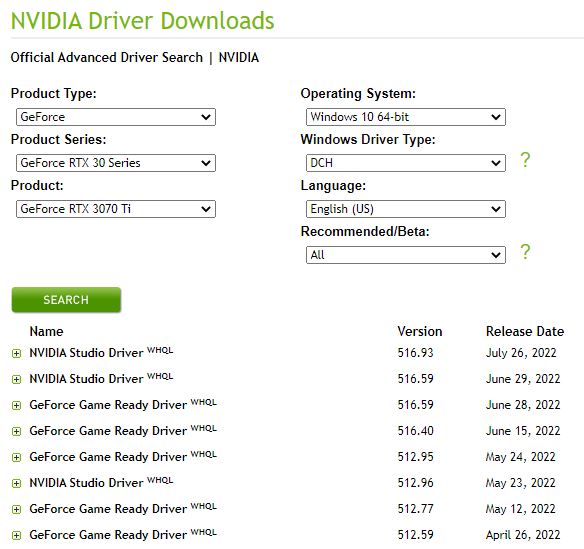
Yesterday, my production PC (Windows 10, i7-6700, 32GB RAM, 3070 Ti GPU) started the “blinking thing” again. As soon as I logged in, the right-hand monitor would go black then come back at irregular intervals. Previous episodes have responded to a driver update. But this time, no such update was handy. But my 3070 Ti runs either a gaming (for game play and high frame rates) or studio (for creative and production work) version. This time, fixing the blinking monitor required Nvidia Studio Driver to do its thing.

Why Is It That Blinking Monitor Requires Nvidia Studio Driver?

This issue has been popping up on my production PC since I switched out the 1070 Ti for the oversized 3070 Ti in January. I’m starting to wonder if my power supply may be having issues with the load on this system.

Reliability monitor doesn’t show any errors. But a dive into Event Viewer shows a Service Control Error 7031 that points to the Nvidia Local System Container at around the times I was getting the blink behavior. Since I’ve switched from the Gaming version of the driver to its Studio counterpart, the error has not resurfaced. Looks like it may be some kind of software glitch after all.

GeForce Experience lets you switch between the two driver flavors pretty easily. Simply click the vertical ellipsis to the right of the Check for Updates item and it gives you a radio button to pick one or the other, like so:

Fortunately for me, switching from”Game Ready” to “Studio” restored my system to proper operation. Good thing I’m not a serious gamer, eh?

Facebooklinkedin
Facebooklinkedin

BitLocker Follies Follow Secure Boot

To qualify for Windows 11, a PC must support Secure Boot. It doesn’t necessarily have to be turned on. But if it is turned on, I learned last week that BitLocker follies follow secure boot like ducklings follow their Momma. In other words: if BitLocker is turned on for the C: (Windows boot/system) drive, it must also be turned on for the File History drive that Windows 11 uses as well.

What Does BitLocker Follies Follow Secure Boot Mean?

I learned this hard way when I tried to turn File History on for my Lenovo X12 Thinkpad PC. Because it had secure boot turned on, I had to enable BitLocker for the external drive upon which I targeted File History. This immediately got me to climbing an “interesting” learning curve.

While summiting that slope, I learned the following things:

1. You can’t manipulate an external drive’s BitLocker status through RDP. For security reasons, you must be directly logged into the target system. Sigh.

2. Turning BitLocker on requires setting a password to obtain or deny access to its encryption/decryption capabilities. This makes good sense, but gives me “just one more thing” to remember. Sigh again.

3. At first, BitLocker encryption looks fast. It got up to 84-85% complete in minutes. To my dismay and disappointment, the final 15-16% took HOURS to complete. By no coincidence whatsoever, space consumed on the drive is between 15 and 16%, too. It took the better part of 6 hours for the encryption to finish, in fact (0.71 TB worth).

4. Now, when I want to access the encrypted drive, I must first open it in Explorer, and unlock it by providing its password.

It’s All Good . . . I Hope

At least I now understand the necessary relationship between Secure Boot, BitLocker, and File History. I hope I don’t need to go a-troubleshooting soon. But if I must, I will. Stay tuned: I’ll keep you posted.


Facebooklinkedin
Facebooklinkedin

Clean Install Succeeds Where Beta Promotion Fails

For the past couple of Dev Channel builds, I’ve been trying — and failing — to get my Beta Channel test PC promoted to the Dev Channel. For Builds 22593 and 22581 the tap had been opened to upgrade from Beta to Dev Channel. But on my Lenovo ThinkPad X380 Yoga (8th Gen i7, 16 GB RAM and 1 TB SSD) it didn’t work. After many hours of dithering about, a clean install succeeds where Beta promotion fails. Let me explain…

Why Clean Install Succeeds Where Beta Promotion Fails

Wiping the primary system/boot drive was apparently the ticket to success. Given that I seemed to have mystery driver issues, starting over with a clean slate has finally set things right. And indeed, it was a rough and time-consuming ride along the way. Ultimately it took less than 35 minutes to perform the clean install itself. Alas, though, it always takes longer to put all the apps and settings back the way I want them from a clean slate. That’s life!

Interesting Lessons Learned

This is my first clean Windows 11 install since the new OS showed up in mid-2021. I had to be reminded that the BitLocker ID associated with the key needed to enable a USB-based install comes from the device. I spent a while trying to provide the wrong key, because I didn’t start by matching the Key ID value to the Device Name. Only then did I find and enter the right recovery key. Sigh.

I also learned that Norton’s external drive scan function takes FOREVER to complete. I let it run for 1:15 out of curiosity, but that was already too long for me to wait to move onto my next step. So I cancelled the scan (which took no time at all, thank goodness) and went onto the clean install.

Performing the clean install was remarkably quick. It included the option of defining a machine name near the tail end, too (something new to me). That was an opportunity I grabbed gratefully, and saved myself a bit of time moving ahead into post-install efforts.

Bottom line: I’m incredibly grateful to have this machine back where it needs to be. It’s nice not to have the mystery 0XC1900101 error hanging over my PC (and my head) any longer. I’d love to know what caused it, and how to fix it, but I never got enough data to make that happen. That said, it’s nice to know the “repair of last resort” — namely a clean install — still does the trick when other techniques come up short.

Facebooklinkedin
Facebooklinkedin