Category Archives: PowerShell

Extra C++ Redistributable Must Go

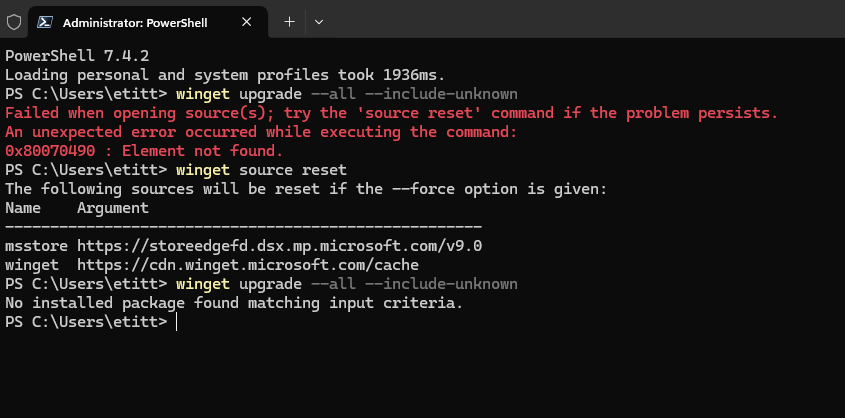
Here’s an interesting winget puzzle. Over the past couple of days, I noticed winget was reporting success in upgrading a Visual C++ Redistributable from version 14.36.32532 to 14.38.31919.0. Yet, each time I ran winget after that the same thing would reappear. Good thing I know what’s up with that: it means the new install doesn’t remove the old, now obsolete version. Thus, that extra C++ Redistributable must go.

Accomplishing Extra C++ Redistributable Must Go

In the lead-in graphic I show the two versions side by side inside Revo (bottom of image). I used that same tool to uninstall the other one manually. If you look at the sequence of commands therein, you’ll see I check upgrades. It shows me a new Visual C++ version to install. I install it, and check again: oops! Same old version of the redistributable still needs an update.

Or does it? Actually, it needs to be uninstalled. I could’ve done it with the winget syntax:

winget uninstall Microsoft.VCRedist.2015+.x86 -v 14.36.32532.0

But instead because I had Revo already open I simply right clicked the old version, chose uninstall, and let it do its thing. Gone!

What Happened Next?

As expected, the next time I ran winget upgrade to see if any updates remained pending I got back this mysterious but welcome message. “No installed package found matching input criteria.” In winget-speak, that means it didn’t find anything that needed an update. In other words: removing the obsolete Visual C++ Redistributable took care of my previously persistent version 14.36.32532.0.

Good-oh! Glad I’ve seen this kind of thing before. It told me that I probably had to kill the old version manually, to keep it from provoking a reminder to upgrade to the new. Even though it was present already…

Facebooklinkedin
Facebooklinkedin

Using Get-WUHistory Requires Finesse

I’m a big fan of PowerShell. That’s why I was excited to learn about a collection of cmdlets from the PowerShell Gallery named PSWindowsUpdate. Chief among its constituents is a cmdlet named Get-WUHistory that I’ve been finding both helpful and vexing. I say that using Get-WUHistory requires finesse because it works well on Windows 10, but hangs on PCs with longer “history trails” in Windows 11. Let me explain and illustrate what that means…

Why Using Get-WUHistory Requires Finesse

I’m only running Windows 10 on one actual PC (not counting VMs). By chance, that’s where I started working with the PSWindowsUpdate cmdlets. To begin with, you’ll need to install this collection, using this command:

Install-Module -Name PSWindowsUpdate -Force

If you haven’t visited the PowerShell Gallery before, you’ll be asked to grant various permissions so your PC (or VM) can access and use its contents. If necessary, please do so. Then, your installation will complete. After it’s done, you can use the Get-WUHistory command (among others — see a complete list of all 25 cmdlets from this package).

There’s something going on in Windows 11 that will sometimes cause Get-WUHistory to “hang.” How can you tell? The output won’t complete, you won’t get a prompt back, and the cursor keeps blinking. Indeed, it doesn’t even respond to CTRL-C to terminate the command. You must close the open PowerShell window (or tab) to regain control over Windows Terminal.

What’s the Trick to Make Things Work?

For some odd reason limiting the scope of output keeps the Get-WUHistory cmdlet working. Thus, in Windows 11 instead of simply entering Get-WUHistory at the command line, try this version instead:

Get-WUHistory -last 1000

This tells the cmdlet to limit its output to only the first 1000 entries it finds in the update history. Notice that on one of my test PCs, the actual number of entries in the update history is only 157 items, yet the command hangs anyway — except when it’s scoped. Go figure!

Unless scoped [-last 1000] Get-WUHistory hangs on Windows 11.

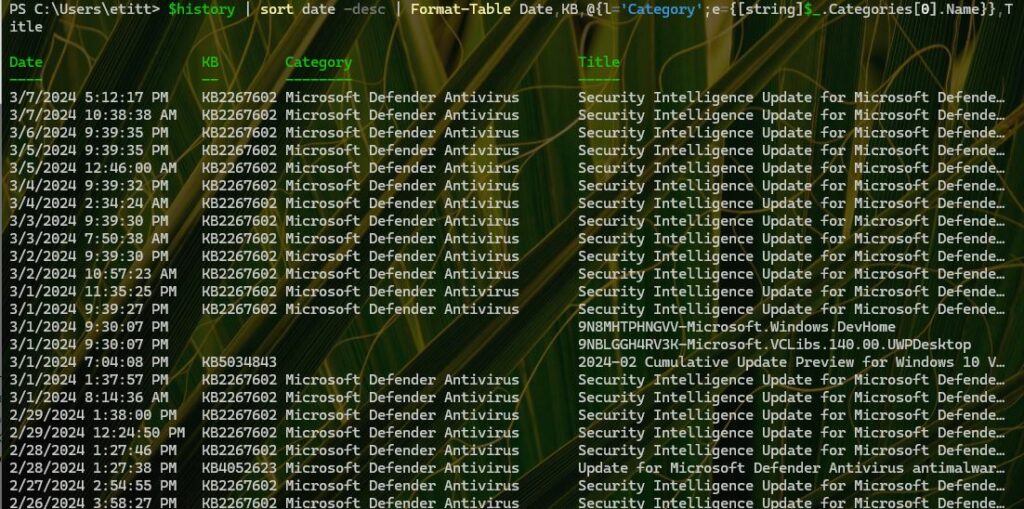
The lead-in graphic shows the first screen of output from a scoped version of the Get-WUHistory cmdlet. Notice that most of the updates relate to Windows Security (Windows Defender intelligence updates, antimalware platform updates, and so forth). Too much chaff, not enough wheat, IMO. Here’s a way to turn down the volume…

Reducing Get-WUHistory Output Volume

One can, of course, filter Get-WUHistory Output — in addition to limiting its scope — to reduce the output volume. Here’s a command string I found to be incredibly helpful in seeing what’s there, sans security-related stuff:

Get-WUHistory -last 1000 |
Where-Object {$_.Title -notlike "*Security*"}

What you see broken across two lines (or more) in the preceding is actually a single (if complex) PowerShell command string. Be sure to remove or ignore any internal line breaks when running this inside Windows Terminal. You’ll get back a mercifully much shorter list of items, mostly cumulative updates (CUs), MSRTs, Update Stack Packages, and the odd antimalware platform update. As you can see, this cuts 157 items down to a more manageable 12. Good stuff!

Eliminating the word security in the “Title” field filters out most of the dross. [Click image for full-sized view.]

Facebooklinkedin
Facebooklinkedin

PowerToys Sources: WinGet & MSStore

I saw yesterday on Twitter (X?) that PowerToys version  v.0.72.0 dropped. So I started banging on WinGet to upgrade me. It’s been at least 20 hours since that announcement, but WinGet still has no manifest for the new version. Indeed, the lead-in graphic shows v.0.71.0 as current. But there are two PowerToys Sources: WinGet & MSStore. And sure enough, installing the Store version brought one of my Lenovo X380 ThinkPads up to the latest iteration. This features in the lead-in graphic as well. The second WinGet list PowerToys command shows the current version installed — with a WinGet source, no less — after I downloaded and installed the latest version from the MS Store. Go figure!

Why Two PowerToys Sources: WinGet & MSStore?

The answer to the preceding query depends on how organizations do updates internally. Those who let WU and the MS Store handle things should choose the Microsoft Store version of MS apps when they can. This will automatically handle things on its own. But those who control updates will find WinGet invaluable. It makes a great focus for automation via PowerShell scripts as and when their update windows open.

Does that mean one or the other source for updates is better? Not at all. But today, it looks like the updates through the MS Store track new releases faster than WinGet does — for PowerToys, at least. I’m also interested that even though my update comes from the store, it shows WinGet as its source. But as long as it’s updated quickly and correctly, that’s OK.

Facebooklinkedin
Facebooklinkedin

Dissecting Winget Logs Shows Root Causes

Hmmmm. I just did something risky, or perhaps dumb on my production PC. You can see the evidence in the lead-in graphic, a PowerShell session that shows an issue (in red, at bottom) with the installer hash for a Google Chrome update. What you can’t see is that I was already updating Chrome inside Chrome itself while this was happening. The installer changes when a new version is installed. Fortunately, dissecting Winget logs shows root causes, so that’s what I did next. It was more illuminating than the error message, for sure…

How Dissecting Winget Logs Shows Root Causes

First, some background on Winget logs. You can find out more about them (and related troubleshooting stuff) in the MS Learn article “Debugging and troubleshooting issues with the winget tool.” It also gives you a huge honkin path where the log files reside — namely:

%LOCALAPPDATA%\Packages\Microsoft.DesktopAppInstaller_8wekyb3d8bbwe\LocalState\DiagOutputDir

But, rather than grab and use this, I simply told Voidtools Everything to show me all instances of the final directory name DiagOutputDir. That got me there a whole lot faster!

Once into the logfile named WinGet-2023-07-21-10-59-05.148.log I jumped to the bottom to see how it mentioned Chrome. Here’s the tail end of that log from 11:00:09 to 11:00:14.


2023-07-21 11:00:09.043 [CLI ] Generated temp download path: C:\Users\etitt\AppData\Local\Temp\WinGet\Google.Chrome.115.0.5790.99\2c925b57d4892c4fbe177b3d7f91098a3bcdb0d95957c37872a1244bf9edae26
2023-07-21 11:00:09.043 [CORE] Downloading to path: C:\Users\etitt\AppData\Local\Temp\WinGet\Google.Chrome.115.0.5790.99\2c925b57d4892c4fbe177b3d7f91098a3bcdb0d95957c37872a1244bf9edae26
2023-07-21 11:00:09.044 [CORE] DeliveryOptimization downloading from url: https://dl.google.com/dl/chrome/install/googlechromestandaloneenterprise64.msi
2023-07-21 11:00:13.663 [CORE] Download completed.
2023-07-21 11:00:14.593 [CORE] Started applying motw to C:\Users\etitt\AppData\Local\Temp\WinGet\Google.Chrome.115.0.5790.99\2c925b57d4892c4fbe177b3d7f91098a3bcdb0d95957c37872a1244bf9edae26 with zone: 3
2023-07-21 11:00:14.602 [CORE] Finished applying motw
2023-07-21 11:00:14.603 [CLI ] Package hash verification failed. SHA256 in manifest [2c925b57d4892c4fbe177b3d7f91098a3bcdb0d95957c37872a1244bf9edae26] does not match download [aae26a4cf7d92a4c9198d8fac9534670e9fb5f8d1e38897d99b0b51e68107d2a]
2023-07-21 11:00:14.604 [CLI ] Terminating context: 0x8a150011 at D:\a\_work\1\s\external\pkg\src\AppInstallerCLICore\Workflows\DownloadFlow.cpp:15e
2023-07-21 11:00:14.604 [CLI ] Terminating context: 0x8a15002c at D:\a\_work\1\s\external\pkg\src\AppInstallerCLICore\Workflows\InstallFlow.cpp:28a

I bolded the line where things went south. Basically, the hash verification failed because I had already overwritten the old version of the installer with the new version (and the new Chrome version itself, as well). Good thing winget is smart enough to recognize the ground has shifted under its feet. If it finds things it doesn’t expect, it wisely decides to quit what it’s doing. Now I know what I had always suspected. And now, of course, you know too. Cheers!

Facebooklinkedin
Facebooklinkedin

WinGet Upgrade PowerShell Working

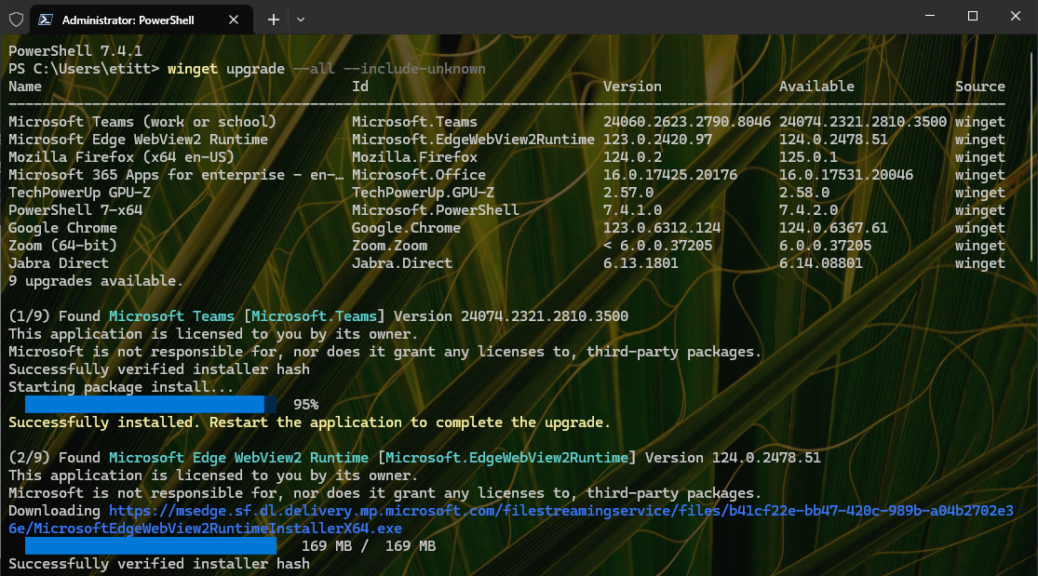
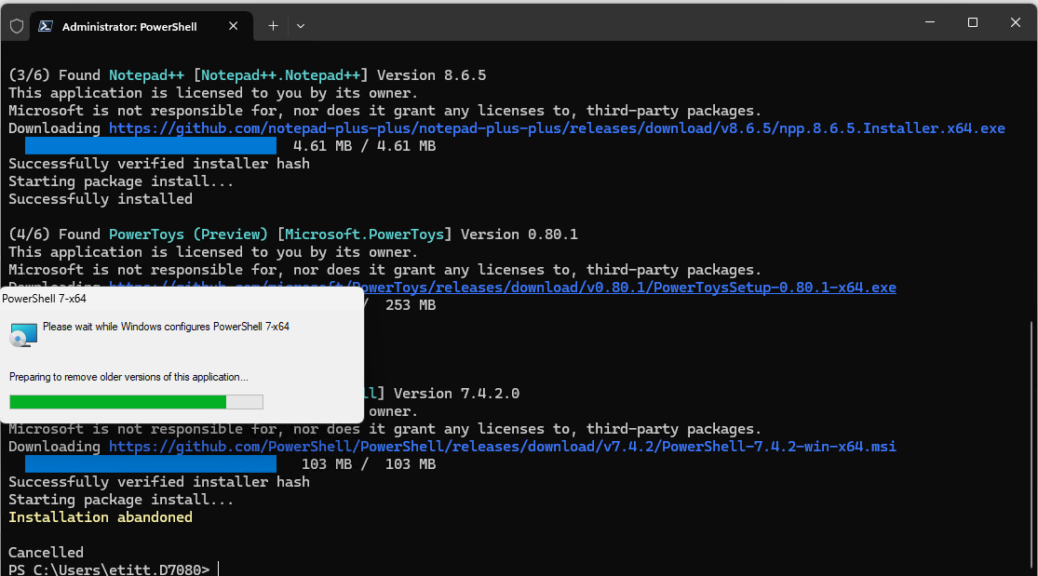
At the end of last month, I blogged about an interesting issue: when you used WinGet to upgrade PowerShell (in PowerShell) that operation would complete, but the screen wouldn’t update properly. As I reported, it showed cancelled and required opening a new PS session to see the current, upgraded version number. No more: now, MS has WinGet upgrade PowerShell working as it should be. See the lead-in graphic for visual proof.

If WinGet Upgrade PowerShell Working, Then What?

No more weirdness in the self-upgrade process, I guess. The lead-in graphic shows that PowerShell updated the initial session window to match the current version (7.3.6) with the version number at the top of the that window. Indeed, I’m forced to *SWEAR* it said 7.3.5 when I started, and appeal to the 2nd line of the WinGet upgrade output because I didn’t think to capture “before” and “after” screencaps. LOL, it didn’t occur to me that the developers would rewrite the terminal window to update the version number. But they did!

I contacted Demitrius Nelon, Team Lead for WinGet at MS to report this weirdness, which he confirmed for me. What he didn’t tell me was that they fixed this in the 7.3.6 release. But its behavior, as shown in the lead-in graphic, speaks for itself. Good stuff and thanks, people: good job.

Got It on Another PC!

I went to upgrade another PC and *DID* capture the initial screen showing 7.3.5 at the top. No more swearing: here’s the screen before the 7.3.6 upgrade completes so you can see the old version number in its top line.

WinGet Upgrade PowerShell Working.X390

See!? There’s the old version number before the 7.3.6 update completes. It’s like magic!

Note added 7/19: looks like this capability (no cancelled and updating version number) may only be in Windows 11. When I updated my sole remaining Windows 10 physical PC this morning, the cancelled message recurred as in my earlier blog post on this subject. Go figure!

Facebooklinkedin
Facebooklinkedin

PowerToys Team Closes WinGet Gap

Now THAT’s what I like to see. Yesterday morning, I noticed a new version of PowerToys (v0.71.0) was out. So quite naturally, I ran WinGet to upgrade same. No dice. At 11:45 AM (Central) I tweeted  about this. I observed it was “kind of surprising to see a new PowerToys release…without a matching WinGet upgrade manifest.”  8 minutes later, the team leader responded “we’re working on it.” And by that afternoon, the PowerToys team closes WinGet gap. There’s a working manifest for version 71 in place. Neat-o, and thanks, people!

PowerToys Team Closes WinGet Gap Quickly

It’s a real testment to the energy and drive of the teams involved that things were already in progress as I reported in. (In fact, I heard from the WinGet team lead, too.) This morning I installed PowerToys on the Lenovo ThinkPad X1 Extreme (8th-gen i9, 32 GB RAM, 1.5 TB SSD) and got the latest version. That sequence appears as the lead-in graphic above.

If you look at that graphic, you’ll see that WinGet found only a Zoom upgrade. Oops! That’s because PowerToys wasn’t installed on this PC — yet. But when I did install the .exe version (Microsoft. Powertoys) 0.71.0 (shown as v0.71.0 in the thumbnail at lower right) appears. That’s exactly what should have happened,. It also shows the WinGet manifest for that version of PowerToys is present and working properly.

Always Nice When Things Work Out…

I must say that both the WinGet and PowerToys teams have always been great to work with. They respond to input, questions, and feedback quickly. And when they have to act, they tend to do so sooner than later. Thus, my thanks to Demetrius Nelon (WinGet team lead) and his merry munchkins, as well as Clint Rutkas (PowerToys team lead) and his peppy people, too.  Please: keep up the good work.


Facebooklinkedin
Facebooklinkedin

Sussing Out WinTerm Color Schemes

In my writing and research work for TekkiGurus, I’m pursuing a GitHub project that works within the Windows Terminal environment. It’s called ColorTool. Simply put, ColorTool shows the colors used in the console window; it also lets you tweak them. Its color charts are kind of interesting and I’ve trying to figure them out. MS has a tendency to show them inside an Ubuntu command session inside Windows Terminal. I show them as they pop up in PowerShell in the lead-in graphic. As I’m learning how this all works, I’m sussing out WinTerm color schemes, too.

Bing Chatbot Helps When Sussing Out WinTerm Color Schemes

I’ve been reading a lot, and asking around to try to learn how to decode the values that show up in the display form of a Windows Terminal color scheme. So far, it’s proved rather more challenging than I had expected. So far, I’ve been attacking output strings to tease out their meanings. This is what I’ve learned so far, mostly thanks to the Bing Chatbot in Windows 11 Canary (Build 25393):

  • The string “gYw” that appears in the columns of rows 2-10) stands for gray, yellow and white. It uses prevailing foreground color, whatever that may be.
  • The values 30m through 37m that appear as row heads (first column left) are ANSI escape codes for foreground colors
  • The values 40m through 47m that appear as column heads (second column through 9th column left) are ANSI escape codes for background colors.
  • Looking at the color chart, the text strings “gYw” show the foreground color, while the solid bar for each column shows the background color.

In profound contrast, Ubuntu puts foreground colors as columns, and background colors as rows. I also shows escape sequences instead of color names. Initially, this bamboozled me. But now I see what’s going on…

Sussing Out WinTerm Color Schemes.ubuntu

Notice that background appears as double rows with escape codes at left in column 1, and foreground colors appear as the text for escape codes in rows 2-9).

Wow, it’s all starting to make a certain amount of sense. And I mostly have the Bing Chatbot to thank for explaining such extremely low-level details. Apparently, those who work with terminal/console color charts know all this stuff already.

Now, I finally understand that a color scheme assigns a range of color values to the 8 ANSI escape codes for the foreground colors 30m through 37m (which may also be expressed as ESC[30m …). It does the same for the 8 ANSI escape codes for the background colors, too (40m through 47m, likewise ESC[30m).

OK, Now I Know What’s What

Suddenly, I feel armed with the information I need to make sense of the Windows Terminal color schemes and their related color charts. This should make my jobs of explaining them, and their customization, a WHOLE LOT easier. I’m jazzed…

Facebooklinkedin
Facebooklinkedin

Testing Bing Chat AI Text Generation

Hmmm. This has been interesting… I’ve been using the Bing Chat tool in the Canary Channel version of Windows 11 lately. I just asked it to shed some light on a Windows Console (aka Windows Terminal) tool that I’ve been working with lately. Let me provide the query I used while testing Bing Chat AI text generation:

“Give me 400 words about the Winodws Console colortool”

I’ll provide the results as a blockquote under the next heading. Then I’ll explain what’s good about it and where — IMO at least — it falls a little short.

Results from Testing Bing Chat AI Text Generation

Notice that the chatbot correctly interprets my mistyping of Windows as “Winodws” in the input, and gives me the answer I wanted. Good stuff! Here’s what it told me:

The Windows Console Colortool is a utility that helps set the color palette of the Windows Console. It can be used to apply the new default color scheme and several alternate pre-defined color schemes or even schemes of your own1The tool is open source and hosted on GitHub2.

To use the Colortool, open up Command prompt and run: colortool [scheme name in schemes/ e.g: campbell]. Right-click on the window title to access the ‘Properties’ dialogue box. Once the properties dialogue box opens press OK (which saves the color change)1.

Notice it provides highlighted, hyperlinked text to additional references (which show up in the lead-in graphic as footnotes 1 and 2). It’s essentially a rewrite of descriptive information from the colortool’s github page. Curiously, that does not show up as the primary reference here (it’s number 2, though). Concerns about the accuracy of the material I’ve seen voiced in other analyses are apparently NOT an issue when you ask the chatbot to keep the text short. Everything it says it 100% accurate and verifiable.

OK Then, What’s Missing?

The text does not explain that the ZIP file for the colortool must be downloaded and unpacked into a folder that’s either included in the $PATH environment variable, or made the focus of the Command Prompt (or PowerShell) session in which the tool gets invoked. It just assumes all those details have been handled and jumps straight into the syntax and behavior of the tool itself.

That’s all well and good, but makes a telling demonstration of why AI chatbots can help, but not necessarily take over, for knowledgeable human actors with a more nuanced understanding of the context in which they’re operating. At least not yet, anyway…

It’s extremely interesting stuff, and is definitely going to help me with my job of explaining things to readers in the future. If you’re running the Canary Build (25393) for Windows 11, click the Bing symbol at the upper right of the default Edge window to dig in and try it for yourself. Great fun!

Facebooklinkedin
Facebooklinkedin

WinGet Chrome Update Follies Continue

There are many occasions when I run WinGet and it tells me Chrome needs an update. Sometimes, WinGet handles that update; other times it does not. I just pushed my luck, and got more information about why that happens. It’s shown in the lead-in graphic, and indicates a change in the “install technology” is involved. In such a start-stop fashion, my WinGet Chrome update follies continue…

Yes/No: WinGet Chrome Update Follies Continue

WinGet is inherently conservative by design. If the developers change something about the installer WinGet calls to handle updates, it won’t force that update. As you can see in the lead-in graphic, when I explicitly tell WinGet to update Chrome (e.g. winget upgrade google.chrome references the package name) it gives me an informative error message instead:

A newer version was found, but the install technology is different from the current version installed. Please uninstall the package and install the newer version.

OTOH, if I fire up Chrome, then click on Help → About, it’s happy to update itself at my behest. See?

WinGet Chrome Update Follies Continue.internal-update

The internal update facility in Chrome doesn’t care about “install technology.” It just runs.

The advice in the WinGet message thus really targets using WinGet to perform the upgrade. Indeed if you run this sequence of commands:

WinGet uninstall Google.Chrome

WinGet install Google.Chrome

then Winget will achieve the desired result of updating Chrome. In the past, I’ve speculated that if Chrome is running, the update might not happen. Now that I see this error message, this looks like a much more likely explanation.

But wait…!

I tried this on another test PC just now, and on that machine the Chrome update proceeded without any issue. Go figure!

Maybe it is a case of whether or not a Chrome process is running. On the other test PC it had just been rebooted, so no such potential complications were present. It’s always something, right?

Facebooklinkedin
Facebooklinkedin

MS Defender Update Targets Deployment Images

If you can trust the header data in this MS Support note (I do) it was updated on June 5, 2023. The item is entitled “Windows Defender update for Windows Operating system installation. It describes how to imbue offline Windows images with the latest and greatest Defender capabilities. In fact, that article includes a warning not to apply them to live images. Thus, it’s clear that this MS Defender update targets deployment images.

I got my date information about the article from its HTML meta-data:

<meta name="lastPublishedDate" content="2023-06-05">
<meta name="firstPublishedDate" content="2020-12-04">

How  MS Defender Update Targets Deployment Images

Pre-requisites to run the updates — for WIM and VHD files — include:

  • Works on OS install images for 64-bit Windows 10 and 11, and Windows Server 2016 and 2019
  • OS environment must include PowerShell version 5.1 or newer (current production version is 7.3.4 as I write this)
  • Microsoft.Powershell.Security and DISM modules installed
  • The PowerShell session for the script  <code>DefenderUpdateWinImage.ps1</code> runs with admin privileges. (“Run as administrator” or equivalent.)

The script provides switches to apply, remove or roll back, and list details for the installed update. Useful for those who maintain Windows images and want their security levels up to current snuff.

Find all the details in the MS Support article previously named. Do this before your next scheduled update window, for sure. Of course, this means you’re using Windows Defender as part of your security infrastructure.

MS Is BIG in Security

I just worked on a promotional piece for a joint Rubrik and MIcrosoft security webinar (YouTube video). Amazingly, MS describes itself as “the biggest cyber security company in the world” and did over US$20B in such business in 2022. I guess they do have some legs to stand on in this arena. And indeed, they’re doing all kinds of fascinating stuff with AI and ML to improve their security posture and incident response capabilities. Great stuff!


Facebooklinkedin
Facebooklinkedin