Category Archives: Insider stuff

Canary Dev Gain Enhanced Webp Support

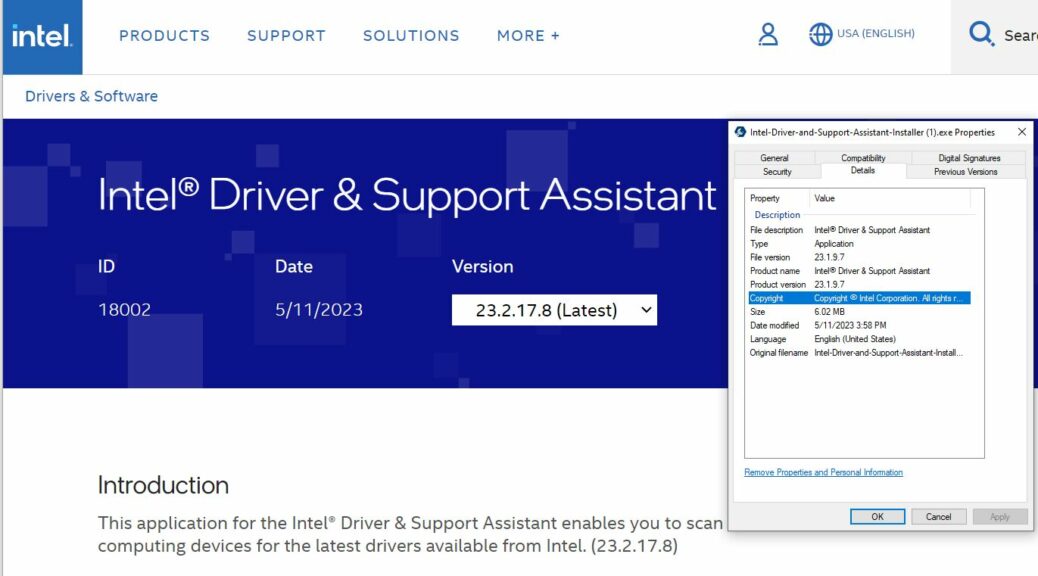
Here’s an interesting change in the bleeding edge versions for Windows 11. Indeed, Canary Dev gain enhanced Webp support for images of that type. It does require visiting the MS store on one of those platforms to download and install the Webp Image Extensions app shown in the lead-in screencap. After that, a number of interesting options present themselves. Let me explain … and illustrate!

What Canary Dev Gain Enhanced Webp Support Means

Thanks to Sergey Tkachenko at WinAero, I learned about this yesterday. What I didn’t realize was how widespread webp support has already become across the Windows 10 and 11 landscape. As you can see, the following image — prosaically named bunny.webp — shows up just fine inside WordPress (and by extension, most web browsers).Canary Dev Gain Enhanced Webp Support.bunny

Say hello to bunny.webp!

Indeed, it turns out that in addition to Photos and Edge, webp also works in Corel PaintShop, Snagit Editor, Paint, IrfanView (though I did have to download and install a plug-in DLL for Webp) and more. And it worked on Windows 10 as well as 11. It’s just that the Windows Photos app (and possibly Edge for some users) couldn’t handle webp before installing the afore-mentioned Store app “Webp Image Extensions.”

What Is Webp Anyway?

Webp is yet another compact, accurate image format. A Google design, it made its debut in 2010 but didn’t go widely public until April 2018 (when the vendor released a stable “supporting library” for the format — See Wikipedia). Looking at the bunny above, I see that Webp has some characteristics in common with the XML-based SVG graphics format. That said, it also supports captured photos, animation, tiling, advanced meta-data and more.

Visit Google’s WebP page for the official line on this format, which is gaining wider acceptance and use. As Google explains “WebP is a modern image format that provides superior lossless and lossy compression for images on the web. Using WebP, webmasters and web developers can create smaller, richer images that make the web faster.”

This was an interesting exercise for me, and a good learning experience. Worth digging into for IT and web professionals alike, if you haven’t dug in here already…

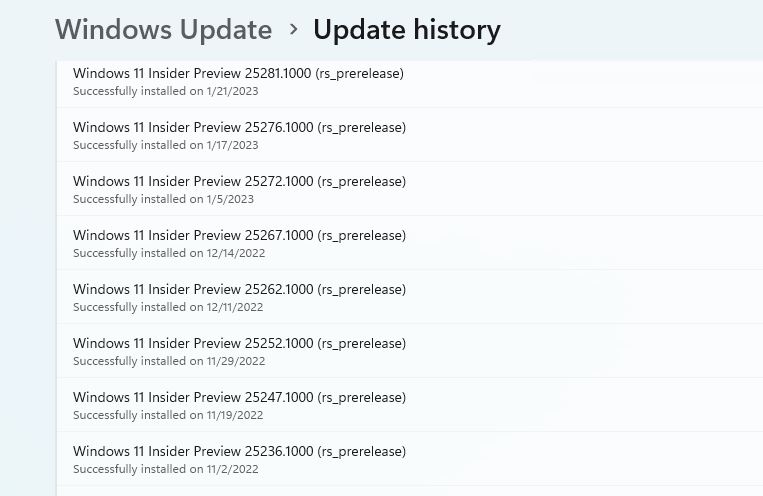
Note: Webp does NOT work in Photos in Windows 10 or Window 11 (versions with numbers lower than those for Canary or Dev channels, 25357 and 23451, respectively). Outside the OS umbrella, though, Webp seems to work in browsers and image apps and applications of all kinds.

Facebooklinkedin
Facebooklinkedin

P16 Manifests LSASS Bug

The Windows Local Security Authority Subsystem Service, aka LSASS, handles security policy enforcement for that OS. With KB5023706 (installed on 3/14) on my mainstream Windows 11 PC, some have shown interesting side-effects. My P16 manifests LSASS bug shown in the lead-in graphic.

Basically, it falsely asserts that LSASS protection is turned off (see text in red box). How do I know it’s actually running? As I searched the System log in Event Viewer, I found a message indicating the “LSASS.exe (process) was started…” as part of that system’s last boot-up. According to this discussion of that very issue at BleepingComputer.com, this indicates that LSASS protection is enabled and working as it should be.

P16 Manifests LSASS Bug.evt-viewer

The Event Viewer (System Log) reports a successful start of LSASS.exe as part of the OS boot-up process. It’s working!

What To Do If Your P16 Manifests LSASS Bug

Of course, this applies to all Windows PCs of all kinds. That said, the afore-linked BleepingComputer story explains a couple of Registry hacks that will fix such spurious notifications. MS will probably get around to fixing this sooner or later. Meanwhile, I’m not concerned about false security flags. Indeed, I’m content to wait until it’s corrected in some future update.

It sounds like a serious error. And it would be a major security hole, if the notification were true. But since it’s simply a false positive, and I’ve proved to myself that things are working as they should be, I’ll live with it.

This problem has been in play for some while now (BleepingComputer reports it goes back to January 2023). If I search for “Local security authority protection is off” at ElevenForum.com, I see hits as far back as March 1, 2023, on this topic. All are unanimous in flagging this as a false positive not worth corrective action.

But that’s the way things sometimes go here in Windows-World. Take it under advisement if you see the “Yellow bang!” in Windows Security on your Windows 11 PC. Cheers!

Facebooklinkedin
Facebooklinkedin

Missing Advanced Startup Gets Explained

Here’s a real Homer Simpson moment for you: Doh! I just figured out why I can’t find the Advanced Startup option on some of my Windows 11 PCs (see lead-in screen-cap, then compare to the next one below). It came when I checked a reference on running that ability from the command line. Simply put: the missing Advanced Startup gets explained as a local-remote distinction. It shows up when accessing a device directly, but not via Remote Desktop.

Now you see it, now you don’t (vice-versa, actually…)

Quick Note Means Missing Advanced Startup Gets Explained

I referred to a pureinfotech story to figure out how to get to advanced startup when it didn’t show up as in the lead-in graphic. Turns out the explanation appeared in a “Quick Note” in a discussion of accessing Advanced Startup via Settings → System → Recovery. It reads:

Quick note: The Advanced Startup option in the Settings app isn’t available through a Remote Desktop Connection.

And wouldn’t you know it? I was accessing a test PC via RDP (Remote Desktop Connection) at the time. Sure enough, as soon as I broke the remote session and logged into that same machine via the local keyboard, the Advanced Startup entry made itself available. Doh again!

Command Line Method Works Remotely, Tho…

The old standby shutdown command at an administrative command prompt still works, even in a remote session. For the record, that syntax is:

shutdown /r /o /f /t 00

Those switches work as follows:
/r  Restarts the computer after shutdown
/o  Goes to Advanced Boot options menu
/f   Forces running applications to close sans user warnings
/t   Waits 0 seconds before restart (works immediately)

So now I finally understand why the Advanced Startup item under Recovery sometimes goes missing on me. It MUST be run locally to work. Can I get one more Doh!?

Facebooklinkedin
Facebooklinkedin

Pet Peeve: Upgrade Walls Around Free Versions

I was checking upgrades over the weekend (part of my daily routine, in fact). I found myself having to search for a specific version of a favorite app. Why? Because the developer erected upgrade walls around free versions of the app. It’s just a “little reminder,” I guess, that users should support developers by paying for what they use.

Why Put Upgrade Walls Around Free Versions?

Basically, the developer steered its “manual update” capability into the purchase dialog for the same program’s for-a-fee version. I have the paid-for version on my production PC, in fact. But I don’t pay for the instances I run on my test PCs (which vastly outnumber my home desktop and traveling “work laptop” — by 5 to 1). It just ticks me off when the developer leads users down a road with no obvious access to downloading the free version through the application’s own built-in update facility. Am I wrong to feel that way?

I don’t think so. But in this case, I had to remember that the name of the free version includes “lite” in its name (cute). Then, I had to Google the name of the application with that string in its name to get to the right download page. Not too challenging, but at least mildly vexatious, IMO.

The Pecuniary Imperative

Sure, developers need income to justify their time and effort spent in creating and maintaining their offerings. But do users need to be reminded that they could pay for the for-a-fee version each time they update (or upgrade) its free counterpart? Depends on who you ask: some developers obviously feel that the answer to that question is “Hell, yeah!” As for me, I just find it somewhat annoying.

Sigh. That’s just the way things go in Windows-World sometimes. Thanks for letting me vent…

Facebooklinkedin
Facebooklinkedin

X390 Network Return Requires Discovery Tweaks

Son Gregory is back from college for the summer, bearing his Lenovo ThinkPad X390 Yoga laptop. Its 8th-gen i7-8565U CPU, 16 GB RAM, and 500 GB Intel SSD are entirely adequate for his mobile computing needs. But I couldn’t see his device on the LAN when he first joined back in. Indeed, an X390 network return required discovery tweaks to make itself entirely visible. A couple of quick, minor toggles in “Advanced sharing settings” made everything OK.

Understanding X390 Network Return Requires Discovery Tweaks

I’m still getting used to digging into Advanced sharing settings inside the Windows settings app. That’s where I made sure the following toggles were in the “On” position:

Once I made sure discovery was working, Presto! the X390 (computer name = “DinaX390” as shown in the lead-in graphic) appeared. Sometimes, it’s the little things that mean alot.

The X390 Gets a Thorough Once-Over

I’m glad to see the machine is running Windows 11 22H2 (Build 22621.1702). SUMo also gives its paltry 17 identifiable programs a clean bill of health, update-wise. I have to say that it looks like Gregory took excellent care of his laptop while away at school. Good for him!

Now that it’s showing up inside Advanced IP Scanner, I can see what it’s doing on the network, too. All’s well that ends well.

Facebooklinkedin
Facebooklinkedin

Intel DSA Version Confusion

OK then, I’m back in the office after a 10-day hiatus. Natch, after meeting today’s writing deadlines, I started updating all 11 of my Windows PCs. Along the way, I found myself caught up in Intel DSA version confusion for that company’s Driver & Support Assistant software.

Look at the lead-in screencap. The Intel download page shows version 23.2.17.8 is the latest and greatest version. Yet the details for the download file show it as version 23.1.9.7. And indeed, when you install or repair DSA using the file the lower-numbered version is what’s installed. Go figure!

Overcoming Intel DSA Version Confusion

After handling over 100 updates, the Patch Tuesday and incidental WU stuff, I didn’t want to find myself troubleshooting a bogus update problem. But that’s what I’ve got going on. Until Intel puts the update for version 23.2.17.8 in the “Latest” position on its download center, there’s not much I can do to fix this.

C’mon Intel: please fix this issue so OCD updaters — like yours truly — can get caught up. I’ve already got 23.1.9.7 (the version that actually appears in the Properties window for the 23.2.17.8 download) installed. I can’t catch up until the right file gets posted to the download center.

It’s Always Something, Right?

Just goes to show you that here in Windows-World there’s always some kind of gotcha lurking to make life more interesting. In some cases, my issues are of my own making. In this particular case, it looks like something odd is up with the Intel download page itself.

Just for grins, I went to an alternate download source. Much to my surprise, that installer shows the correct version number for this file, to wit:

Intel DSA Version Confusion.alt-source

An “alternate download source” DOES have the right file.
Go figure again!

I wish I knew how the other source got the right file, when I couldn’t grab it myself directly. As Mr. Churchill said of Russia, that makes this “a riddle, wrapped in a mystery, inside an enigma.” I don’t know whether to laugh, or cry.

Facebooklinkedin
Facebooklinkedin

30 Problem-Free Upgrades Since July 2022

Every now and then, I step back from the day-to-day Windows routine. I like to reflect on what I’ve seen and done. Looking at my Update History, I see 30 problem-free upgrades since July 2022. It’s end-of-April, so that means 30 updates in 9 months (3.33 updates per month). And nary a lick of trouble with any of them either in the Dev or Canary channels. Remarkable!

What 30 Problem-Free Upgrades Since July 2022 Means

This is on the 2018 vintage Lenovo ThinkPad X380 Yoga. It’s an 8th-gen Intel i7-8650 CPU, 16 GB DDR4, 1 TB (nominal) Toshiba SSD. On my newer X12 Hybrid ThinkPad (11th-Gen i7-1180G7, 16 GB DDR4, 1TB (nominal) WD SSD), I had to clean install Canary after my initial attempts to upgrade from Dev Channel to Canary failed. That was a pain!

But the X380 Yoga keeps chugging along. It’s a little slower than the X12 hybrid — as you’d expect, given the age difference (2018 vs 2020) — but it’s proved rock-solid and completely reliable. My son has an X390 Yoga (2017 model,  i7-8665U CPU, 16 GB RAM, 1 TB SSD) that’s been equally reliable as his carry-around, note-taking machine for use in class.

ThinkPad, ThinkPad, All the Way…

Looking around the house right now, I have 6 laptops here (plus the one in Boston with son, Gregory). 5 of 7 are ThinkPads, one’s a Lenovo Legion, and the last (and soon-to-be-retired) is a 2014 vintage Surface Pro 3. I have come to be a big believer in ThinkPads because:

1. I like the keyboards
2. The maker provides easy access to technical manuals for DIY upgrades
3. These laptops have handled everything I’ve thrown at them and just keep working
4. Shopping around delivers amazing buys (I paid under $1K each for the two X380 and one X390 Yoga I currently own; ditto for my former X220 Tablet and T25 Notebook machines, now retired).

You may not be able to judge a book by its cover, but you certainly can judge a notebook/laptop brand on a decade-plus of mostly stellar experiences. I’m completely sold on the ThinkPad brand.

Personal Note…

I’ve been quiet since April 28 for good reason. We flew to Boston on May 1 to pick son Gregory up after his first year at college (move-out day was May 4). Then we spent the next 4 days in NYC on a family adventure that included more walking than I thought I could handle. It was great! We’re all glad to be back at home, and I’m glad to be resuming a normal work schedule tomorrow. I wrote this blog post just before I left to have something to post immediately upon my return home. Let the games resume!!!

Facebooklinkedin
Facebooklinkedin

Another Interesting PowerShell Clean-up

Wow! What a ride… I was working on my Lenovo P16 Mobile Workstation this morning. Winget kept finding two versions of PowerShell — namely 7.3.8.0 and 7.3.4.0 — when I ran an open-ended upgrade command. That said, I couldn’t find the older version anywhere. Ultimately, this would lead me to another interesting PowerShell cleanup. Let me walk you through what I had to do to come clean, as ’twere…

Starting Another Interesting PowerShell Clean-up

I’ll begin by explaining where I started from. I was running the Preview version of PowerShell. The complete name string (FQDN equivalent): Microsoft.Powershell.Preview. The list command for that string was showing two versions in winget output, as described above. Upgrade attempts had no effect on the older version, despite reporting success. Sigh…

Also, when I searched all the folders where the software should be lurking (from the PowerShell environment variable), I found it nowhere. Likewise, my usual fallback trick — searching for filename pwsh.exe (the PowerShell executable) — showed only one instance.

Frustrating!

Ending the Clean-up Conclusively

When all else fails, remove/replace still does the trick. I ran the following commands to fix things so that only one version shows as in the lead-in graphic for this story:

1. winget uninstall -q Microsoft.PowerShell.Preview -v 7.3.8.0
2. winget uninstall -q Microsoft.PowerShell.Preview -v 7.4.0.3
2. winget install –id Microsoft.Powershell –source winget

That replaced the Preview with the Production version, and did away with the elusive (unfindable, even) older Preview version. Problem solved. Sheesh!

Note: Here’s a handy article from MS Learn “Installing PowerShell on Windows” that supplied me with number 3 above. Works well, but I did have to close my open PowerShell window for the install process to complete. Can’t have the old stepping on the new again, can we? Sigh again…

Facebooklinkedin
Facebooklinkedin

Fast Tracking Windows 11 Updates

On April 25, MS released KB5025305 for Windows 11 as a CU preview. It offers an interesting new addition to Windows Update. As shown in the lead-in graphic, that option reads “Get the latest updates as soon as they’re available.” By default, this option is not available on managed PCs. Thus, admins need not worry. But it does provide a way to enable fast tracking Windows 11 updates for those who want them as soon as they come out.

What Fast Tracking Windows 11 Updates Means

Here’s how MS explains this interesting move (from an MS Support note entited “Get Windows updates as soon as they’re available“):

Windows devices get new functionality at different times as Microsoft delivers non-security updates, fixes, improvements, and enhancements via several servicing technologies—including controlled feature rollout (CFR). With this approach, updates may be gradually rolled out to devices.

The good news is if you have Windows 11, version 22H2 or later, you can choose to get the latest non-security and feature updates as soon as they become available for your device (now and in the future).

The lead-in graphic shows the slider control for “Get the latest updates…” in its default position. Users must opt into this offer to exercise it. That means moving the slider from the “Off” position to “On.”

Should You, or Shouldn’t You?

This kind of thing is a fine idea for people like me — a devout Windows Insider who diligently tracks every new wrinkle across multiple OSes and release versions. But for others, especially on production PCs? No so much…

My take on this new feature is that it’s a fine thing for test machines, or other PCs not intended to support everyday, workaday job roles. My best guess about how this will play out is that experimenters, testers and slightly over-the-edge enthusiasts will turn it on. Most everybody else will leave it alone … as they no doubt should.

As for me, I think I’ll try it out on a couple of test machines (I have half-a-dozen or more at my disposal right now) and see how it goes. Stay tuned: I’ll report back occasionally on what I see and learn.


Facebooklinkedin
Facebooklinkedin

Windows 11 Install Network Bypass

Windows 11 is a little trickier to install with a local account and no working Internet link than was Windows 10. That said, there’s a “trick” you can use to take a Windows 11 Install network bypass. It relies on a specific command file in the %windir%\System32\oobe folder named BypassNRO.cmd. See the lead-in graphic for this small but weighty 1KB file.

Warning! Do NOT open this file to “see what happens…” Let me tell you instead and skip it for yourself: it reboots your PC (as it would during install to change modes). To open the file, visit it in Explorer, right-click with left Shift key depressed, and choose “Copy as path” from the pop-up menu. Then paste that path specification into Notepad, Notepad++, or your favorite text editor. It’s a three-liner that turns off input echo, adds a registry key (to bypass the network requirement), and then restarts the PC instantly.

How-to: Taking the Windows 11 Install Network Bypass

Start the install process with the Internet disconnected (this is key). When the Windows 11 installer tells you “Oops, you’ve lost Internet connection” don’t press the Retry button. Click Shift+F10 to open a command prompt instead. Type OOBE\BYPASSNRO, then hit enter (no spaces, because it’s a file specification — the installer runs in %windir%\system 32).

The PC will restart, and you’ll see a different screen that reads  “Let’s connect…” (see below). Notice the link at lower right that says “I don’t have internet.” Click that.

At that point, you’ll be prompted to create a local account for login post-install. The OOBE process will complete without having to use an MSA (Microsoft Account, with associated e-mail address) during the process. This can be helpful for all kinds of reasons (including easier scripting for automated installs).

Credit Is As Credit Is Given

I have to thank user SproutTheRobot at MS Answers for providing the screenshots and instructions for using oobe\bypassnro. I’d also like to thank the users at ElevenForum.com in the thread What is “oobe\bypassnro”? for their illuminating discussion of this process. It’s what led me to the MS Answers item cited here. Thanks, people!

Facebooklinkedin
Facebooklinkedin