Category Archives: Insider stuff

P16 Blows Up, Requires Clean Install

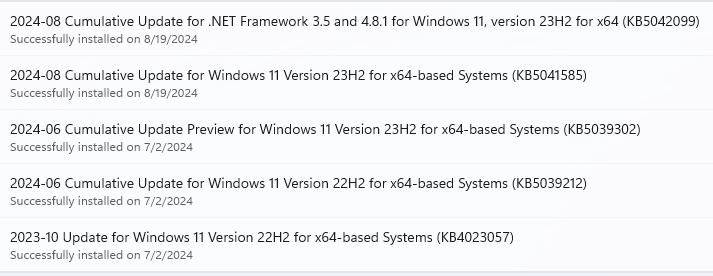
Wow! I took an unexpected detour yesterday. Upon rebooting my Lenovo P16 Mobile Workstation after CU KB5039302, it got stuck in perpetual Restart. After about an hour wasted on the spinning balls and apparently going nowhere, I forcibly rebooted the PC. Bad idea! Long story short: soon thereafter the P16 blows up, requires clean install to restore to working order. Sigh: let me explain…

Why P16 Blows Up, Requires Clean Install

I’ve seen my share of Windows crashes since the 3.1 days. This was one of the scariest. Indeed, it is the first one I can recall where even the Macrium Reflect Rescue Media couldn’t bring the system back from the dead. I could boot up the restore environment but the trackpad was MIA (fixable with an external mouse) as was the external NVMe drive where the restore image resides (not fixable at all).

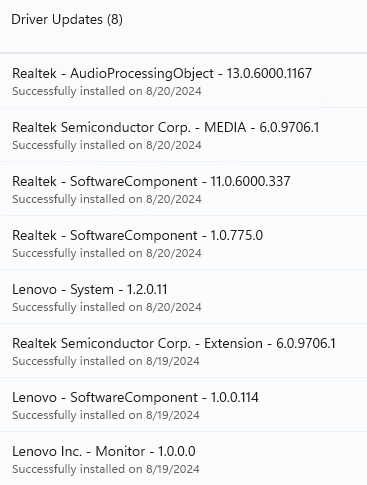
So I downloaded a fresh Windows 11 23H2 ISO, turned off secure boot, and fired off a bootable UFD created using the MS MCT. That got the PC running again. But I still found myself woefully short of device drivers. A quick install of Lenovo Vantage and a set of updates later, that defect was remedied: I went from 20-odd “Unknown devices” in DevMgr to zero (0). Good!

Right now, I’ve just reinstalled Macrium Reflect, and am rebooting to be able to make a snapshot of the rebuilt system (and create new Rescue Media). After that I’ll try the lone pending update for the P16 and see if it finally goes through. My best guess is that something went sideways after that update. Indeed the P16 automatically rebuilt its BIOS when I did finally get the machine to reboot after the CU hung on me. So whatever affected the system, it was at a pretty low level.

Fingers Crossed, I Try Again…

With a new rescue disk, and a fresh image backup demonstrably at hand (see next screencap), I once again tried CU KB5039302.

P16 Blows Up, Requires Clean Install.exp-list

Today (6/26) there’s a fresh backup available!

Downloading takes some time . . . but eventually, it gets to installing . . . and about 20 minutes later (!) I’m ready to restart again,  with appendages overlapping for as much luck as I can get. So I fire off the restart and watch it count down (or up) . . . reboot . . . restart . . . spinning circle . . . and a second restart?! . . . SUCCESS!!!

That was officially weird, and I’m glad it’s behind me now.

The News Catches Up

This morning, I came across a story about KB5039302 at WindowsLatest. The title says it all Windows 11 KB5039302 breaks PCs, MS pulls the update. It specifically mentions the very “boot loop” that I describe earlier, and ties to nested virtualization. (I’m a heavy user of Hyper-V VMs on that PC so: no joke!)

The recommended fix is what I guess I should’ve done, rather than a clean install (though without trackpad drivers or access to USB-attached NVMe drives, things were challenging):

You must use the WinRE page to access the troubleshooting tools, remove the update, or do a clean install.

OK, now we know. But here in Windows-World, there’s always something around the corner looking to bite  you if it can. It certainly bit me! But that’s what Windows Insiders are for, I think . . .

Concluding Unscientific PostScript

I also understand now why the initial application of KB5039302 blew up on the P16, but why the post-clean-install upgrade worked. In the former case, Hyper-V and nested virtualization was already present and active. In the latter case, I didn’t enable Hyper-V and VMs until AFTER I’d applied the update. Turns out that was exactly the right thing to do. Better sometimes, indeed, to be lucky than good!

Facebooklinkedin
Facebooklinkedin

WinGet VPN Update Gotcha

I’ve seen it before, and I’ll see it again. In running routine WinGet updates yesterday, I noticed that my VPN (Private Internet Access, a paid-for subscription) wasn’t getting handled. I figured out why pretty quickly, too: it was because the VPN was running and WinGet didn’t want to mess with that connection. Although I’ve labeled this as a WinGet VPN update gotcha, it’s evidence of the program’s conservative outlook on interrupting something actively underway.

It’s Not Really a WinGet VPN Update Gotcha

Take a look at the lead-in graphic. You can see that WinGet knows an update is pending. You can also see that WinGet doesn’t apply that update. What you can’t see is that between the winget upgrade  command and the following winget list command, I opened PIA (Private Internet Access) and used its internal update function to perform that pending operation. Thus the winget list command shows the latest version number (3.5.7+08120). Indeed it’s the very same version number that shows in the preceding winget upgrade command as  “Available.” If you can’t see it on-screen, right-click that graphic and open it in a separate tab (it’s at bottom center).

In working with WinGet over the past few years  — it first appeared in May, 2020, and I started using it early in 2022 — I’ve observed that it will often skip over updates when the program involved is running. This happens pretty regularly with web browsers (e.g. Chrome, Edge, and Firefox, in my case), but with other applications, too.

I appreciate this approach because it minimizes the risk of lost connections or data resulting from an upgrade. It can be a little disconcerting when it happens, but quick investigation usually straightens things out in short order. Keep up the good work, people!

Facebooklinkedin
Facebooklinkedin

Windows 11 on ARM IS Different

Gadzooks! It’s been an interesting last few days. Friday morning, a Snapdragon X Elite-based Copilot+ PC — the nifty Lenovo Yoga Slim 7 — showed up here at Chez Tittel. I’ve been working and messing around with it pretty much ever since, amidst occasional bouts of paying work. Among my observations so far: Windows 11 on ARM is different from its x86 counterpart. Let me explain…

Why Say: Windows 11 on ARM IS Different

Take a look at the intro screencap. I ran it on the Copilot+ PC immediately after updating that unit from WU. On an x86 PC, the progress bar would count to 10% on one line, then it would count to 100% on a second line before completing the component cleanup directive (middle portion of the image). On ARM, no such shenanigans. In general also, this also PC runs faster than x86 for all these intense DISM commands. But there’s more…

After I got going on this PC Friday afternoon, I tried to uninstall McAfee (one of the few bits of junk/gunk Lenovo throws onto its laptops these days). The uninstaller got to 10% and sat there . . . and sat there . . . and sat there FOREVER. At the time time, the Start menu became unresponsive, apps and applications wouldn’t load, and the machine in general ran like a wounded animal by fits and starts. WTF?

Then it dawned on me: I checked WU and, sure enough, a CU update for the .NET Framework (KB5037589) had been installed, and a restart was pending. I killed everything else, then restarted the unit to complete that update. Immediately afterward, the PC returned to speedy, fluent operation. I haven’t had a noticeable glitch since then.

My conclusion: if an update on an ARM PC requires a restart, it’s best done immediately after the update finishes installing. I could’ve saved myself oodles of wasted time and wondering what was wrong with the Yoga Slim 7 if I’d done that myself yesterday. Now I know: it won’t happen again. That’s a very different story on x86, where I’ve gotten away with postponing restarts for days sometimes…

More to Come, I’m Sure…

But I’m just getting started with this new AI-enabled PC. I’m sure I’ll have lots more to report in the days and weeks ahead. This morning, I started playing with Copilot and observed that it runs faster, but doesn’t seem any better-equipped to read my mind properly than it was before. I’m still learning how to build queries so I can get good answers. I’ve also tried out the AI-enabled version of MS Paint with varying degrees of success.

Stay tuned as I get myself oriented, and start learning how to take proper advantage of a Copilot+ PC. It should be interesting!

Facebooklinkedin
Facebooklinkedin

Yoga Copilot+ PC Pops In Unexpectedly

When I sent an email to the Lenovo Reviews team earlier this week, I asked that they send me a Copilot+ PC at their earliest convenience. When “the Boss” told me “You have a package” this morning, I had no idea what it might be. But gosh: it’s  a brand-spanking-new Yoga Lenovo Yoga Slim 7 14Q8X9. It’s still booting — during which it clearly recognized itself as a Copilot+ PC — so I can’t even say what’s under the hood just yet. But when a Yoga Copilot+ PC pops in unexpectedly, I’m happy to work through its OOBE and setup stuff. Wow!

Yoga Copilot+ PC Pops In Unexpectedly, Things Get Fun!

OK, I got far enough into booting that I can say a little about what’s what (thanks to System Information in the running OS):

  • Snapdragon X1E78100 CPU
  • 3K (2944×1840) OLED display (great, sharp colors)
  • 16 GB RAM
  • 512 GB SSD
  • Windows 11 Home (!)
  • All 3 USB ports (2 left, 1 right) are USB 40Gbps

From what I can see about pricing on the product page, my unit as configured would cost US$1,200.00 (in round numbers). If I were buying one, I’d definitely spend the US$69 to bump it up to 32GB RAM, and US$45 to take it up to a 1TB SSD.

Apparently, I’ve got a lot of work to do on intake. I’ll be upgrading this to Windows 11 Pro, mostly so I can use RDP to get into the machine from my dual-screen desktop.

First Impressions

As with the Lenovo Yoga Pro 9i that preceded it, the Yoga Slim 7 shows up in plastic-free packaging. It took less than a minute to unbox and put things together. Interestingly, the unit wouldn’t boot until I plugged the brick into an AC outlet, and hooked it up. Normally, Lenovo sends review units out with a full charge. But not this time — probably because they put it in the pipeline for shipping as soon as I requested the unit on Wednesday. Again: I’m stunned and thankful.

The unit lives up to its slim moniker, but feels sturdy and high-quality in the hand. According to its product page, it weighs 2.82.lbs/1.28kg:  but it feels both light and powerful. The deck and outer surfaces are all a wonderful dark shade of midnight blue.

An Upgrade Wrinkle…

Interestingly, I couldn’t use a MAK Windows 11 Pro key to upgrade the unit (maybe that one doesn’t include ARM coverage?). I had to burn one of my MVP Windows 11 Pro retail licenses to get the upgrade through the Activation center in Settings. It shows the same screen as when using Recovery to perform an in-place repair install (unsurprisingly). I’ll report back in when this finishes.

Soon, I’ll also be able to report in on the Yoga Slim 7’s Snapdragon specific AI-based Copilot features. That should be a total gas. Right now, I’m still in the intake process, getting ready to put this PC through its paces. Stay tuned!

My next move will be to box up and send back the truly terrific Lenovo Yoga Pro 9i I’ve had since late April. It’s been a great (and powerful) PC especially for VMs in Hyper-V. I’ll be sorry to see it go. But I promised to send it back as soon as another USB4 capable unit showed up here at Chez Tittel. That means an outing to the FedEx storefront at 183A and 1431 later this afternoon. Good-oh!

Facebooklinkedin
Facebooklinkedin

Defender Threat-Flags MTPW

MTPW is the intialism for MiniTool Partition Wizard, a long-time mainstay in my stable of free and capable Windows tools. I’m not sure exactly why MS/Defender decided it’s a “potentially unwanted app.” That said you can see the message from Microsoft Defender Beta as the lead-in graphic, which also labels it as a threat, albeit an abandoned one. To repeat: I don’t know why Defender threat-flags MTPW download, but there it most assuredly is.

Digging into Defender Threat-Flags MTPW

Turns out that pw12-free.exe is an old, outdated name for MiniTool Partition Wizard (note the 2020 date, if you’re not convinced). The current version is named pw-free-online.exe. It throws no Defender Beta alerts, nor does VirusTotal find it at all objectionable. I guess that makes this one of those WTF moments that Windows can occasionally throw this way.

Given a security alert, I’d much rather have it turn out to be a false positive as is apparently the case here. Indeed, Everything can’t even find a copy of the offending file on my test PC (a 2018-vintage Lenovo Yoga 380X). Another bullet dodged, apparently, or less-than-vicious threat averted. I can’t make up my mind: you decide.

The Good Thing About False Positives…

Is, of course, that you can cheerfully ignore them. Indeed, because the offending file can’t even be found, it’s no longer a concern — if ever it was one. I checked the current download (pw-free-online.exe) just to make doubly-darned sure. But there’s no threat there that I can see. Good enough for me!

Facebooklinkedin
Facebooklinkedin

Teams Classic Lingers On

OK, we’re up to version 1.7.00.15969 for Teams Classic now. Amidst a whopping 8 (!) updates that showed up for my production PC this morning, I couldn’t help but notice two versions of teams. If you look at the lead-in graphic, it provides clear evidence that Teams Classic lingers on … and on … and on. Sigh.

Teams Classic Lingers On.2nd teams item

As WinGet starts updating the second Teams item is clearly labeled “Classic.” [Click image for full-size view.]

Why Is It That Teams Classic Lingers On?

The end of support for Teams Classic has been pushed out at least once that I know of. It now stands at July 1, 2024, according to the MS Learn article “End of availability for classic Teams client.” As far as I can tell the side-by-side appearance of Teams (New) and Teams (Classic) is only an issue on Windows 10, not Windows 11. Too bad that’s still where most of the users are, eh?

To answer the preceding question/heading, “I’m not sure.” The afore-linked MS Learn item still says “Microsoft [will be] attempting to uninstall the class Teams client 14 days after the installation of new Teams.” Gosh, I’ve tried to force this three or four times now in the past 14 weeks or so, and it has never stayed off my system for more than a week afterward. And that includes manual uninstalls using  WinGet to target Teams Classic directly, to wit:

WinGet uninstall Microsoft.Teams.classic
Someday, perhaps soon (early next month?) it may disappear for good. Can’t wait to see what happens next!

Facebooklinkedin
Facebooklinkedin

Comparing USB4 40 vs 20 Gbps

My rationale for keeping the terrific Lenovo Yoga Pro 9i for a couple of extra weeks comes from a recently acquired Maiwo 40 Gbps USB4 NVMe enclosure. Handily, the 9i has two USB-C ports side-by-side. One is rated 40 Gbps, the other 20 Gbps. The lead-in graphic has me comparing USB4 40 vs 20 Gbps via CrystalDiskMark. As you can see, the port speed makes a difference, especially for large block transfers (upper half of each chart).

Comparing USB4 40 vs 20 Gbps: What’s the Diff?

As you can see in the lead-in graphic, the 40Gbps port is faster than its 20Gbps counterpart in 3 out of 4 rows in CrystalDiskMark. It’s double or better for the top 2 rows which involve large (1MB) block transfers. It’s also faster on random writes of 4K blocks, and slightly slower in random reads of such blocks.

Copilot explains these differences as follows (and I am convinced it’s correct because of fundamental principles involved):

  • Large reads and writes benefit more from the higher speed . . . because they involve continuous data transfer.
  • Smaller reads and writes may not fully utilize the increased speed, resulting in smaller differences.

Indeed it makes sense to me that the 4K transfers (which means such reads involve 8 512-byte sectors per read or write) would be less sensitive to bandwidth than 1 MB transfers (2,048 512-byte sectors per read or write, as in 211 transfers overall for each such operation). There’s a lot more time for the speed difference to manifest for those larger transfers. The smaller ones are so fast, the channel speed differences don’t matter much (or at all).

Comparing Backup Times

But CrystalDiskMark is a synthetic benchmark, so it’s not entirely clear how accurately it reflects speeds when performing various operations. For me, the ultimate test of an external USB storage device is how fast it can complete an image backup of the PC’s boot/system drive. Indeed backup and restore top my list of “things to use external USB storage for.” So let’s compare those numbers, shall we?

Because my fave backup tool — namely, Macrium Reflect — is no longer free, I installed and used EaseUS ToDo Backup Free instead. I ran two complete backups with the same drive, same cable: one thru the 40Gbps port, the other thru the 20 Gbps port. File Explorer reports the size of the C: partition at 73GB; other partitions on that drive weigh in at over 1GB total (interestingly, EaseUS reports backup size at 119.5GB). I used 120GB as my backup size in the following table.  I also checked Settings | Bluetooth & devices | USB | USB4 hubs and devices to confirm that the first timing used the 40Gbps and the second the 20Gbps USB-C ports.

Port    Total Time    GB/min
40Gbps  03:22 (202)   35.64
20Gbps  05:11 (311)   23.15

As you might expect the difference is not linear. The 40Gbps backup averages about 35% faster, not 100% as a purely linear ratio would dictate. Even so, this saves 109 seconds (01:49) on backup time. As the backups get bigger, the gap widens. Very interesting!

More for Less

Right now a 40Gbps NVMe enclosure (with cooling fan) costs  (US$70) about fifty bucks LESS than what I paid for a 20Gbps device two years ago (sans fan). Thus, I’d say the difference was definitely worth it.

If you’re buying new, there’s no reason to consider an older 20Gbps device. The real question for those with PCs or laptops 2 years old or older is: does this speed difference justify buying a newer computer? Only you can decide for yourself. For me, it’s pretty compelling . . . but for now, I’m using a loaner unit from Lenovo to measure this capability. I haven’t shelled out to buy a brand-new machine with my own cash recently, either. But I’m thinking about it, hard.

Facebooklinkedin
Facebooklinkedin

EFI Boot Logo Follies

It’s been an interesting last couple of days. I really like the boot logo from the Lenovo Yoga Pro 9i. It’s popped up often as I’ve been reviewing it since the end of April. But I’ll be darned if I can find or  extract that file from the UEFI image. Along the way, I’ve indulged in all kinds of fascinating, down-the-rabbit-hole EFI boot logo follies.

You can see some evidence of this in the high-relectivity photo from my iPhone. It shows me shooting the logo from the Yoga’s initial boot screen. It’s been a gas. But so far I’ve been unable to grab the  bitmaps that animate this logo during the boot process.

Where My EFI Boot Logo Follies Have Led…

I started down this trail by using MiniTool Partition Wizard to examine the contents of the EFI partition on the Yoga. Alas, nowhere did I find a neat, discrete bitmap (or set of bitmaps, as the runtime animation strongly suggest must be buried in there somewhere).

Next I tried my luck with the HackBGRT, specifically designed to use the MS Paint app to drop another bitmap into UEFI to take over for the existing one. Despite my hopes it would let me see (and grab, even) what was already in there, no such luck.

My search for copies of this file online have gone unsatisfied. I’ve dropped a request to the reviews coordinator at Lenovo, but have gotten no response. I’m going to ping one of their SMEs and see if they can talk to the UEFI builders and help me out.

All I Got Was a Lousy T-shirt … err iPhone Grab

Amusingly enough, the iPhone snapshot I took of the logo shows me taking that picture. Ordinarily, I wouldn’t reproduce such an amateur, ghastly image here in the blog. But it captures perfectly the “chase-my-tail” exercise I’ve been going through trying to lay hands on the original Yoga Pro 9i boot logo. It’s right there. I can see it every time I boot. But that’s as close as I can get right now…

Simon Allison Comes Through!

When I checked into LInkedIn this morning, the former Windows Insider MVP named above posted a link to the graphic. Now you can grab it, too. Here’s what it looks like (and THANKS, Simon):

This doesn’t show the animation (you’d need the full set of images for that). But hey: there ’tis as a profound demonstration that we’re all better together than separately.

Facebooklinkedin
Facebooklinkedin

USB4 Means Yoga Pro 9 Stays On

I have to apologize to the review team at Lenovo. I’d told them I’d be sending back their splendid Yoga Pro 9(i) last Friday. Then I got an assignment from AskWoody to write about external, USB-attached NVMe (and other SSD) storage devices. So of course I had to a buy a current-gen 40 Gbps USB4 drive enclosure. Also, its inbuilt USB4 means Yoga Pro 9 stays on here at Chez Tittel while testing is underway. Sorry, Jeff and Amanda: I need to keep this beast a bit longer…

Why USB4 Means Yoga Pro 9 Stays On

Short answer: it’s my only PC/laptop with USB4 capability. And I want to research and write about same. And on the Yoga Pro 9i the first thing I observe is that while it has two USB-C ports, only one of them supports 40 Gbps throughput (the other is USB-C 3.2 and tops out at half that). This makes a big difference in read/write speeds. Ditto for cables: for best results you need a cable marked 40 Gbps or Thunderbolt 4, too. The device info for the MAIWO 40Gbps enclosure shows what needs to appear for fastest I/O:

USB4 Means Yoga Pro 9 Stays On.Settings-USBdevinfo

The salient info is at the bottom: 40Gbps. It also detects a Gen3 NVMe SSD.

Over the next 10 days or so, I’ll be comparing enclosures, drives, and cables with related measurements. This should be interesting. But for now, let me observe that I paid US$70 for a 40Gbps NVMe enclosure yesterday. When I bought the previous generation (20Gbps) enclosures, the cheapest ones cost US$120 or thereabouts. It’s good that the technology is getting both faster and cheaper. I’m very interested to see how quickly Macrium Reflect can back up the Yoga Pro 9i with a fast SSD and this fast enclosure. Should be fun!

Top of the Heap? You tell me…

FWIW, Cale Hunt over at WindowsCentral just anointed the Lenovo Yoga 9i as the #1 best laptop for 2024. I’ve found it to be pretty stellar in my 5 weeks working with it so far. It’s been great at handling complex programs, lots of VMs, and both compute- and graphics-intensive workloads. Too bad it came out before Copilot + PC requirements were known. It’s close, but not quite at that level. Sigh.

Facebooklinkedin
Facebooklinkedin

WinGet Source Hiccup Self-Repair

I saw a new WinGet error message yesterday. In attempting a “blanket update” PowerShell showed a “Failed when opening source(s)…” error instead (see intro graphic above). That same error also suggested its own fix via WinGet source reset. I didn’t read carefully enough to see that the –force option was also required. But my next upgrade attempt succeeded anyway. There was apparently a WinGet Source hiccup self-repair at work. What happened?

OK, Why Did WinGet Source Hiccup Self-Repair?

I can only speculate that there was a transient communications glitch between my test PC and the URLs associated with the Microsoft Store and WinGet itself. To me, this dual drop most likely indicates an interruption of service at the ISP level. Both domains have vastly different IP addresses so it’s unlikely to have been something at their end. Hence my best guess that something affected the lookups from my end through my ISP,  Spectrum.com.

It’s amusing that I discovered this hiccup simply by entering another command (albeit an incorrect one). Upon re-entering the original blanket update:

winget upgrade –all — include-unknown

Everything went through as expected on the second try. Through well-cultivated habits, in fact, my first impulse with Windows when things don’t work as expected is simply to try again and see what happens. In this fragile world of ours (including Windows-World) what doesn’t work at first often succeeds on a subsequent attempt.

Had it turned out otherwise, I’d be showing a different screencap, and telling a different story. This time, second try was the charm!

Facebooklinkedin
Facebooklinkedin