Category Archives: Cool Tools

30 Problem-Free Upgrades Since July 2022

Every now and then, I step back from the day-to-day Windows routine. I like to reflect on what I’ve seen and done. Looking at my Update History, I see 30 problem-free upgrades since July 2022. It’s end-of-April, so that means 30 updates in 9 months (3.33 updates per month). And nary a lick of trouble with any of them either in the Dev or Canary channels. Remarkable!

What 30 Problem-Free Upgrades Since July 2022 Means

This is on the 2018 vintage Lenovo ThinkPad X380 Yoga. It’s an 8th-gen Intel i7-8650 CPU, 16 GB DDR4, 1 TB (nominal) Toshiba SSD. On my newer X12 Hybrid ThinkPad (11th-Gen i7-1180G7, 16 GB DDR4, 1TB (nominal) WD SSD), I had to clean install Canary after my initial attempts to upgrade from Dev Channel to Canary failed. That was a pain!

But the X380 Yoga keeps chugging along. It’s a little slower than the X12 hybrid — as you’d expect, given the age difference (2018 vs 2020) — but it’s proved rock-solid and completely reliable. My son has an X390 Yoga (2017 model,  i7-8665U CPU, 16 GB RAM, 1 TB SSD) that’s been equally reliable as his carry-around, note-taking machine for use in class.

ThinkPad, ThinkPad, All the Way…

Looking around the house right now, I have 6 laptops here (plus the one in Boston with son, Gregory). 5 of 7 are ThinkPads, one’s a Lenovo Legion, and the last (and soon-to-be-retired) is a 2014 vintage Surface Pro 3. I have come to be a big believer in ThinkPads because:

1. I like the keyboards
2. The maker provides easy access to technical manuals for DIY upgrades
3. These laptops have handled everything I’ve thrown at them and just keep working
4. Shopping around delivers amazing buys (I paid under $1K each for the two X380 and one X390 Yoga I currently own; ditto for my former X220 Tablet and T25 Notebook machines, now retired).

You may not be able to judge a book by its cover, but you certainly can judge a notebook/laptop brand on a decade-plus of mostly stellar experiences. I’m completely sold on the ThinkPad brand.

Personal Note…

I’ve been quiet since April 28 for good reason. We flew to Boston on May 1 to pick son Gregory up after his first year at college (move-out day was May 4). Then we spent the next 4 days in NYC on a family adventure that included more walking than I thought I could handle. It was great! We’re all glad to be back at home, and I’m glad to be resuming a normal work schedule tomorrow. I wrote this blog post just before I left to have something to post immediately upon my return home. Let the games resume!!!

Facebooklinkedin
Facebooklinkedin

Another Interesting PowerShell Clean-up

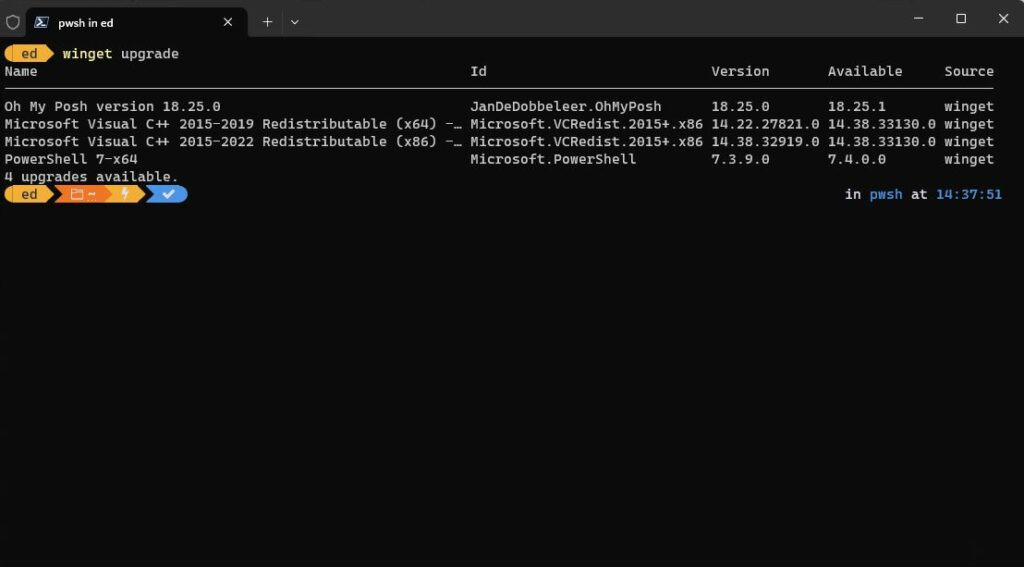
Wow! What a ride… I was working on my Lenovo P16 Mobile Workstation this morning. Winget kept finding two versions of PowerShell — namely 7.3.8.0 and 7.3.4.0 — when I ran an open-ended upgrade command. That said, I couldn’t find the older version anywhere. Ultimately, this would lead me to another interesting PowerShell cleanup. Let me walk you through what I had to do to come clean, as ’twere…

Starting Another Interesting PowerShell Clean-up

I’ll begin by explaining where I started from. I was running the Preview version of PowerShell. The complete name string (FQDN equivalent): Microsoft.Powershell.Preview. The list command for that string was showing two versions in winget output, as described above. Upgrade attempts had no effect on the older version, despite reporting success. Sigh…

Also, when I searched all the folders where the software should be lurking (from the PowerShell environment variable), I found it nowhere. Likewise, my usual fallback trick — searching for filename pwsh.exe (the PowerShell executable) — showed only one instance.

Frustrating!

Ending the Clean-up Conclusively

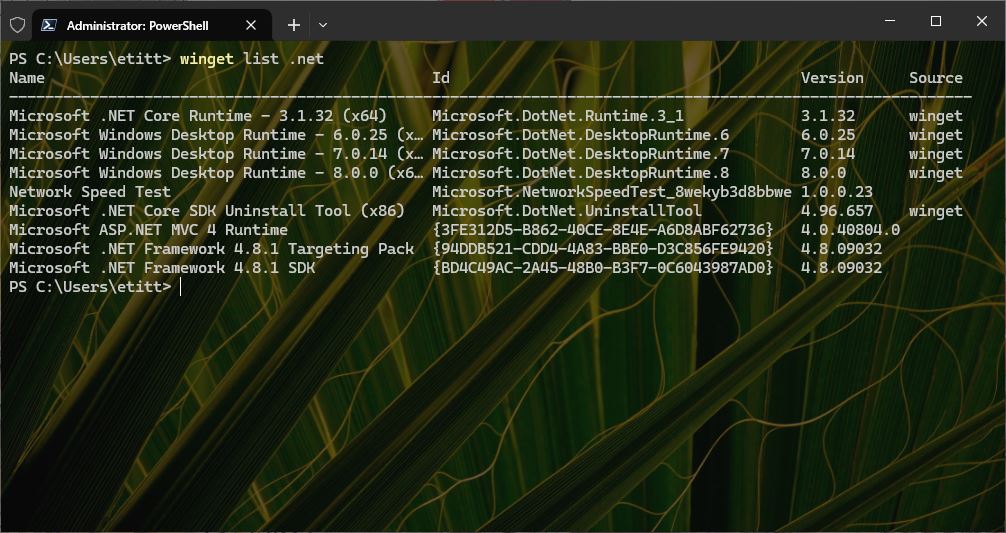
When all else fails, remove/replace still does the trick. I ran the following commands to fix things so that only one version shows as in the lead-in graphic for this story:

1. winget uninstall -q Microsoft.PowerShell.Preview -v 7.3.8.0
2. winget uninstall -q Microsoft.PowerShell.Preview -v 7.4.0.3
2. winget install –id Microsoft.Powershell –source winget

That replaced the Preview with the Production version, and did away with the elusive (unfindable, even) older Preview version. Problem solved. Sheesh!

Note: Here’s a handy article from MS Learn “Installing PowerShell on Windows” that supplied me with number 3 above. Works well, but I did have to close my open PowerShell window for the install process to complete. Can’t have the old stepping on the new again, can we? Sigh again…

Facebooklinkedin
Facebooklinkedin

Achieving Intel Driver Update Silence

I’ve been writing a fair amount lately about updating the Windows OS, apps, applications and drivers. On that last subject — drivers — Intel has an outsized impact on most of my PCs (11 of 13 use Intel CPUs; all of them include at least some Intel chipsets). I’ve been updating Bluetooth, LAN (Wireless and GbE), and Graphics over the last couple of days. I counted anywhere from 5 to 9 mouse clicks needed to work through the various installers. This has me thinking: “What’s Involved in Achieving Intel Driver Update Silence?”

All this said, I’d also like to observe that I use the Intel Driver & Support Assistant (aka DSA) to drive most of my Intel driver upkeep activities. Overall, it does a pretty good job.

Is Achieving Intel Driver Update Silence Even Possible?

To some degree, yes. If you search the Intel site for “silent Intel X install” (where X = one of Bluetooth, Wireless, LAN, Graphic, …) you’ll find articles on how to run installers at the command line in silent mode. I’ll provide a list below, but here’s a discouraging disclaimer from the  Graphic driver how-to (bold emphasis mine).

s, –silent A silent installation that uses default selections in the place of user input. Not all visual indications are disabled in silent mode.

There’s the rub, in the bolded text. Running silent does away with most, but not all, visual indications.

Here’s a list of some very popular how-to’s that cover silent installation:

1. Graphic driver how-to
2. Bluetooth driver how-to
3. Base Driver & ProSET how-to (GbE, etc.)
4. Wi-Fi driver how-to
5. Chipset Installation utility how-to
6. USB 3.0 eXtensible Controller how-to

That’s all I could think of, off the top of my head. Looks like my earlier search formula works pretty well on the Intel site, though. If you need something else, chances are good it will work for that, too. If not, please drop me a line to let me know what else you found or figured out.

Facebooklinkedin
Facebooklinkedin

Windows 11 Install Network Bypass

Windows 11 is a little trickier to install with a local account and no working Internet link than was Windows 10. That said, there’s a “trick” you can use to take a Windows 11 Install network bypass. It relies on a specific command file in the %windir%\System32\oobe folder named BypassNRO.cmd. See the lead-in graphic for this small but weighty 1KB file.

Warning! Do NOT open this file to “see what happens…” Let me tell you instead and skip it for yourself: it reboots your PC (as it would during install to change modes). To open the file, visit it in Explorer, right-click with left Shift key depressed, and choose “Copy as path” from the pop-up menu. Then paste that path specification into Notepad, Notepad++, or your favorite text editor. It’s a three-liner that turns off input echo, adds a registry key (to bypass the network requirement), and then restarts the PC instantly.

How-to: Taking the Windows 11 Install Network Bypass

Start the install process with the Internet disconnected (this is key). When the Windows 11 installer tells you “Oops, you’ve lost Internet connection” don’t press the Retry button. Click Shift+F10 to open a command prompt instead. Type OOBE\BYPASSNRO, then hit enter (no spaces, because it’s a file specification — the installer runs in %windir%\system 32).

The PC will restart, and you’ll see a different screen that reads  “Let’s connect…” (see below). Notice the link at lower right that says “I don’t have internet.” Click that.

At that point, you’ll be prompted to create a local account for login post-install. The OOBE process will complete without having to use an MSA (Microsoft Account, with associated e-mail address) during the process. This can be helpful for all kinds of reasons (including easier scripting for automated installs).

Credit Is As Credit Is Given

I have to thank user SproutTheRobot at MS Answers for providing the screenshots and instructions for using oobe\bypassnro. I’d also like to thank the users at ElevenForum.com in the thread What is “oobe\bypassnro”? for their illuminating discussion of this process. It’s what led me to the MS Answers item cited here. Thanks, people!

Facebooklinkedin
Facebooklinkedin

Windows 11 Wallpapers Listed

Saw an interesting story at gHacks last week. Entitled “Where are the desktop wallpapers?” it provided a link to the Windows folder where one can find Windows 11 wallpapers. That was interesting, but it also led me to search through its various folders and files. Here, I’ve gone a bit further, so you’ll find all the Windows 11 wallpapers listed and described — and their folder hierarchy.

The lead-in graphic shows the complete folder hierarchy for all of Windows 11’s default wallpaper files. For ease of understanding, I list that as a primitive “text hierarchy” below:

C:\Windows
--Web
----\4K\Wallpaper\Windows (2)
----\Screen (6)
----\touchkeyboard (8)
----\Wallpaper
------\CapturedMotion (4)
------\Extended (0)
------\Flow (4)
------\Glow (4)
------\Lenovo (1)
------\Spotlight (2)
------\Sunrise (4)
------\Windows (2)

There are a total of 37 files inside 11 folders with actual content. I’ll list things out in more detail in the next section. The default Windows wallpapers appear in the folder named C:\Windows\Web\4K\Wallpaper\Windows just for the record. I’m not sure what the others are for, but you can use them if you like.

Windows 11 Wallpapers Listed and Described

I’ll provide the full path to each populated folder, then follow with a short description of the files in each one. Folders appear  as next-level heads below.

C:\Windows\Web\4K\Wallpaper\Windows

Again, this is the default that Windows 11 uses for wallpaper images, of which there are two. Files included:

img0_1920x1200.jpg: 2K bloom (light background)
img19_1920x1200.jpg: 2K bloom (dark background)

C:\Windows\Web\Screen

This includes 6 files, of which four are bloom variants, and two others different. Here’s the list:

img100.jpg: 3840x2160 bloom detail (dark blue)
img101.jpg: 3840x2400 lunar eclipse (blue/light edge)
img102.jpg: 6400x4000 sunrise/set over lake
img103.jpg: 3839x2400 multi-color bloom
img104.jpg: 3840x2400 grey-to off-white bloom
img105.jpg: 1920x1200 medium blue solid color

C:\Windows\Web\touchkeyboard

This includes 8 files, 4 each in both light and dark themes. It includes a mix of image including folded surfaces, foreground/background surface, light and dark curves.  Because the filenames (in bold) are long, I used a smaller font for compactness. Here’s the list:

TouchKeyboardThemeDark000.jpg: 2736x1539 folded surface against shaded blue
TouchKeyboardThemeDark001.jpg: 2736x1539 folded surfaces against shaded orange to blue
TouchKeyboardThemeDark002.jpg: 2736x1539 foreground surface orange to dark, similar background
TouchKeyboardThemeDark003.jpg: 2736x1539 red light & dark curves against blue to pink sky
TouchKeyboardThemeLight000.jpg: 2736x1539 dark000 with light bkgrnd
TouchKeyboardThemeLight001.jpg: 2736x1539 dark001 in light colors
TouchKeyboardThemeLight002.jpg: 2736x1539 dark002 in light colors
TouchKeyboardThemeLight003.jpg: 2736x1539 dark003 in lighter shades

C:\Windows\Web\Wallpaper\Captured Motion

There are 4 files taken as freeze frames from some kind of computer-generated animation. Here’s that list:

img24.jpg: 3840x2401 surfaces in red, transparent, yellow...
img25.jpg: 3840x2400 ribbons in red to pink
img26.jpg: 3841x2400 laminated surfaces in orange, red, etc.
img27.jpg: 3840x2400 oil droplets in reds, purples, etc.

C:\Windows\Web\Wallpaper\Flow

Different versions of the same kind of bloom image used for the Windows 11 default wallpaper, four files. These are:

img32.jpg: 3841x2400 bloom image in light-blue to gray hues
img33.jpg: 3841x2400 different bloom image greenish hues
img34.jpg: 3840x2400 another bloom image in pinkish hues
img35.jpg: 3840x2400 another bloom image in img32 palette

C:\Windows\Web\Wallpaper\Glow

Different, cropped (or closer-in) versions of the lunar eclipse img101 mentioned earlier, four total, to wit:

img20.jpg: 3840x2400 close-up in purples
img21.jpg: 3840x2400 close-up in purples and blues
img22.jpg: 3840x2400 close-up in oranges and reds
img23.jpg: 3840x2400 close-up in blues and greens

C:\Windows\Web\Wallpaper\Lenovo

I’ve actually got this image as wallpaper on a couple of Lenovo PCs, so Lenovo uses it for sure. There’s just the one image in this folder:

ThinkStation_wallpaper_2560x1440.png: logo on beach

C:\Windows\Web\Wallpaper\Spotlight

Another bloom image and photo composition, with unique filenames, two in total:

img14.jpg: 3840x2400 classic blue bloom image
img50.jpg: 560x350 composite photo triptych

C:\Windows\Web\Wallpaper\Sunrise

Reworked versions of the sunrise scene from img102 listed earlier. Each one of the four images here is slightly different:

img28.jpg: 3840x2400 sun on horizon
img29.jpg: 3840x2400 different shoreline, clouds
img30.jpg: 3840x2400 different sun render
img31.jpg: 3840x2400 different shoreline, sun render

C:\Windows\Web\Wallpaper\Windows

Both files here are the same as those in the default wallpaper directory up top. Filenames are shorter (but reference the same image numbers). They are:

img0.jpg: 3840x2400 classic bloom (light background)
img19.jpg: 3840x2400 classic bloom (dark background)

And that’s it for the Windows 11 wallpapers. You can use this as an inventory to show you what’s there, or as a roadmap to go find things for yourself. Cheers!

Facebooklinkedin
Facebooklinkedin

Cloud File Service Update Secrets

If you read my Windows musings with any frequency, you know that I’m constantly patrolling my PCs to check for updates, patches and fixes. One thing I’ve been noticing lately is that updates for cloud based file services can be tricky. In response, I’ve been cataloging cloud file service update secrets. Let me explain…

What Makes Cloud File Service Update Secrets Useful?

In working with numerous law firms, publishers, and software companies, I find myself using various file services to exchange large chunks of digital stuff. These are usually ZIP files bigger than 25MB (the top end on email attachment size in many SMTP servers). Simply put, they provide a way to move lots of project files around. Most also offer enhanced authentication and security capabilities.

The following table addresses the various cloud file services I use, with some additional information. I’ll walk through things below.

Provider Name Trick
Google Google Drive No
Box Box Drive Yes
Dropbox Dropbox Yes
Microsoft  OneDrive Yes

Column 1 identifies the maker, 2 names the cloud file service, and 3 indicates if an update trick is required (Yes) or not (No). Notice that 3 of my 4 all require “tricks” for update. That mostly has to do with how often they update their software, and how often they push those updates to users.

Updating Box

Box itself describes the whole drill in detail at its support article entitled “Installing and Updating Box Drive.” The Windows TLDR version is: Right-click the Box icon in the TaskBar notification area; if an Update entry appears in that menu, click same. The following notification appears:

Click Update Box Drive and you’re done. If this doesn’t work, you must uninstall Box, visit the Box Download page, click the download button, then reinstall. Then you’ll be caught up. Easey-peasey, pretty much. But I’ve had to intervene with remove-replace manuevers several times over the past couple of years.

Updating Dropbox

The support article here is entitled “Update to the latest version…” As with Box, right-click the Dropbox icon in the Taskbar notification area. Check notifications. If an update is pending that hasn’t yet been applied, you’ll find an update button there. If you don’t see such a button, this is where things get interesting. You may not find the latest version at the download page. Here’s the trick: you need to visit the Dropbox Client Releases page instead, where you’ll want to grab the one near the top labeled “Stable Build” with the highest release number. You can simply install this without having to uninstall beforehand (this installer is smart enough to update an existing install if it recognizes one).

Updating OneDrive

Most of the time, OneDrive updates itself automatically as part of a Windows OS install and/or Office install/365 subscription. Some-times, you may have to intervene to get it working. This Business Insider article takes you through those steps in detail. Right-click the OneDrive icon in the Taskbar notification area, click Settings, then About. The OneDrive version entry comes up as a link. Click that link and you’ll open the MS OneDrive release notes page. Download and install the link at the intersection of Latest release build (left) and Production ring (above) and you’ll be good to go. As with Dropbox, the OneDrive installer is smart enough to update an existing installation if it finds one.

No More Secrets?

I have no more update secrets to share for cloud file services. That’s because these are the only ones I’m using. I’m sure, were I using more, I would have more secrets to share. But looking for the maker’s “how to update” support page is a good place to start, after which third party sources may shed additional light. Good luck with your own update secrets in that regard. Cheers!


Facebooklinkedin
Facebooklinkedin

AI Support Shows Up in Task Manager

After recent updates to Office on Windows 10 and 11, AI support shows up in Task Manager. It’s in a process named “ai.exe” of which you can see four instances in the lead-in graphic. That comes from my Windows 10 production desktop, but you can also see this running in Windows 11 versions as well.

That said, this facility comes from Office, not OS, upgrades. That means it won’t show up on PCs that aren’t running Office 365 or newer standalone versions. Nevertheless, I find it interesting that MS is moving AI into its own processing environment away from the executables for individual office components (e.g. Word, PowerPoint, Excel, Outlook, Teams and so forth). In fact, I’m guessing that the reason I see four instances in Task Manager reflect recent use of all four of those components recently on this very PC.

What AI Support Shows Up in Task Manager Says…

It tells me that MS is really getting serious about supporting AI throughout its application stack. I have to presume that support in the OS itself won’t be too far behind. Yesterday’s announcement that new Surface devices will support Neural Processing Units (NPUs) to speed AI workloads therefore comes as additional confirmation. To me,  this represents a shift in the kinds of things that OSes and apps can do, and handle, as part of normal operations. AI is here, and it’s not going away.

Read more about what’s going on here in this Windows Latest story dated April 10. It’s got much more detail about the processes, folders, and executables that have recently popped up in Windows 10 and 11. Personally, I find it fascinating, and hope to see tangible impacts in my work with Office apps soon. So far, after a six-day stretch during which I’ve worked in Word all day long (8 hrs +) I haven’t really noticed anything… But here’s hopin’, right?

Facebooklinkedin
Facebooklinkedin

Weird Windows 10 Winget Timeout Error

OK, I’m mystified by this one. Running through the usual update checks this morning, I noticed Winget was taking longer than usual to complete on my Windows 11 PCs. And when I checked my production PC, I got the weird Windows 10 Winget timeout error you see in the lead-in graphic. In fact, I ran it twice and got the same error both times. So I jumped over to my sole remaining other Windows 10 PC. While it also took longer than usual to complete, it did so successfully. What gives?

Weird Windows 10 Winget Timeout Error Is Opaque

What’s interesting — to me, anyway — is that I can’t find any useful information on how to fix this error. My most productive search string is “winget upgrade timeout.” Even so, I don’t see anything useful about this error nor how to fix it. Ditto for a search on “winget upgrade failed when searching source.” Interesting!

I just ran it again on the production PC and got some output (the manifest progress bar showed, then went blank, and the timeout error popped up again). I suspect some issue involving communication with the MS Store is also involved because “msstore” is identified as the source. That said, I access the Store app and update there without difficulty (though it, too, took longer than usual).

I just filed a Feedback Hub item. I’ll be interested to see if this gets a response. And that’s how things go in Windows-World sometimes. Stay tuned: this one might fix itself…

Note Added Early Afternoon

After noodling about on this for a bit, I found a PowerShell script at GitHub to install Winget afresh. I ran it, it reported success. But there’s no change to the timeout error. Resolution may have to come from elsewhere. We’ll see…

Note Added April 23 AM

OK then: winget is working once again, on all machines. As Pink Floyd once put it: It was apparently just “A Momentary Lapse of Reason.” Glad to have things working again. Wish I knew why they broke in the first place. But these things happen, here in Windows-World.

Facebooklinkedin
Facebooklinkedin

PowerShell Update Oddity Version Confusion

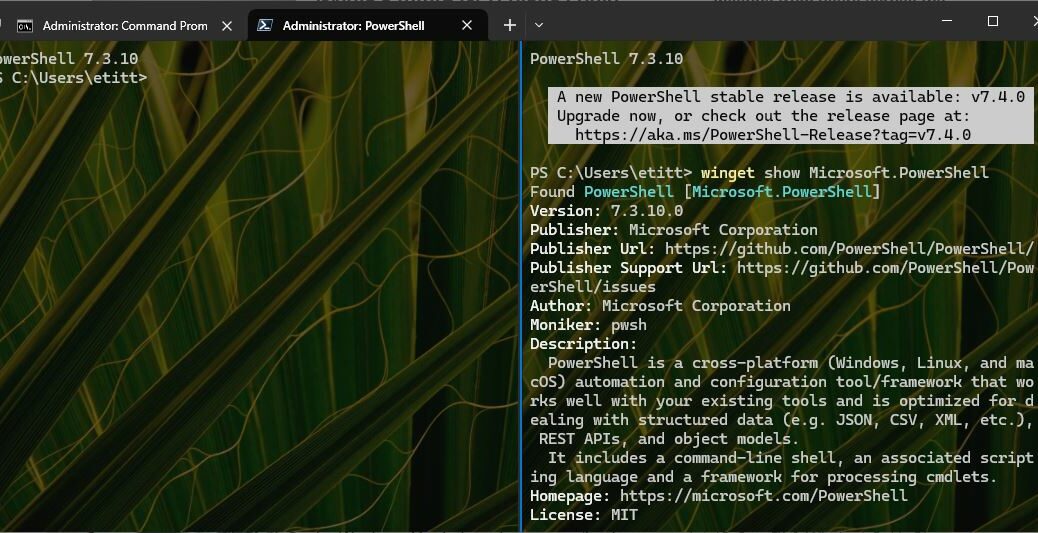
I’m flummoxed. I just upgraded PowerShell from version 7.3.3.0 to 7.3.4.0. It’s the latest stable version, as you can plainly see at GitHub. But even after updating, that preceding version still shows up using winget list powershell. An explicit uninstall request reports “No installed package found matching input criteria.” Hmm; WTF? I can only call this a PowerShell update oddity version confusion problem!

If you look at the left-hand tab in the lead-in graphic, you’ll see two versions of Powershell, one numbered 7.3.3.0 and the other 7.3.4.0. But when I try to uninstall the older one, winget can’t find it. And indeed when I try to open it in the right-hand tab, it comes up at the current (latest) version. I’ve seen something like this before, so I start thinking about causes and workarounds. Read on to see how I resolved this one…

Resolving PowerShell Update Oddity Version Confusion

I’m of the school that says if you can’t do it one way in Windows, you can almost always find another. If I poke around in my file system searching on “pwsh.exe” (the name of the powershell executable file), I see an app-based instance of the 7.3.3.0 version in ProgramFiles\WindowsApps. And sure enough, inside Settings → Apps, I find three (count ’em) versions of PowerShell. Here’s a snap:
AFAIK, I only need the middle one, so I right-click to uninstall the other two. When I’m done, I check Windows Terminal, and it tells me I need to reset my default profile. I do, and choose version 7.3.4.0. When I open a new Terminal window and run winget list powershell again, it shows only a single (and correct) version. Problem solved!

Now, all I have to do is figure out why the winget uninstall didn’t work, but a manual uninstall inside the Apps widget in Settings did the trick. I’m gonna have to think about that for a while… Stay tuned!

Facebooklinkedin
Facebooklinkedin

No Windows 11 Presence Sensing Here

I read, with some amusement and a sense of inevitability this morning  about a new Windows 11 feature. The latest Windows 11 Beta release (Build 22624.1610) supports presence sensing. Of course, special PC hardware augments are required. Apparently I have no PC new or advanced enough for this. Alas, no Windows 11 presence sensing for me!

What No Windows 11 Presence Sensing Means

If I remember correctly the notion of “presence” comes from computer telephony. It means the user is present and in front of the device (PC, in this case). Presence data helps guide whether or not requests and data go to users who’ve registered for specific conferences, events, and so forth. If they’re present, they’re included; if not, they’re not. And also, presence detection can work with Windows Hello (via IR camera sensing) to determine if a user is in front of the PC, to handle login and access.

My Lenovo P16 Mobile Workstation is pretty good at visual recognition. It’s also a mid-to-late 2021 vintage PC. Thus, I’m surprised that it apparently does not support Windows Presence. How do I know? There’s no “Presence sensing” entry in Settings → Privacy & Security → entry on that PC (or any of my other machines). Sigh. Why is that when MS announces a new Windows feature, I either don’t have it in the build, or it’s not supported on my PC? I guess it’s just a consistent turn of (ill) fate for yours truly.

I’ll see if I can remember to ask Lenovo to make sure this feature is present (pun intended) on my next eval unit. If so, I can check it out. If not, I don’t think it will kill me.

And so it sometimes (or often) goes, here in Windows-World. Stay tuned for news about other new stuff I don’t (or can’t) have. I’ll keep you posted.


Facebooklinkedin
Facebooklinkedin