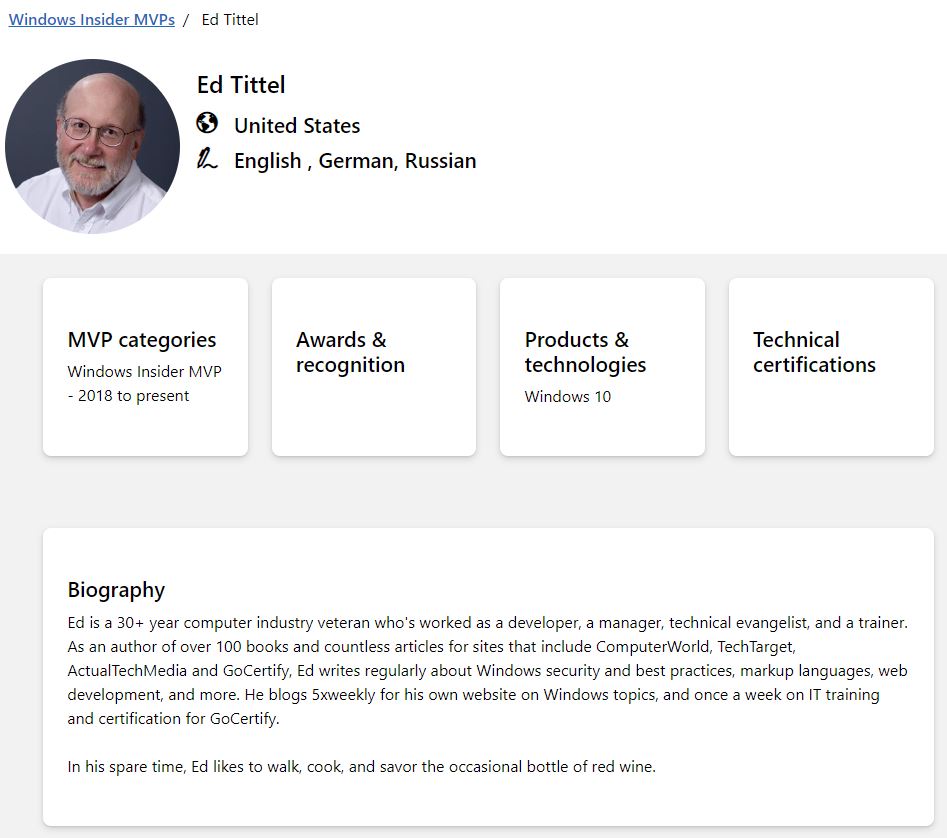
All posts by Ed Tittel

Full-time freelance writer, researcher and occasional expert witness, I specialize in Windows operating systems, information security, markup languages, and Web development tools and environments. I blog for numerous Websites, still write (or revise) the occasional book, and write lots of articles, white papers, tech briefs, and so forth.

Windows 11 22458 Enforces TPM Support

On September 15, MS released the new Insider Preview Build 22458 into the Dev Channel. Widespread reporting indicates that the build won’t install on target PCs that don’t meet Windows 11’s TPM requirement. Thus, it’s fair to say that Windows 11 22458 enforces TPM support. In other words, that build won’t install on older PCs unless the user resorts to one of the well-known workarounds documented to bypass this limitation.

Indeed, for PCs already in the Insider Program, a visit to Start → Settings → Update & Security → Windows Insider Program will recommend against making such an attempt. This warning appears as the lead-in graphic for this story. It comes from my Surface Pro 3, whose 2013-vintage 4th generation CPU and lack of TPM 2.0 support put it outside the scope of Windows 11 requirements.

Were I to try it on that machine anyway, I would get an error message and my attempt to install 22458 would fail. Here’s a snip from WinAero.com that shows what this would look like:

Windows 11 22458 Enforces TPM Support.no-tpm

Without TPM 2.0 support, the latest Windows 11 Build 22458 won’t install. Workarounds remain possible, however.

If Windows 11 22458 Enforces TPM Support, Then What?

I’m playing things straight. The PCs I can’t upgrade to meet Windows 11 requirements will stay on Windows 10. The Surface Pro 3 is a great example. Most of my fleet already meets those standards. I’ve got one more PC — my production desktop — to upgrade to match those requirements. I’m going to try to get it done this weekend.

But for those who don’t mind — or outright enjoy — flouting MS requirements, there are workarounds based on ISO installs and registry hacks that bypass the TPM and other hardware checks. MS recommends against such tomfoolery and warns those who indulge that future security updates may not be provided for out-of-spec machines. That isn’t stopping a lot of folks, as the “Let’s run Windows 11 on … incompatible hardware” thread at Elevenforum.com clearly indicates. To these brave stalwarts I say “Have fun, but keep a backup handy, and be ready to roll back to Windows 10 when and if that’s needed.”

Facebooklinkedin
Facebooklinkedin

Dual NVMe Enclosure Supports RAID

Whoever built this product clearly saw me coming. After upgrading both of my older desktops, I find myself looking for ways to use their now-idled NVMe drives. One is a Samsung OEM 512GB NVMe from the 2014 vintage PC, and the other is a Samsung 950 EVO 1TB NVMe from the 2016 model. As it happens, Sabrent has an offering for just that. In fact, its dual NVMe enclosure supports RAID, too.

What Dual NVMe Enclosure Supports RAID Means

Thanks to built-in RAID support,  this enclosure offers faster throughput than a single-drive configuration. It even handles Thunderbolt, so I can use it in my newer docks and on my newer laptops and desktops. At a list price of US$249 my initial though was: “Ummm. No!” But after I visited the Amazon page and saw it was marked down to US$149 (about double the price of two phantom-powered Sabrent Thunderbolt 3 NVMe enclosures) that response changed to “Ummm. Yes…”

The specs claim speeds up to 1,500 MB for single drives, but up to 2,500 MB for drives in RAID configurations (I’m guessing that means striped or mirrored, rather than JBOD). Watching some of the videos that Sabrent provides on how to set things up, my guess is confirmed.

Should I Take the Plunge?

Now, I have to decide if I want to further raid the exchequer to cover an additional US$149 outlay, on top of the ~US$1,300 I’ve already spend to get my production desktop hardware refresh funded. I’ll have to chew on this for a little while, and perhaps ask “the Boss” for permission. Should I indeed buy into this device, I’ll review it in a future blog post.

In the meantime, I must consider how deeply I feel like digging into available funds right now. That’s a perennial problem for hardware junkies like myself, and one I’ve wrested with before. Stay tuned: I’ll keep you posted.

Facebooklinkedin
Facebooklinkedin

USB-3/C Header Cable Mystery

OK then. I’ve got the parts for my second hardware refresh. I now understand I may have been rooked. The Asrock B550 Extreme4 mobo comes with a perfectly serviceable 19-pin USB 3.1/3.2 header block on the motherboard, but no cable to match. And upon looking around, I find precious few such cables available at any price. To me, this poses something of a USB-3/C header cable mystery. It’s a mystery I’d like to solve before I start building.

Solving USB-3/C Header Cable Mystery

The situation raises an interesting question: should such cables come with the mobo or the case? In my case (pun intended) I’m recycling something that predates USB-C and USB 3.2/Thunderbolt 3 or higher. Thus, I’m purchasing the 5.25″ drive bay plug-in shown in the lead-in graphic. It needs a 19 (sometimes called 20) pin connector to get from the mobo header to the front panel device.

Thing is, I can’t tell if the device includes any cables or not. I can tell, having just checked, that the Asrock mobo includes no cables except for some SATA cables for hooking up such drives. To span the distance from the front panel to the back of the motherboard, it looks like I need to buy 3 (!) 15 cm cables to be sure to get from the bottom and back of the case to the top and front. Sigh.

When in Doubt, Spend More $$$

Just to be safe, I’m going to order the cables along with the front-panel device. If that device includes cables I’ll be sure to email Amazon to get them to update the product info. It’s currently silent on that all-important subject (to me, anyway).

And indeed, these are the kinds of conundrums that face people like me trying to refresh hardware in anticipation of meeting Windows 11 hardware requirements. I can’t see any point in having an unused high-speed USB header on my motherboard without making those ports easily accessible. Stay tuned: I’ll let you know how it all turns out.

Facebooklinkedin
Facebooklinkedin

Chrome Software Reporter Tool Monopolizes CPU

After upgrading my Lenovo X12 Hybrid Tablet to Windows 11 Build 22454 , I noticed CPU usage stayed elevated. For a long time, in fact: at least 5 minutes or longer. Checking Task Manager the culprit was obvious. Item software_reporter_tool.exe consumed half or more of available CPU cycles. Upon further investigation, I learned two things. (1) plenty of other people have experienced this. (2) it’s a part of Chrome’s Cleanup toolkit, designed to remove software that could cause potential issues with Chrome. Having just rebooted, Chrome wasn’t even running. But that apparently didn’t stop its background tasks from executing. And that, dear readers, is how I learned that sometimes the Chrome Software Reporter tool monopolizes CPU on Windows PCs.

Do This When Chrome Software Reporter Tool Monopolizes CPU

I found an article from Martin Brinkmann at Ghacks.net about this phenomenon dated January 2018. It provides a battery of potential fixes. These include a variety of blocking techniques based on file permissions, and Chrome policies (via registry hack). I actually found a 2020 Codersera article that offered a more direct approach.

It’s the one I implemented, and it’s working well so far:
1. Open Chrome controls (vertical ellipsis symbol at upper left of browser window).
2. Click “Settings” resulting pop-up menu
3. Click down-arrow next to “Advanced” near bottom of that window.
4. Scroll down to “System” section and turn off item that reads “Continue running background apps when Google Chrome is closed” (move slider to left).

That should do it. At least, it seems to have worked for me: I haven’t seen any recurrences since I made this configuration change.

When Odd Processes Stand Out, Research Helps

This technique is a familiar one to those keep an eye on Windows performance. It’s often a good way to start digging into slowdowns like the one I ran into last week. I generally try to rely on well-known and -respected resources when it comes to fixes (if not the maker or vendor’s own tech support info). But usually, when there’s a will to fix such things, a way to fix them can be found.

If worst comes to worst (and I have a recent backup) I might even right-click the offending process and select “End process tree” to see what happens. Please note: don’t do this with Windows OS components, or you’re likely to experience a BSOD. ‘Nuff said.

Facebooklinkedin
Facebooklinkedin

Windows 11 Keeps Strange Component Store Cleanup Behavior

Since June 28, Windows 11 has been available  to Insider Preview program participants. Those willing to devote a VM or PC to running the new OS may do so. Needless to say, I’ve got it running on multiple PCs (2 Dev Channel, 1 Beta Channel). As I’ve been getting to know the latest OS version, I noticed that Windows 11 keeps strange component store cleanup behavior. Let me explain…

What Windows 11 Keeps Strange Component Store Cleanup Behavior Means

Check out the lead-in graphic from this story. It comes from PowerShell v7.1.4. It shows results after running a specific command –namely DISM /online /cleanup-image /analyzecomponentstore under a special set of conditions. One: the target PC has recently had a Cumulative Update (CU) installed. Two: the target PC has not been rebooted since that install occurred.

If you look at the image, you’ll see there’s a progress line that ends at 10.0% (above). A second progress line shows 44.2% complete on its way to the 100% mark. Believe it or not, Windows 10 also shows this very behavior. I’d kind of hoped that MS would have noticed, and made sure that Windows 11 didn’t manifest the same. As the screencap shows, apparently not.

If you reboot the PC after installing the CU, this doesn’t happen. Either way, component store cleanup proceeds as it should and gets rid of no-longer-needed backups and disabled features.  Here’s what the whole thing looks like on my Lenovo X380 Yoga Beta Channel test machine:

Windows 11 Keeps Strange Component Store Cleanup Behavior.entire

[Click image for full-sized view.]

Notice that the initial “analyze” shows 7.94 GB/7.52 GB as the reported and actual size of the component store before cleanup. After cleanup (bottom of screencap) those numbers drop to 7.06 GB/6.81 GB for a savings of 0.88 GB/ 0.71 GB from the 2 reclaimable packages cleaned up during the process.

It’s Only a “Flesh Wound”

To recall the famous gag line from the Monty Python and the Holy Grail, with all apologies due to the artistes, this little oddity is neither terribly worrisome nor significant. That said, I do find it interesting that at least some of the eccentricities present in Windows 10 persist into Windows 11 as well.

Please post a comment here, or send me an email through my contact form if you know of any other Windows 10 oddities that carry over into Windows 11. Inquiring minds want to know, mine most definitely included.

Facebooklinkedin
Facebooklinkedin

Trick Restores Missing Chrome Scrollbar

OK, then. Here’s an oddity for my fellow Tenforums users (and possibly other heavy Chrome users). In navigating the forums there daily, I jump from forum to forum in order of appearance. Within each forum I read over new threads, as well as old threads with new content. Sometimes when I use the “Previous Thread” link at the bottom of each page to get to the next oldest item, that page comes up without a vertical scrollbar at the right-hand edge. Recently, I discovered that a certain trick restores missing Chrome scrollbar. Let me explain…

What Trick Restores Missing Chrome Scrollbar?

For a long while when the scrollbar disappeared I would switch between normal window and maximized window using the control at its upper right corner. When the normal window appeared, it would always have a scrollbar. And when I reverted to the maximized (full-screen) version, it would get its scrollbar back. This was a viable workaround, but a little too distracting to please me.

The trick I discovered last week is to use the down arrow to move the cursor deeper (downward) into the open web page. After the screen has to refresh to accommodate more new content at the bottom, the scrollbar also reappears. This takes little time, and is nowhere near as distracting as the two mouseclicks needed to revert to normal page size, then go back to full-screen mode. If you ever find yourself in this situation, try this approach. As it now works for me, it may do likewise for you.

What’s Causing This Bizarre Behavior?

I’m working on a dual-monitor rig. I run Chrome in the left-hand window with desktop extended across both monitors. My best guess is that sometimes, when I transition from one page to the next, the maximized view somehow “eats” the vertical scrollbar at the far right of the screen. Here’s what my layout looks like in Settings → System → Display.

Trick Restores Missing Chrome Scrollbar.display

With a Chrome windows on display 1 maximized, its right edge might sometimes impinge on display 2 territory.

Such is my theory, anyway. That said, I’m glad to have found a quick and easy workaround that keeps me chugging along without interrupting my concentration or workflow. These are the kinds of adjustments and adaptivity one must practice to do one’s job, and get things done, here in Windows-World.

Facebooklinkedin
Facebooklinkedin

New Windows 11 Requirements Check Tool Available

It’s not just “yet another Windows 11 requirements check tool.” Prosaically enough that’s how it’s named, though. But with this new Windows 11 Requirements Check Tool available, curious PC users can get more insight into their upgrade situations. The tool is available from ByteJams.com a site/author I hadn’t run into before. But thanks to Martin Brinkmann at Ghacks.net I’m reasonably comfortable using — and recommending — this tool.

Where Is New Windows 11 Requirements Check Tool Available?

Looks like the site is based in Europe, possibily in the Netherlands (see this NSlookup output). The home page includes reasonably complete Release Notes (bottom of page) that show 9 releases in the period from July 21 through September 8 (that’s today, as I write this item). That latest version is numbered v.1.1.0 at present.

The tool resides in a standalone executable file named Win11RCT.exe. It is 647 KB in size (File Explorer value). It runs extremely quickly and is easy to use (no installation required). I like it more than any of the three such tools I covered yesterday — namely, Microsoft’s PC Health Check Tool, JB Carreon’s Win11CompChk.bat script, and the GitHub WhyNotWin11 project. I’d put the MS tool and WhyNotWin11 tied for second place now.

What Win11RCT v1.1.0 Has to Say

The tool goes through all of the Windows 11 hardware requirements. It reports on minimum requirements (upper portion of output, as shown in lead-in graphic), and on feature specific requirements (lower portion of display). Among other things, the tool informed me that the  Samsung NMVe driver is not Windows 11 compatible, and that the generic MS “Standard NMVe Express Controller” must be present to support DirectStorage (I was unaware of this, as some readers here may also be likewise unaware).

Interestingly, I also observed one downside for running the tool via RDP. It reports on display characteristics for the RDP output rather than the built-in or primary device monitor. That said, it does mention the built-in display as you can see under the minimum reqs “Display” field as “3840×2160, 15 inch” (which does meets HDR requirements, FWIW).

At the moment, I’d recommend Win11RCT.exe as the best of the bunch. Be sure to check it out. Thanks, Martin!

Facebooklinkedin
Facebooklinkedin

Checking Target PC Windows 11 Readiness

I’ve found 3 tools useful in checking my PCs — mostly laptops — to see whether or not they’ll run Windows 11. When it comes to checking target PC Windows 11 readiness, I turn to one of:

1. Microsoft’s PC Health Check* (re-released August 30). Its output serves as the lead-in graphic for this story from my 2018 Lenovo ThinkPad X1 Extreme (8th gen i-7 CPU, etc.)
2. GitHub project WhyNotWin11
3. GitHub/ElevenForum project Windows 11 Compatibility Check

Please note: Microsoft’s tool is currently available only to registered members of the Windows Insiders program. Knowing that some readers may not want to register simply to get the tool, I also provide links to the other two as alternatives.

Checking Target PC Windows 11 Readiness Is Easy

PC Health Check is the only one of the three that needs installation. It downloads as a Microsoft self-installing file (extension: .msi). Of the other two tools, one runs straight from the executable download (WhyNotWin11.exe). The other consists of a batch file named Win11CompChk.bat: it runs in an administrative command prompt.

Of these three tools, all do an adequate job or better. Were it not for the Insider program membership requirement, PC Health Check would get my highest accolades. That status won’t last long though: it should soon go into general release (probably no later than the official GA date for Windows 11 itself, October 5).

Right now, WhyNotWin11 gets my top vote because it requires no installation, runs quickly, and delivers accurate results.

Win11CompChk.bat has a few rough spots still, but experienced users can steer around them pretty easily:

  • For one thing, it treats support for WDDM 2 as a must-have (it’s only required for those who want to wirelessly project to an external monitor).
  • For another thing, it won’t pass Secure boot capable systems unless secure boot is turned on (both other tools pass systems, whether or not secure boot is enabled or disabled, so long as it’s present).

Be sure to check them out, and see which one(s) you like best. Cheers!

Facebooklinkedin
Facebooklinkedin

Windows 11 Dev Channel Goes Nickel

Just yesterday, September 2, the MS Windows Insider team re-forked the Beta and Dev Channels for Windows 11. The Windows 11 Dev Channel goes Nickel. Thus, it picks up a new release branch where experimental features not tied to specific upcoming releases can be exposed and explored. Note the major Build number in the lead-in graphic. It jumps to 22449, far ahead of other build numbers of any sort.

The Beta Channel, on the other hand is still tied to 21H1 and Build 22000.  As the upcoming Windows 11 release date — October 5 — edges ever closer, that should remain constant. Beta will be the focus for bug hunts and ongoing fixes. The run-up to that GA date (32 days away as I write this story) should be interesting.

Finally, these two release forks now diverge. I predict Beta will continue to track “the next, upcoming Windows 11 release.” Dev will show us what’s possible but not inevitable for future releases .

When Windows 11 Dev Channel Goes Nickel, What to Expect?

MS has already warned Insiders about future Dev channel releases. They will be less stable and more subject to gotchas and bugs. The 22449 release blog says (emphasis mine):

These builds are from the earliest stage in a new development cycle with the latest work-in-progress code from our engineers. These aren’t always stable builds, and sometimes you will see issues that block key activities or require workarounds while flighting in the Dev Channel. It is important to make sure you  read the known issues listed in our blog posts as we document many of these issues with each flight.

And please: if you participate in the Dev Channel, I urge you to follow Microsoft’s advice. That is: “read the known issues” as each new upgrade emerges. More than once, I’ve been bitten because I jumped first, and read the issues list second. Thus, I’ve learned from first-hand experience, little of it positive, to heed that warning.

I’m glad to see this happening. I look forward to what emerges in  Dev Channel releases going forward. That’s why I joined the Insider Program to begin with. It’s why I look forward to bashing bugs, reporting (and learning from) issues, and making things work. For some of us in Windows-World — including me — this passes as entertainment!

Facebooklinkedin
Facebooklinkedin

Managing Windows 11 Defaults Gets Tricky

Oho! I just learned something interesting from Martin Brinkmann over at Ghacks.Net. It seems that in Windows 11, MS has re-jiggered the way default application selection works. In Windows 10 one could grab an application and associate it with all typical file or link types in one go. Alas, managing Windows 11 defaults gets tricky, because you must now choose them one at a time.

MS also supplies various defaults by default so to speak, which explains why Microsoft Edge shows up so persistently when opening web-related file types. Thus, for example, I count 22 such entries in Settings → Apps → Default apps → (Browser name here). I chose Google Chrome as my example in the lead-in graphic above. If you really want to make Chrome the overall default, you must jump into each of the 22 associated file or link types and pick Chrome from the pick list for each one.

Why Say: Managing Windows 11 Defaults Gets Tricky?

Maybe I should have said “labor intensive” instead. But “tricky” makes for a more compelling headline, so I’ll admit to taking just a wee bit of artistic license here. Truth is, as long as you know that this is how Windows 11 works, it’s the kind of thing you need to do once for those applications you want to make default when Microsoft supplies something different. This takes time and a little effort, but it’s not the end of the world as we know it by a long shot.

I’m hoping Nir Sofer reads this blog post, though, and whips out a Windows11Default tool to help automate this task. Seems like it should be fairly straightforward for someone with the right understanding of Windows internals to make this happen. I see a fascinating thread on this topic in the Spiceworld Forums that explains that GPOs and an XML file can do the trick. I’ll be noodling around with this for a while and see if I can figure something further out. Hopefully, Windows 11 and 10 work the same way in this regard. Stay tuned, and I’ll find out…

Facebooklinkedin
Facebooklinkedin