All posts by Ed Tittel

Full-time freelance writer, researcher and occasional expert witness, I specialize in Windows operating systems, information security, markup languages, and Web development tools and environments. I blog for numerous Websites, still write (or revise) the occasional book, and write lots of articles, white papers, tech briefs, and so forth.

22H2 Moment4 Brings Back ReFS

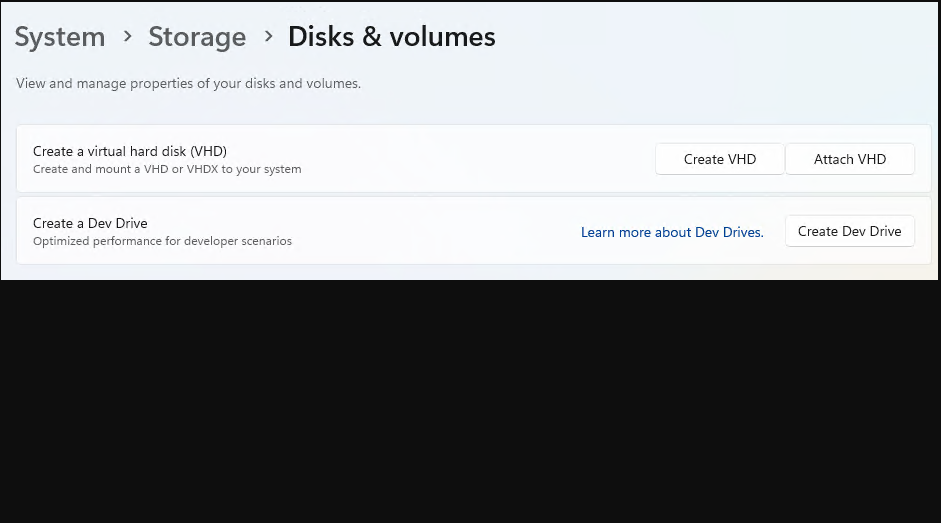
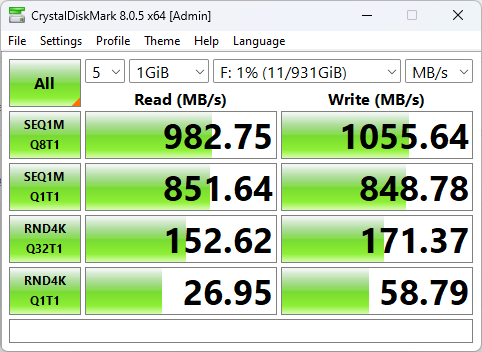
For a long time, Windows desktop access to the Resilient File System (aka ReFS) was limited and iffy. Introduced in Windows Server 2012, facilities to create ReFS volumes were dropped from Windows 10 1709. (Exceptions: Enterprise and Pro for Workstation editions). In Windows 11, AFAICT, it’s been a thing only in Enterprise Insider Preview builds — until now. With this week’s Update Preview, 22H2 Moment4 brings back ReFS. The lead-in screencap comes from one of my Windows 11 Pro test PCs, in fact. Check it out!

How 22H2 Moment4 Brings Back ReFS

It does so in the context of the Dev Home utility in Windows 11. This app provides scaffolding to support a range of developer functions in the OS. These include widgets, access to GitHub projects, and — you guessed it — the ability to create a “Dev Drive” which can be formatted using ReFS. That’s what you see in the lead-in screencap.

One of the major options in Dev Home lets users create this so-called Dev Drive. It looks like this:

When you click the button, it puts you in into Settings → System → Storage → Disks & volumes. If you click Create Dev Drive again there, you’ll find various options. You can create a new VHD, resize an existing volume (to reclaim space for a new one) or possibly allocate unused disk space (only if available). In my testing, I elected to resize my existing volume boot/system volume.

MS Claims a Speed Advantage…

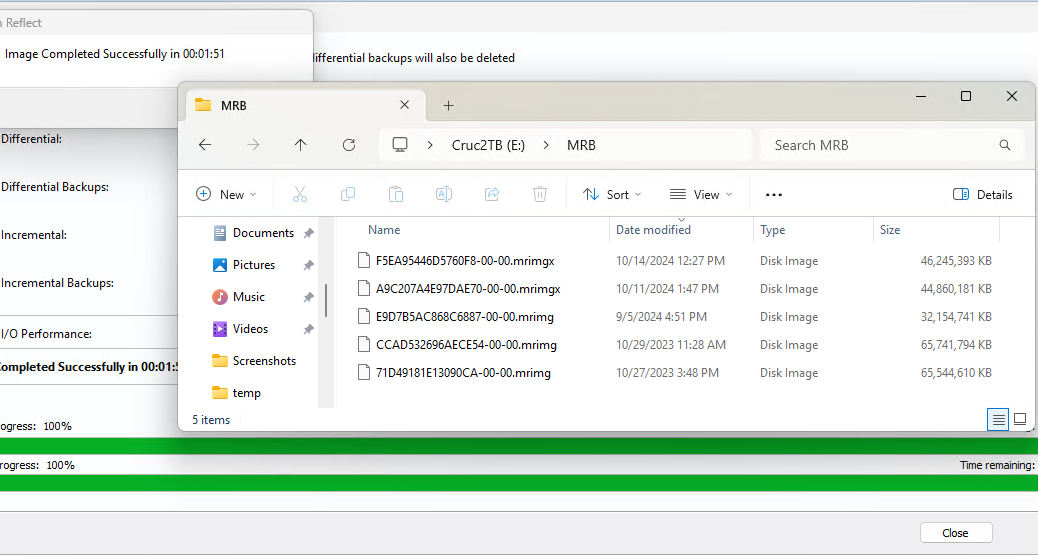
In its description of dev drives, MS claims to “improve performance for key developer workloads” (see this blog post for a chart of comparisons with NTFS). In my own experience, it was pretty remarkable. It took less than 2 seconds to copy a Windows 11 ISO (~4GB in size) from an external TB4 NVMe SSD to the new ReFS volume. Mighty quick!

I’m going to have to play around with this to really understand how it works and peforms, but so far it’s an interesting toy. And it’s also nice to see ReFS make a comeback into the broader reaches of Windows 11. Try it out for yourself!

Facebooklinkedin
Facebooklinkedin

UUP Dump Shenanigans Ongoing

Just over a month ago, I reported that UUPDump.net was going down on a more-or-less regular basis. I’m sorry to follow up and say that UUPDump.net is now completely off the air. It had been supplanted by UUPDump.ee. But that’s apparently off the air, too. Right now, there’s an apparent mirror or clone site up and running at www.uup.ee that keeps Windows images available. With these UUP Dump shenanigans ongoing, “How long?” is an open and valid question.

As an experiment, I ran the script for a Windows 11 Pro ISO for Build 22621.2338 (Insider Preview, Beta Channel). It completed, but I need to test it by performing an in-place repair install on the target PC. In the meantime, I’m left wondering about all this up-and-down and site-hopping activity. The lead-in graphic shows output from near the tail end of the ISO creation process.

What UUP Dump Shenanigans Ongoing Means

I have long admired the work and insight that goes into letting UUP Dump do its thing. It’s been an invaluable resource for me and the Windows community ever since I started working with Kari the Finn on Win10.Guru in 2018 or thereabouts.

But now, I’m growing increasingly reluctant to recommend this as a resource to others. It’s simply gotten a little too flaky to trust completely. It’s definitely become more of a “Use at your own risk” kind of thing, even as it continues to do what it has always done.

Wouldn’t it be great if MS took this over, or provided sponsorship funds for the UUP Dump crew’s obviously strained resources? Shoot! I’d be willing to pay US$25 to 50 a year to support their efforts. But I don’t see any way to do that, either. Sigh.

Note Added 4+ Hours Later

After posting a query to ElevenForum.com, uber-user @Bree responded with some great information. Seems that the UUP team is now focusing their efforts on the UUP Dump channel on Discord, and on an app named uupdump.7z. So I’m digging into that info, and will write about it in a future blog post. Looks like it takes the process local, instead of relying on a server to support it. Could be good!

Facebooklinkedin
Facebooklinkedin

DevHome Update Hiccup Deciphered

On those test PCs where I’ve got Microsoft DevHome installed, i noticed an update issue last week. The lead-in graphic shows a failure when a dependency install for WindowsAppRuntime bombs out. So when I saw this MSPowerUser story about a new version, I found my DevHome update hiccup deciphered at last.

Getting to: DevHome Update Hiccup Deciphered

In light of a new version with different capabilities, my workaround for this problem also makes perfect sense. I tried uninstalling DevHome using winget. However, a leftover remained in “Installed Apps” — where, curiously enough, the uninstall button is greyed-out and inaccessible. Indeed, neither the Repair nor Reset buttons changed things at all. Interesting.

DevHome Update Hiccup Deciphered.notrepair

The button I want (uninstall) is inaccessible. Sigh.

A Curious Fix Emerges

I went ahead and restarted the affected test PC (one of my 2018 vintage Lenovo ThinkPad X380 Yogas). After restarting, it updated the Windows Store apps — of which Dev Home is one. It shows up as the most recently updated item (“Modified minutes ago”) under the Library tab.

And guess what? Running winget upgrade again, post-reboot, shows nothing in need of update. This tells me that when winget finds Store apps in need of updates that it can’t handle itself, running updates through the Store can fix what ails them. I’m not sure the reboot was necessary. But gosh: it sure looks like the “Get updates” function in Store did the trick. Extremely good to know!

Facebooklinkedin
Facebooklinkedin

P1 Gen 6 Post-Sleep RDP Fail Fixed

I’m still breaking in the Lenovo P1 Gen 6 Mobile Workstation here at Chez Tittel. It’s pretty much where I want it right now. Indeed, its 13th-gen Intel i7-13800H 20-core CPU is nothing less than awe-inspiring. This week I had enough spare bandwidth to notice that while I could easily remote into the unit right after a reboot, it became unavailable to RDP after falling asleep. As soon as I disabled sleep while plugged into A/C power, I found this P1 Gen6 post-sleep RDP fail fixed. The corresponding Power & Battery Setting shows in the lead-in graphic above.

Getting to P1 Gen 6 Post-Sleep RDP Fail Fixed

Fixing things was the easy part. Figuring out what was wrong took a while. I was able to ping the unit’s LAN address, but Remote Desktop Connection (and the Remote Desktop app) stubbornly refused to let me access the PC.

Having been down this road before with other PCs, I soon realized that:
(a) RDP connections worked right after any reboot
(b) those same connections quit working after waking from sleep
I don’t know what it is about PC sleep behaviors but they can sometimes be mysterious and opaque. I’m just glad the simple, obvious solution — disabling sleep on A/C power — does the trick.

What About PowerToys Awake?

This situation actually reminded me that I hadn’t yet installed PowerToys on the P1 Gen6 laptop. Having now done so, I have to believe my access issues are over with Awake enabled and on the job. Just to be doubly darn sure I set it to “Keep awake indefinitely.” Now when I try to RDP into this laptop, it should be ready, willing and able to accept that connection. Let’s see!

P1 Gen 6 Post-Sleep RDP Fail Fixed.powertoys-awake
Note added 2 Days Later: I’ve been running the P1 Gen 6 for a couple of days now without further remote access issues. Looks like the fix really is in. Good!

Facebooklinkedin
Facebooklinkedin

Update Trick Delivers Clean PS 7.3.7 Install

OK, then, Here’s an interesting way to handle the September 19 update for PowerShell, from 7.3.6 to 7.3.7. Indeed this specific update trick delivers clean PS 7.3.7 install. I’ve run into minor glitches on previous up-versions, because I was using PowerShell to update itself. It would show cancelled as its final update status, as the old runtime had to fall over to get itself out of the way for the new one.

You can see this at work in the lead-in graphic. It shows the Installer running to update PowerShell as a pop-up within the PS windows itself. In fact, it runs to completion without issues. Why? Because I closed the open default PS session and ran the PS update inside an Administrative Command Prompt session instead.

Which Update Trick Delivers Clean PS 7.3.7 Install?

Because PS essentially interferes with itself if it runs the upgrade from one version to the next, the trick is NOT to use PowerShell. That’s why I switched to Command Prompt instead, and ran the upgrade there. No strange behavior, no “Cancelled” status at the end, nothing weird at all, in fact. You can see a new PS session window at right here with the new 7.3.7 version clearly identified (the left-hand side shows the complete PS upgrade in Command Prompt):

Update Trick Delivers Clean PS 7.3.7 Install.split-window

Once the update is finished I used the Command Palette to open a PS session split-right, which shows the new version running.

I’ll have to remember this for future PS updates. I’ve just used this technique on a half-dozen test PCs and it works like a charm!


Facebooklinkedin
Facebooklinkedin

Snappy Driver Installer Worth Considering

I know. I know. Lots of Windows experts and pundits, including at AskWoody, TenForums and ElevenForum, don’t recommend or support driver update tools. That said, I find Snappy Driver Installer worth considering anyway (at least, the Origin fork). Let me recite some recent experience. Then I’ll enumerate the reasons why I’m so grateful for Snappy Driver Installer…

Why Say: Snappy Driver Installer Worth Considering

First let me explain why I’m grateful for this tool and its labor-intensive project. Almost alone among such tools, Snappy Driver installer (SDI) is open source (GNU GPL v3.0 license). Most decent driver update tools cost upwards of US$30 per year, some more than that.

Just this morning, Norton (still running it on my production PC, but I plan to bid it adieu with my next desktop build) told me I had 14 drivers out of date. It costs upwards of US$60 to add its driver scanning functions (and a bunch of other stuff, too) to its ~US$90 annual subscription fee. I’m not interested in paying more, thanks, but I was glad to learn I had some drivers out of date.

Firing up SDI for the first time is interesting because it needs more just under 37GB of driver files to offer a complete collection of stuff from which to work. Even so, the tool is smart enough to focus only on driver packs (7ZIP files of related drivers) that a target PC needs. For this target PC, that involved just a bit over 3 GB across 8 different archive files. SDI was able to handle all the out-of-date drivers on its own, in about 30 minutes (most unattended, while I did something else).

SDI Benefits and Features (IMO Anyway…)

Snappy Driver Installer is free. It’s easy to maintain a portable version on a UFD you can use for all your Windows PCs. It works with all current Windows versions (I’ve used it across the range of Windows 10 and 11 editions and builds).

For me, SDI does the job nicely and keeps my PCs current without annual subscription fees. And because I routinely shoot an image backup before mucking about with drivers, I can say no such update has ever hosed one of the PCs under my purview.

Like I said at the outset: SDI is worth checking out for yourself. You just might find it useful. Your call…

Note: For timing purposes I fired up SDI on another test PC to see how long it takes to grab the whole collection of driver packs. Right now, it’s 115 minutes in at 50% done. That means it could take as long as 4 hours to complete. It’s clocking between 18 and 85 Mbps as it runs, so it’s apparently throttled deliberately and carefully. Final runtime came in well under 3 hours (just over 155 minutes, or 2:35).

Wait! There’s more: Version forks and controversies

I got a tweet today from David Ballesteros. He let me know there are dueling versions of SDI, including the one formerly linked above (I removed it as I’ll explain). Another is called SDI Origin, which gets an interesting description at MajorGeeks.

WARNING!!! Malware is reported in the SDI fork. Thus, many online posters say — no surprise there — use SDI Origin instead. I’ve not run into any of said reported malware, adware or other potential gotchas, but my PCs are pretty armored up.

Just to be on the safe side it seems like SDIO (SDI Origin) is the best version to use. That’s why I killed the link to the other fork (but it’s easy to find online). And as I look at the filenames on my home drive for Snappy I see I wound up with the Origin version in both subfolders anyway (directory root is named SDIO).

As you can see in this properties Window, even my original exe file is named “Snappy Driver Installer Origin.” Reinforces the old saying: it’s better to be lucky than good. Phew: might’ve dodged a bullet!

Facebooklinkedin
Facebooklinkedin

Latest Soonest Windows Update Benefits

Hmmmm. When I started reading through a discussion of an upcoming Windows11 23H2 release on WindowsLatest this morning, I soon realized there was more going on than I had thought. Seems like opting into the “latest updates” option shown in the lead-in graphic does more than I had thought. In fact, one gets unexpected latest soonest Windows Update benefits. Let me explain…

What Are Latest Soonest Windows Update Benefits?

As a pretty passionate Windows Insider, I’m always after the latest and greatest that Windows Insider Previews have to offer. Sure they can be occasionally gnarly, or even troublesome. But that’s a big part of what I signed up for when I joined the program.

And until recently, I had too often felt left out when MS started A/B testing new features, and I wound up on the “B fork” (the one that doesn’t get the new stuff). That’s why I was hornswoggled to read these sentences in the afore-linked WindowsLatest story:

All Windows 11 and Microsoft Edge updates now use Controlled Feature Rollouts (CFR) technology, gradually introducing new features. Users can choose to get these features immediately by enabling a specific toggle in Windows 11 22H2 or later.

Yowza! That’s just what I’ve always wanted. Not realizing this would forcibly put me on the “A fork” for all CFRs, I had opted in anyway. I did so just because I think that’s my job as a serious Insider (and WIMVP).

How nice to learn I’m getting what I really wanted without having know that’s the way this toggle (or slider) really works. I’m jazzed: thanks Microsoft!

Facebooklinkedin
Facebooklinkedin

Snipping Tool Gains OCR Text Grab

Here’s a good one. In the latest builds of Windows 11 Canary and Dev (25951.1010 and 23545.1000, respectively) Snipping Tool gains new functionality that’s both interesting and useful. In those versions Snipping Tool gains OCR text grab capability. You can see it at work in the lead-in graphic.

Exploring How Snipping Tool Gains OCR Text Grab

The secret to this functionality is the text grab button at the top of the toolbar (center of image, lightly highlighted in off-pink). It looks like several lines of text inside a box, to wit:

Snipping Tool Gains OCR Text Grab.button

Not as pretty when magnified, but the intent is pretty clear.

When you use the text grab function in Snipping Tool, you get buttons to “Copy all text: and “Quick redact” (blocks out sections of text with dark overlays). OTOH, if you right-click inside the selected text area inside such a snip you get a pop-up menu with Copy text, Select all and Redact text buttons.

It’s all good, and this capability is quite welcome. Indeed, I have to ask: why didn’t MS add this years and years ago? I’ve had to turn to other tools for this capability in the past. Nice to have it built right into Snipping Tool now. Good stuff!

It’ll be a while before this goes into general availability, though. I’m guessing this won’t make it into production until the 24H2 release comes out next year. We’ll see: I’ll track this and keep you posted.

Facebooklinkedin
Facebooklinkedin

Interesting OMP Winget Gotcha Is Easily Fixed

I have to laugh. When I opened Windows Terminal/PowerShell yesterday morning, I got a notification that a new version of OhMyPosh (OMP) was available. So naturally, I tried to see the update. When that failed, I tried to update OMP directly, and that failed, too. But thankfully, this interesting OMP gotcha is easily fixed. I’ll explain …

But first take a look at the lead-in graphic above. It starts with the notification. That happens when loading PS causes the OMP environment to start up, too. But running winget upgrade shows an issue with accessing the winget database. Ditto for trying an explicit, directed upgrade on the string “Oh My Posh.” What to do?

OK, Here’s How Interesting OMP Winget Gotcha Is Easily Fixed

First, the fix: I went to GitHub, where developer Jan DeDobbeleer always maintains a current version under its “Latest” link. For the record, I downloaded and installed his install-amd64.exe file there and the upgrade completed without a hitch.

But what went wrong with OMP in the first place? I sent Jan a Twitter (X) message and he replied: “Yes, unfortunately winget, just like the Store, is slower in processing new versions.” I took this to mean the changes were already posted to the manifest database, but that those changes had not yet been committed.

It’s Just a Matter of Time

And indeed, I just checked one of my other test PCs with OMP installed. Running winget just now, it shows — and stands ready to — upgrade OMP to the latest version. Looks like the notification beat the update yesterday, but they’re now back in synch. Here’s visual proof:

Interesting OMP Winget Gotcha Is Easily Fixed.next-check

This morning’s check works as expected. Database is caught up!

And boy howdy, as we say here in Texas, isn’t that just the way things sometimes go, here in Windows-World. You bet!

Facebooklinkedin
Facebooklinkedin

Registry Hack Cleans Out Stale RDC Items

Wow! I guess there have been more changes in the PC fleet here at Chez Tittel than I thought lately. I kept seeing stale entries in the drop-down list from Remote Desktop Connection. So I found a Microsoft Learn article that explains how to remove or replace them. It’s entitled How to remove entries from the Remote Desktop Connection Computer box. Its registry hack cleans out stale RDC items. Let me explain…

More Info: Registry Hack Cleans Out Stale RDC Items

Visit the following registry key inside Registry Editor (regedit.exe):

HKEY_CURRENT_USER\Software\Microsoft\Terminal Server Client\Default

Indeed, you can cut’n’paste this string into the address line in regedit, and save yourself the toil and trouble of typing it in. When you get to that key, you should see something like the lead-in graphic underneath the leaf-node (…\Default).

As you can see it includes 10 values named MRU0 through MRU9. To remove any such value, right-click and select ‘Delete’ from the resulting pop-up menu. In my case, I had old values that kept showing up, but also new values I wanted to include. So instead of deleting stale values, I right-clicked their keys, and modified the associated string values to match the machine names of new machines I’d added. As shown in the lead-in graphic that meant adding P1Gen6. Next, I deleted lenyog7i (MRU7) because I’ve returned that unit to Lenovo.

To see what registry changes look like, you must close and then re-open regedit. Here’s what it looks like now (notice that MRU7 is now missing):

Registry Hack Cleans Out Stale RDC Items.updated

Note that MRU7 is missing, now that it’s deleted.

As you add and remove items using this hack, the registry automatically renumbers them. But unless you change the number of items from the default count of 10, you’ll only ever see items MRU0 through MRU9 (10 items, all told). Great fun!

Facebooklinkedin
Facebooklinkedin