Full-time freelance writer, researcher and occasional expert witness, I specialize in Windows operating systems, information security, markup languages, and Web development tools and environments. I blog for numerous Websites, still write (or revise) the occasional book, and write lots of articles, white papers, tech briefs, and so forth.
I’m now using the iCloud service, trying to get better synergy between my desktop and notebook PCs running Windows (8 or 8.1) and my iPhone and iPad (now both running iOS 7). By and large things are going reasonably well, but I noticed some glitches in the past few days after upgrading my production desktop to Windows 8.1 GA (from the September version of the 8.1 called RTM). I wasn’t expecting too much to change between RTM and GA, and mostly that’s been a sustainable supposition, but a few things have changed in surprising ways. And alas, some of those changes have not been for the better…
Case in point: I recently installed the iCloud Control Panel applet on my production desktop, when that system was running Windows 8.1 RTM. To my immense suprise, when I next went to visit My Contacts in Outlook 2013, the contents of the local My Contacts folder was empty. But because I could access the same information online through the iCloud folder instead, I thought to myself at the time “Good thing I’ve got a backup” and also “I can’t believe they decided to remove local data altogether instead of synching local and remote copies.”
That’s why I wasn’t completely bollixed when, in the wake of the 8.1 RTM-to-GA update, iCloud stopped working in Outlook 2013. Instead of accessing the cloud version of my contact data, when I click on iCloud in the Contacts view in Outlook, I get an error message window that reads: “This set of folders cannot be opened. The information store could not be opened.”
So what did I do? I went to my backup PST file and used the Import command to grab the Contacts folder from that file and bring it back into the local copy inside the resident PST file on my production desktop. I got my contacts back without too much fuss and bother, but I still can’t help wondering, yet again: Why did Apple decide to take the only copy of the data and put it in the cloud, so that if you lose access to the Internet (or in this case to the necessary “information store” on the Internet) you can’t access your contact data, either. Not at all.
I have trouble understanding how a software designer could cobble together a system that could so easily deprive a person of his or her contacts. For those of us who, like me and countless others, depend on that information for their livelihoods, that kind of catastrophic loss of access is simply not acceptable. In my case, I knew exactly how to work around it. But I know many others who would be crushed by this loss, and who might not have a backup PST file from which to pull the information. It’s still accessible, by the way, through a login to iCloud.com on my account there — it’s just no longer programmatically accessible to Outlook, for whatever arcane reason broke the Outlook to iCloud connection.
Sure hope Apple or MIcrosoft, or the two of them in tandem, get this fixed sometime soon! I’d also suggest that they give users the option of creating a local backup during the iCloud install process, with some instructions on how to restore that backup should it become necessary. It wouldn’t take much extra effort, though it could confer considerable increased peace of mind.
Here’s a list of instructions that I had to follow on my Lenovo X200 Tablet, to remove an issue with the WAN miniport (#2 and #3) drivers on that machine, whose failure to load up and register properly also rendered Bluetooth inoperable on that machine when running Windows 8 (or 8.1, as you might expect; this material is fully documented in KB article 2871372):
Who came up with this mysterious fix, and how they did figure this out? Wowie-zowie!
Open Device Manager.
Right-click the WAN miniport (Network monitor) device, and then click Update Driver Software.
Click Browse my computer for driver software.
Click Let me pick from a list of device drivers on my computer.
Clear the Show compatible hardware check box.
In the column on the left side, select Microsoft, and in the column on the right side, select Microsoft KM-TEST Loopback Adapter.
In the Update Driver Warning dialog box, click Yes to continue installing this driver.
After the driver is installed, right-click the device, and then click Uninstall.
After the device is uninstalled, right-click the computer name in Device Manager, and then click Scan for hardware changes.
On the View menu, click Show hidden devices.
The WAN Miniport (Network monitor) device should now be started and no longer have a yellow exclamation mark next to it.
For reasons that go way beyond my ken but that I find egregiously irritating, this bit of mumbo-jumbo actually worked! To me, it seems almost like turning widdershins thrice, hopping on one foot, while making an incantation, to try to make something happen. Arthur C. Clarke said that “Any sufficiently advanced technology is indistinguishable from magic,” and I’m damned if I can really tell what’s up here, other than the bizarre reality that installing and then uninstalling a nugatory driver actually results in proper recognition of the underlying hardware, and automatic installation of the correct driver when the next hardware rescan occurs.
There is just a glimmer of a suggestion of what’s really going on here in the “Resolution” section of the related KB article. It says that MS Update 2822241 must be “integrated with” (which I believe means slipstreamed into) the installation image (WIM file, probably) used during setup of Windows 8 for target hardware to avoid these contortions. That tells me that the update rollup in that particular update file somehow fixes the issues discussed in 2871372, even though it’s not specifically called out in the “Issues that this update fixes” in its supporting documentation.
What galls me about this fix (which I’m very grateful to have found, and am now able to use Bluetooth devices on the X220 Tablet) is that it’s so very arcane and non-intuitive. I’m able to address most driver issues in Windows on my own, with a bit of elbow grease, and lots of odd and interesting techniques for extracting driver files from installers for software that won’t run on my systems. I’m OK with that, and have learned how to cope. But installing a loopback driver, and then removing it, to provoke a proper hardware scan for device recognition? The mind reels…
Drat! My production machine has started to act up lately. Yesterday was a pretty extreme example, as this trace from Event Viewer will show:
The system has been getting increasingly, but not unbearably flaky over the past 3-4 months. My symptoms include: no records being written to my Reliability Monitor files (I’m pretty sure this is an unwanted side effect from Soluto), occasional issues with the Acronis Scheduler Service (which doesn’t always start up properly after a reboot), and lately, repeated sit-downs at the machine in the morning to a login prompt (I usually leave it running all the time to do backups and updates in the wee hours of the morning). This latter condition indicates some kind of BSOD may be occurring. I’ve disabled the MSI Afterburner, which overclocks the Nvidia GeForce GTX 460 in my system, because I just updated to the latest drivers, and noticed the video driver started acting up almost immediately thereafter. Since then, no trouble at all…
But anybody who’s messed with Windows for any length of time will know what I mean when I say that these systems’ stability tends to degrade over time if, like me, you’re always installing and playing with new software (sometimes beta, sometimes not), and then de-installing much of the experimental stuff later on because it’s not worth keeping. These days, I try to restrict that sort of fooling around to VMs instead of the base OS, but I still install (and later remove) a great deal more software than is typical for a typical end user installation. If history is any guide, that means it’s time to de-gunk my Windows machine. Ordinarily, that would mean wiping the boot/system drive, performing a clean install of Windows 7, and then reinstalling all of my applications.
But now, I have to consider whether or not I should simply upgrade to Windows 8 instead. I’ve been using that OS for over a year now, and am comfortable enough to use it for production work. It’s also got some very nice features I like a lot — better security, native mounting for ISOs, the ability to snapshot a current install for the “Refresh your PC” operation, and a bunch of other stuff I’d like to use better, and more often. Maybe that means it’s time to take the plunge? I’m starting to think so, but…
…that means I need to find a full day to dedicate to making the switch. My real problem is, I have so much work to do right now I don’t know when I can find the time to perform the cut-over. But with increasing instability, my experience teaches me I’ll be doing it sooner or later anyway, just because my production system is trembling on the threshold between tolerable instability and intolerable instability. For the time being, I guess I’ll just work as hard as I can to try to free up some time in my schedule. Maybe next week? I’ve got my fingers crossed!
[Note added 3/5/2013: As I continued to ponder the “Win8 vs. Win7” decision I came across a ZDnet post from long-time OS expert Steven J. Vaughan Nichols which graphed the uptake of Windows 8 versus Windows Vista, each over the first five months since their respective introductions. Here’s the graphic he produced to present a stark and scary comparison:
Although sales of Windows 8 may be strong, Vaughan-Nichols’ chart makes it clear that sales haven’t yet translated into an equivalent number of Windows 8 users on the Internet. This has pretty much stopped me dead in my tracks, and I’m seriously considering flip-flopping my decision, and re-installing Windows 7 instead. That said, I did upgrade to Vista and found it to be a stable and dependable OS once the marketplace remedied the initial driver incompatibility issues that drove early adopters so crazy. I’m still thinking…]
I’ve got numerous PCs around here and there — I can see two desktops and two laptops as I sit here in my office, and there are two more laptops and one SFF desktop elsewhere in our domicile at this moment; I’ve also got four laptops out on loan right now to various friends and relations. My wife and I both use iPhones (both are 4S models), and we’ve got a family iPad, plus a 32 GB iPod that Gregory used to play on a lot before he got a Nook for his birthday earlier this month. That means we have no shortage of machines into which we might plug one of these iDevices, but there’s an issue in working with them that I wanted to avoid on those machines where I don’t usually play iTunes music or watch much video.
The conundrum pretty much boils down to this: the iPhone driver that Windows loads on its own is pretty ancient, but unless you want to install iTunes, it’s a tricky business to get a more up-to-date driver without carrying all the extra iTunes baggage along with it. Believing there had to be a way to get the drivers without the full-blown package, I searched Google using this string “install iPhone drivers without installing iTunes.” And sure enough, up pops a free utility named CopyTrans Drivers Installer that will do the job for you (here’s a C|Net download link for the 3.35 MB utility in ZIP form, just like the afore-linked product page itself proffers). Download the file, unzip to a directory, then run CopyTransDriversInstaller.exe (version 1.024 as I write this post), and you’re done. Not much to it, really.
There is one catch, however: the program will download iTunes in its entirety, then extract the drivers from that download and install them for you. That’s what the Automatic install option at the lower right of the installer window above is about: it’s well worth using, because it does all the grunt work for you. It also works with the latest and greatest iTunes download available from the Apple site on your behalf — that was version 11.0.2.26 as I wrote this post — so you don’t have to check or worry about version numbers, either. The iTunes download (it’s nearly 86 MB in size) took far longer than any other parts of the installation activity. Though the whole operation took about 8 minutes or so on my Lenovo T520 laptop, more than half that time was devoted to downloading iTunes so the program could extract the drivers contained therein for installation (which took well under a minute, when it finally got underway).
If you want to dock your iDevice to a Windows PC without installing iTunes, it’s probably worth grabbing a copy of the CopyTrans Drivers Installer. Put it through its paces, and you’ll have the latest and greatest iDevice drivers at your disposal without having to shoulder the burden of iTunes (and the Bonjour protocol, iTunesHelper.exe, and anything else Apple decides to throw into the iTunes mix — see this fascinating and horrifying list of background processes that can show up when you use iTunes on a Windows PC, straight from Apple Support).
[Querelous and Concluding Unscientific Postscript, with apologies to Kierkegaard: I’d love to know what tool or technique the CopyTrans Drivers Installer uses to access the contents of the 32- or 64-bit iTunes installer files. I attacked them with both 7Zip (which is suprisingly capable at taking .exe files apart) and Legroom Software’s Universal Extractor (which is a good tool, but hit or miss, and crashed when trying to unpack this file’s contents) without any luck. Knowing how they did their thing would help me do it with other installers, which is sometimes the only way to get access to Windows drivers that may not otherwise be accessible on some PCs, particularly when, for example, trying to snag a Dell driver for use on an HP machine, or vice-versa.]
I’m in a bit of a quandary on an interesting subject. I just purchased a 128 GB USB 2.0 Flash drive — a Centon DataStick Sport — that I picked up on special from TigerDirect for about $65 (as I write this blog, you can pick them up at Amazon for about $80). It seemed like a very good deal when I bought the unit, but I was quickly disabused of my enthusiasm when I plugged it into my desktop PC to copy all 29 GB of music I keep on that machine to see how it performed doing large bulk file transfers. The entire transfer took almost three hours to complete (I can do it in under 40 minutes from one direct-attached disk to another), after which I understood that while I might have purchased plenty of capacity, I didn’t get the kind of performance one might wish to have, to keep the time required for big file transfers more manageable — but then I didn’t pay for that privilege, either.
At least, I now understand why USB 3.0 or eSATA makes more sense for big flash drives, or other forms of external storage, especially if you need to move large amounts of data on a regular basis. But if you go shopping for USB 3.0 flash drives (probably the most practical form of higher-speed flash storage available at the moment) you’ll find prices running from $1-2 GB for such storage, depending on how fast you want that storage to be. In particular, the bigger and faster such drives get, the more they cost. In particular, this $290 Super Talent 100GB USB3.0 Express RC8 Flash Drive (model ST3U100R8S) stuck me as amazingly extravagant, even if it is “Windows To Go certified” for Windows 8 Enterprise.
On the other hand, you can jump over to Newegg and purchase a Vantec NexStar 3 USB 3.0/eSATA 2.5″ drive enclosure for $30, and a very fast Samsung 830 128GB SSD for $105. Add $20 for shipping and handling, and you’ve spent $155 for more storage capacity (119 GB actual storage in Windows Explorer vs. 93 GB likewise) and similar or better speed (depending on whether or not your notebook has an eSATA port or “only USB 3.0″). Given those economics, I have trouble understanding why anybody would buy the higher-dollar UFD, except that the form factor is significantly smaller. But my Vantec drive measures out at about 5.5 x 3.5 x 0.7” and weighs under 250 grams, so it will fit into a laptop bag with no stress or strain at all. And it only takes 5 minutes and a Philips-head screwdriver to put all the pieces together.
But there must be a market, because there are lots of 64 GB and higher-capacity USB 3.0 UFDs available. Go figure!
Through a strange series of events, I got selected to fill Dave Strom’s inestimable shoes at the Dell Customer Advisory Panel (aka DellCAP) meeting in 2011. Since then, I’ve been a member of that sometimes stormy, sometimes sedate, but always interesting group and have provided my input and insight — such as they are — to this hard-hitting group of social media mavens, digital community activists, and consumer rights advocates.
Such memberships apparently come with some interesting privileges, too. About two weeks ago, I drove over to the Parmer Lane Dell campus in northeast Austin to pick up a brand-spanking-new XPS 13 laptop, issued to me on more-or-less permanent loan. The reason for this largesse: the DellCAP members get issued with such a machine to work and play with as they see fit, and write about as they please. So that’s what I’m doing here: sharing my first impressions of this svelte but powerful laptop (current MSRP is around $999) after spending some time getting to know it, and using it for a variety of tasks.
Right out of the box, there’s a lot to like about this snappy little unit, which lots of reviews compare to the MacBook Air. This is a flattering but apt comparison if you ask me, as the owner of a 2010 vintage MacBook Air myself (Core 2 Duo, nVidia GT320 graphics, and 256 MB SSD). The Dell unit is about 0.5″ narrower, but almost the same depth and thickness; the Apple unit weighs 3 lbs 7.7 oz, and the Dell comes in at 2 lbs 15.1 oz. The comparison remains favorable throughout, in fact. Here’s a look at the out-of-the-box Windows Experience for my XPS 13:
Battery life for the XPS 13 is all over the place, depending on what you use the unit for. Continuous WLAN and/or streaming video cuts the typical light-duty battery life of about six to six and half hours to around three to three and half hours. This prompted a nice blog post on the Official Dell Corporate Blog entitled “Maximizing Battery Life on the XPS 13 Ultrabook…” that’s worth a read for those seeking to eke more minutes (or hours) from their units. Overall, battery life is not as good as a MacBook Air (one of the few areas in which the Apple unit comes off best in such a face-off) but it’s not bad, either.
Intel Inside — and More!
The CPU is an Intel i5-2467M, a 1.60 GHz dual core CPU that supports hyperthreading (and shows four processor threads in various performance displays) and includes 3 MB of L3 cache, 2×256 KB of L2 cache (one for each core), and 2×32 KB for data and instructions L1 cache (one for data, the other for instructions, natch). The XPS 13 includes 4 GB of Samsung DDR3-1333 RAM (2×2048 MB modules, not upgradeable), and a zippy Samsung 128GB PM830 mSATA SSD (actual size: 119.24 GB as reported in the Windows 7 Disk Management console). The GPU is an integrated Intel HD 3000 which is fine for my laptop needs (I don’t play many shoot-em-ups or RPGs on such machines) and the 1366×768 glossy Gorilla Glass-covered monitor delivers sharp, clear video as long as I don’t try to work outside or in bright ambient light (in which circumstances, screen glare definitely impairs the display’s visibility).
There aren’t many ports on this puppy, either, thanks to its slim lines and svelte exterior. There’s nothing on either the front or back edges, and here’s the layout for each side of the XPS 13, from rear (hinge) to front (palm rest and touchpad):
Left: Power port (which leads off to a tiny 45W brick 3.5×1.875×1.125″), USB 3.0 port, headphone jack
Right: Mini-DisplayPort, USB 3.0 port.
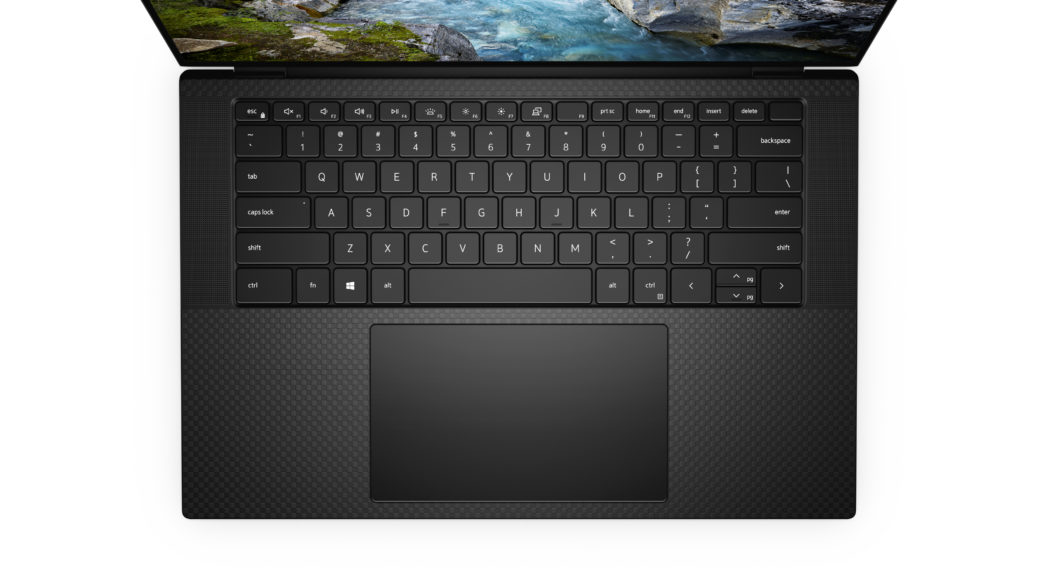
The keyboard features a white back-lit layout with a standard QWERTY deck and nice-sized shift, caps lock, and tab keys at left, and a big backspace, enter, and shift key at right. The top row features half-sized function keys (F1-F12) plus mute, insert/print screen, and delete keys. The far lower right also offers half-sized arrow keys that double as home (left), page up (up), page down (down), and end (right) keys. Far lower left offers Ctrl, Fn, the Windows, and Alt keys with a big spacebar to the left of another Alt and Ctrl key (and then the arrow keys). Typing on the keyboard is a generally positive experience, and requires less time for me to adjust to than some of my other notebook/laptop PCs, some of which — especially my HP HDX9203 “Dragon” — feature what can only be called “wonky” keyboard layouts. For routine e-mail, light typing, and so forth, this keyboard is quite nice to use.
More on the Zippin’ Samsung SSD
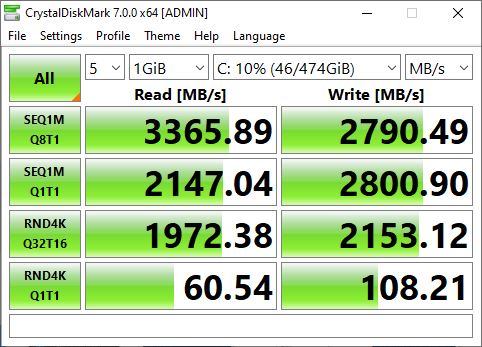
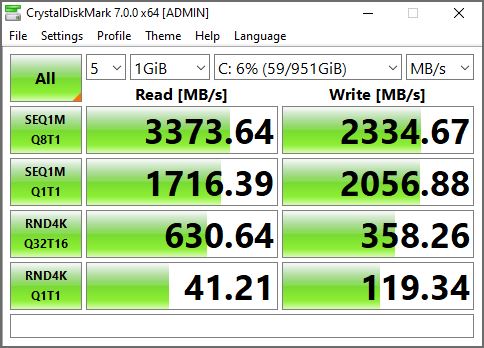
The Samsung PM830 mSATA SSD produces some tasty benchmark values in CrystalDiskMark, and is certainly the fastest laptop SSD I’ve had occasion to work with (the rest of mine are mostly SATA II, and by no means real screamers, unlike some of my desktop units which include an Intel 520 and an OCZ Vertex-4). As my earlier Windows Experience screen cap clearly shows, the disk is the fastest thing about this system.
Fresh from the factory, and…
The XPS 13 showed up with little or no bloatware. The next sequence of screencaps shows my XPS13 with its full complement of software. Of what you see in that list of 55 programs, I installed 17 of them: 7-Zip, Adobe Flash and Reader, CPU-Z, Dell Driver Download Manager, Everything, FileZilla, Image Resizer Powertoy, Intel ProSet Wireless stuff (2), Intel WiDi, ISO Recorder, MS Office (2), Secunia PSI, System Requirements Lab for Intel, and WinDirStat. The .NET Framework 4 elements are probably my doing as well. At any rate, this is not what I would call “a load of crapware” as the following list will attest.
The only Dell element that’s earned a “grrrr” reaction from me so far is its Dell DataSafe Local Backup software: it really doesn’t work as you’d want it to unless you purchase a $39/year “upgrade.” With Windows 7 offering perfectly usable image and file backup through the built-in Backup and Restore facility, I didn’t really see any compelling reason to use the program, nor to pay the upgrade fee. I am fooling around with the Dell DataSafe Online, but with only 2GB of free storage, so far I’m just using it for such stuff as I actually keep in the folders associated with my User identity/account name (18.95 MB, according to the most recent reading).
I also decided to upgrade my system from Windows 7 Home Premium to the Ultimate edition (thanks to my MSDN subscription, this comes as part of that $1,000 a year or so payment, along with most of my other various Microsoft licenses). I’m not sure this was “absolutely necessary” but I like to use the Remote Desktop Connection (and RDP) to remote into my laptops and other systems, and Windows 7 Home Premium doesn’t support such use. I guess that makes it a “nice-to-have convenience” for which I’m appropriately grateful.
What to Make of Dell’s XPS 13
At $999 for the model I’ve got, the XPS is no cheap notebook/laptop. It’s a real ultrabook, with the small size, light heft, and snazzy good looks and accoutrements you’d expect for that kind of money. It’s very usable, friendly, and powerful enough to satisfy all but the most power-hungry programmers, system admins, and heavy-duty tech types. As ultrabooks go, the XPS 13 offers a nice enough price/performance ratio to be worth purchasing, and it makes a great road machine, too.
This year, school is getting serious for my 8-year-old son, Gregory: he’s in the third grade. For the first time, he’s having to deal with real grades for his homework, plus regular quizzes and tests. And later on this year, he’ll face his first standardized test (the Texas Assessment of Knowledge and Skills, or TAKS) as well. He shares a classroom at Cactus Ranch Elementary with 18 other kids, but they have only one general use laptop for the whole group there (the kids do have more general access to computers in the library, and some classes issue laptops to students from cart set-ups for their use as well). His classroom PC is an elderly Dell D630 Latitude that’s on the last phases of its lifecycle — I volunteer in the library once a week, and the school IT guy also works there; he tells me they’re getting ready to upgrade to Vostro models running Windows 7 in 2013.
So I’m loaning my son’s teacher a couple of additional laptops for the kids to share in his classroom. One is my old and trusty Dell D620 Latitude that’s been upgraded with an OCZ Agility 3 SSD, 4 GB RAM, and a T7200 CPU (which puts it on par for processing with the D630, but where its SSD blows the doors off that unit). The other is my equally old and sometimes not-so-trusty HP HDX9203, aka “The Dragon.” I decided to roll the Dragon back to Vista SP2 and it’s been running like a champ ever since. However, Vista’s odd and seemingly random Windows Update behavior hasn’t let me believe I’ve finally caught up with all the updates: with 148 of them installed over the past two days, it’s been a dizzying sequence of download-install-reboot the entire time. Even so, Windows Update now claims I’m completely caught up. We’ll see.
I’m still debating as to whether or not I should install Paragon’s terrific $20 Migrate OS to SSD utility on the Dragon, and then use it to move the OS over to the spare OCZ Vertex 2 nominal 120 GB (actual 111 GB in Windows Explorer) drive I’ve got lying around. There’s no doubt this would speed things up significantly on the Dragon, just like the Agility 3 did for the aging D620, which laughably melds a processor rated at 5.1 in Windows Experience with a drive rated at 7.8! But there are few things you can do to an older laptop to keep it usable that are better than this, so my real question is: do I want to let the Vertex 2 walk out the door, or do I have something better I can do with it? Right now all of my laptops and desktops boot from SSDs already, so perhaps not…
Introduces students to the concepts, terminology, protocols, and services that the Transmission Control Protocol/Internet Protocol (TCP/IP) suite uses to make the Internet work. This text stimulates hands-on skills development by not only describing TCP/IP capabilities, but also by encouraging students to interact with protocols. It provides the troubleshooting knowledge and tools that network administrators and analysts need to keep their systems running smoothly. Guide to TCP/IP, Fourth Edition covers topics ranging from traffic analysis and characterization, to error detection, security analysis and more. Both IPv4 and IPv6 are covered in detail.
Ed brings veteran IP and networking expert Jeff Carrel into the mix on this book, where he served as lead author. Look for greatly expanded coverage of IPv6, lots of interesting hands-on labs and exercises, and an improved real-world focus on configuring and managing IP and IP services in the workplace in this latest edition. It’s bound to be a big hit, not just in the classroom, but on reference bookshelves for networking professionals everywhere.
When I got the news yesterday that the latest 10.8 version of OS X, aka “Mountain Lion,” was available, I jumped on the opportunity to download and install the new OS upgrade for a mere $19.99 at the Apple Store. I’m not sure if it was heavy demand for the approximately 4 GB download file, or online Internet traffic related to the Olympics (the US women’s soccer team played a very strong French team, and managed to beat them 4-2), but it took nearly two hours for me to download the file. I’ve downloaded similarly-sized .ISO files from MSDN many times before, and it has seldom taken more than 45 minutes to an hour for those downloads to complete.
But once I got the file downloaded, the install was a breeze. I fired off the download package, and it took me through the rest of the process in about an hour (half an hour or so to unpack the files and prep the machine for the actual OS install, and another half-hour to perform the installation). So far, the handiest tip I’ve seen in using the slightly altered UI is to place two fingers next to each other near the right edge of the touchpad: this calls up a “fat scrollbar” at the right-hand side of a scrolling window and makes scrolling very easy. Other than that, I haven’t yet noticed too many other dramatic changes except that iCloud is better integrated. In fact, I’ve gone ahead and sprung for a big enough storage subscription to cover all of my iDevices–iPod, iPad, and two iPhones–under a single iCloud account now.
I’ve read other reports online that have recommended against the upgrade, and mentioned that older MacBook Airs run more sluggishly on Lion and Mountain Lion than they did on Leopard. I have a 2010-vintage 13″ model with a 2.13 GHz Intel Dual-Core CPU, 4 GB (2x2GB) DDR3-1067, and the same Nvidia GeForce 320M that’s in my HP dv6t Quad Core notebook, which Apple seemingly uses to better effect than HP does. I haven’t really noticed anything like this, but perhaps that’s because I bought the unit used from an Apple employee who had already installed Lion on this machine. At any rate, it’s somewhat faster than my older dual core notebooks, and not too much slower than my quad-core notebooks, so I have nothing to complain about.
For more information on the latest OS X version, I heartily recommend John Siracusa’s mammoth and detailed review for Ars Technica, which digs very deeply into what’s new with and how best to tweak settings and configuration data. There’s also a nice article on the Ars Technica site entitled “How to create a bootable, backup Mountain Lion install disk” on a USB flash drive or optical disk. Warning: you’ll need to do this BEFORE you install the new OS, because the last bit of that process cleans up the file you need to manipulate to create the backup install image (wish I’d read the article before pulling the trigger on my install, in fact…sigh).
This weekend, I had the chance to rebuild and repair an extremely finicky Windows PC on loan to a friend. It is an HP Dragon (model number HDX9203) that HP released in 2008 prior to the release of Windows 7 (October 2009) as a Windows Vista-based “killer media machine.” It includes an AVerTV cable interface for TV access, a Blu-ray player, a hefty-for-the-time T9500 Core 2 Duo processor, and a huge 20.1″ LCD display.
When I say the machine is big, I’m not kidding. It’s dimensions are 18.7″ (47.5cm) x 13.36″ (33.95cm) x 2.3″ (5.85cm), and it weighs over 15 pounds (6.8 kg). It’s packaged as a laptop, with a special hinge between the keyboard base and the screen, that enables the screen angle to be altered independently of the angle of the hinge with respect to the base. Don’t get it? It lets you pull the screen closer so that you can position it right past the top edge of function keys on the keyboard (as shown in the preceding photo), even though the edge of the lower deck itself is about 2.5″ further back. The screen also has a 1980 x 1200 native resolution, and offers very good brightness and color output. I’ve watched plenty of movies and Blu-rays on it, and it’s a great personal media station for sure.
The problems with this machine were its cost (these units cost $3,200-4,000 when sold in 2008, depending on configuration and components), size (enormous), and weight (no way you could hold this on your lap for any length of time). Battery life is less than 2 hours (less than 90 minutes when watching videos on DVD or Blu-ray), and thus, it more or less requires a wall socket nearby at all times. By the time Windows 7 got released in October of 2009, HP had apparently decided to orphan and abandon this capable but monstrous media PC. They never updated the drivers for Windows 7, and they never really kept up with Vista on that machine terribly seriously, either.
I went ahead and upgraded the machine to Windows 7 anyway, and was ultimately able to get everything working except for the Authentec AES2501 fingerprint scanner, and the AVerTV miniHDTV TV tuner card. I did have to fiddle about with graphics, media card, and network drivers, because I couldn’t count on getting the latest and greatest Windows 7 drivers to work on this machine. Most of HP’s Vista drivers for this machine peter out around 2008, though there are a couple of items with 2009 dates, and I found another HP driver for a different Vista PC with a 2011 date that actually worked on the Dragon as I re-installed Vista and found my way to a functional and reasonably current set of drivers this weekend — mostly by virtue of a painstaking process of trial and error. I bounced between the HP Support pages, various manufacturer download sites (Intel, Marvell, and nVidia), and the DriverAgent driver scanner utility that has become an important element in the top tray of my PC maintenance and upkeep toolbox.
In the end, I was able to get all but three of the drivers for the Dragon running Vista current as per DriverAgent’s scans. I had to stick with a 2010 version of the nVidia 8800M GTS driver, and go with the AES2501 driver that Windows Update supplied for me (later updates were available through DriverAgent and Authentec itself, but didn’t work). Same for the AVerTV tuner card as well: newer drivers were available, and would install on the machine, but rendered the tuner useless.
It ended up taking me the better part of two full days to get Vista installed (about 2 hours) and up-to-date (150 updates took almost ten hours to download, install, and in some cases re-install when first tries failed). Getting the drivers right took about another 7-8 hours, but mostly because I tried to get as current as possible, then backed off to what worked, through trial and error. This was a case where letting Windows pick the “iffy” drivers (video, TV, and fingerprint scanner) would have been my best strategy from the get-go. But I didn’t figure that out until the course of events rubbed my nose in this realization. Live and learn, I guess!
But now the machine is back in fine form, and running Media Center properly. I can return it to my buddy, knowing that he can put the machine to work as it was intended to be used. For some reason or another, I find this immensely satisfying. It is too, too bad that HP didn’t support an upgrade to Windows 7 for this machine, though. What I cobbled together for Windows 7 on my own — thanks in large part to the wealth of information available on the Notebook Review HP HDX 9000 DRAGON Owners Lounge (see Part 1 and Part 2 for thousands of posts, many informative, especially the instructions and links at the beginning of Part 2) — worked well enough for desktop and test use, though it did not work as a fully-functional media center. And in re-reading the Owners Lounge Part 2 stuff just now, I find myself oddly tempted to try a Win7 install again, as several users have indeed gotten everything to work under that OS, and it sounds pretty fast with an SSD as the boot drive. Hmmm….