Category Archives: Windows 11

P16 Blows Up, Requires Clean Install

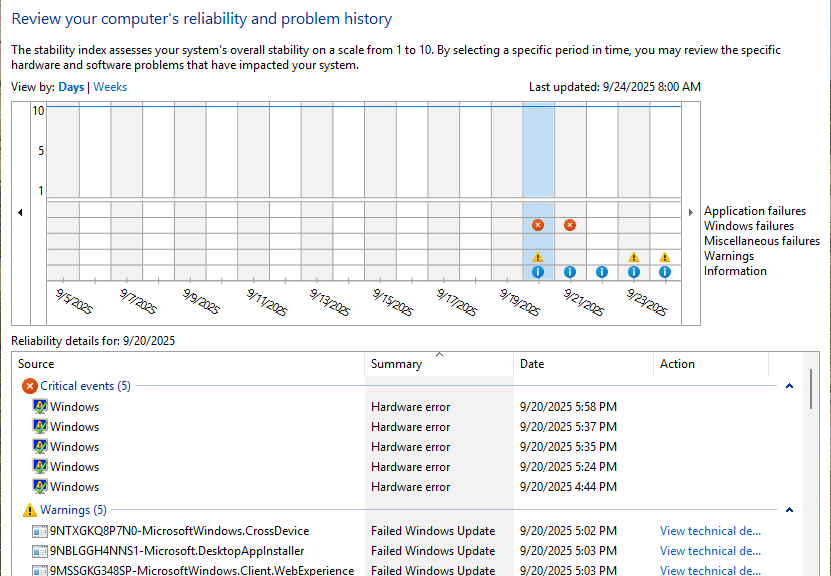
Wow! I took an unexpected detour yesterday. Upon rebooting my Lenovo P16 Mobile Workstation after CU KB5039302, it got stuck in perpetual Restart. After about an hour wasted on the spinning balls and apparently going nowhere, I forcibly rebooted the PC. Bad idea! Long story short: soon thereafter the P16 blows up, requires clean install to restore to working order. Sigh: let me explain…

Why P16 Blows Up, Requires Clean Install

I’ve seen my share of Windows crashes since the 3.1 days. This was one of the scariest. Indeed, it is the first one I can recall where even the Macrium Reflect Rescue Media couldn’t bring the system back from the dead. I could boot up the restore environment but the trackpad was MIA (fixable with an external mouse) as was the external NVMe drive where the restore image resides (not fixable at all).

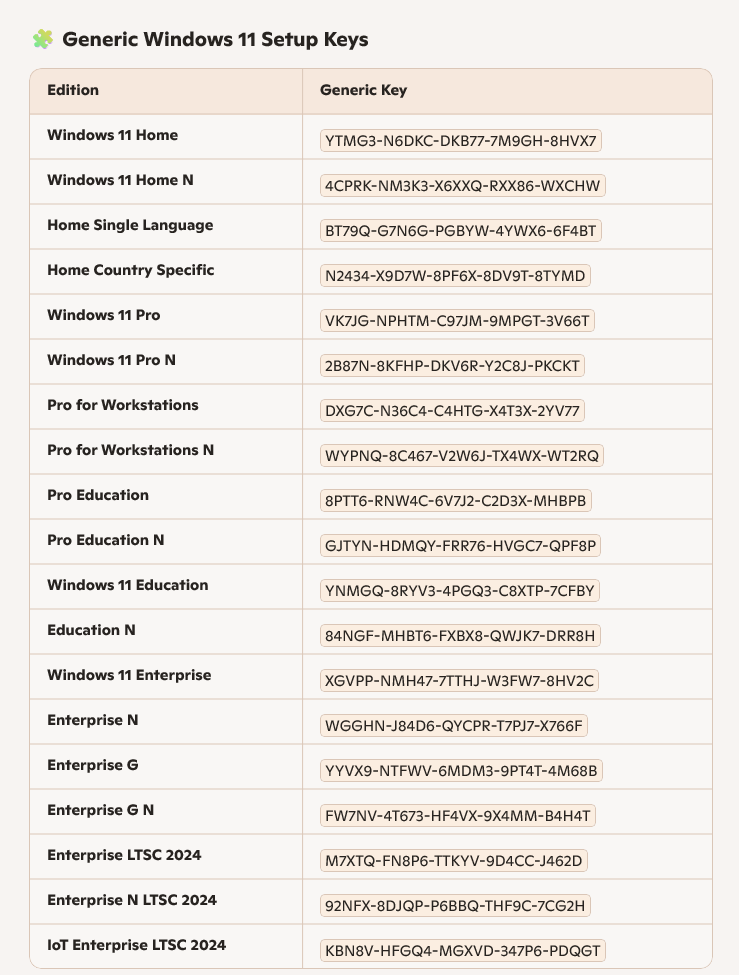
So I downloaded a fresh Windows 11 23H2 ISO, turned off secure boot, and fired off a bootable UFD created using the MS MCT. That got the PC running again. But I still found myself woefully short of device drivers. A quick install of Lenovo Vantage and a set of updates later, that defect was remedied: I went from 20-odd “Unknown devices” in DevMgr to zero (0). Good!

Right now, I’ve just reinstalled Macrium Reflect, and am rebooting to be able to make a snapshot of the rebuilt system (and create new Rescue Media). After that I’ll try the lone pending update for the P16 and see if it finally goes through. My best guess is that something went sideways after that update. Indeed the P16 automatically rebuilt its BIOS when I did finally get the machine to reboot after the CU hung on me. So whatever affected the system, it was at a pretty low level.

Fingers Crossed, I Try Again…

With a new rescue disk, and a fresh image backup demonstrably at hand (see next screencap), I once again tried CU KB5039302.

P16 Blows Up, Requires Clean Install.exp-list

Today (6/26) there’s a fresh backup available!

Downloading takes some time . . . but eventually, it gets to installing . . . and about 20 minutes later (!) I’m ready to restart again,  with appendages overlapping for as much luck as I can get. So I fire off the restart and watch it count down (or up) . . . reboot . . . restart . . . spinning circle . . . and a second restart?! . . . SUCCESS!!!

That was officially weird, and I’m glad it’s behind me now.

The News Catches Up

This morning, I came across a story about KB5039302 at WindowsLatest. The title says it all Windows 11 KB5039302 breaks PCs, MS pulls the update. It specifically mentions the very “boot loop” that I describe earlier, and ties to nested virtualization. (I’m a heavy user of Hyper-V VMs on that PC so: no joke!)

The recommended fix is what I guess I should’ve done, rather than a clean install (though without trackpad drivers or access to USB-attached NVMe drives, things were challenging):

You must use the WinRE page to access the troubleshooting tools, remove the update, or do a clean install.

OK, now we know. But here in Windows-World, there’s always something around the corner looking to bite  you if it can. It certainly bit me! But that’s what Windows Insiders are for, I think . . .

Concluding Unscientific PostScript

I also understand now why the initial application of KB5039302 blew up on the P16, but why the post-clean-install upgrade worked. In the former case, Hyper-V and nested virtualization was already present and active. In the latter case, I didn’t enable Hyper-V and VMs until AFTER I’d applied the update. Turns out that was exactly the right thing to do. Better sometimes, indeed, to be lucky than good!

Facebooklinkedin
Facebooklinkedin

USB4 Gets MS Fixer

Just over a year ago (May 24, 2023) MS added support for USB4 to Windows 11. Curiously enough, multiple MS sources — such as MS Learn, for example — attribute this introduction to KB5026446. A quick check shows no mention of USB4 in that announcement. Be that as it may, MS has released a Support article entitled Fix USB-C problems in Windows. It explains how to troubleshoot the now-common “USB4 functionality may be limited” error message. Of course, you’d need a suitably-equipped PC to see that. This drives my title: USB4 gets MS fixer.

What USB Gets MS Fixer Actually Says…

I’ve been working with USB4 directly since Panasonic sent me a Toughbook just before Christmas in 2023. (See my January 3 2024 post HWiNFO Bestows USB4 Insight for my first hands-on peek.) Thus, what I see in the Fixer item linked earlier is mostly a distillation of common sense gotchas that meeting USB4 link-up requirements imposes:

  1. Gotta have the device (can’t get USB4 from something USB3 or older)
  2. Gotta have the right cable (can’t move at USB4 speeds over older cables: they must be rated TB3 or higher, USB4 or higher)
  3. Gotta have a USB4/TB4 port (strictly speaking, USB4 is a subset of TB4 so either will do — but nothing older handles USB4 devices at native speeds and capabilities)
  4. Gotta have the right drivers (while I’ve never seen a working USB4 port come up with the wrong ones, this is a given to make sure the device chain from port through cable to device will work).

What’s interesting about the MS Learn item is that it mentions a whole slew of error messages that you might see when trying to use a USB4 device — 11 in all, in fact. Worth reading the piece over if only to see how many of them you might have encountered before. FWIW, my personal count is 5 at this point.

The High Cost of USB4 Entry

When I started mucking about with USB4 last fall, I bought a couple of USB4/TB4 NVMe enclosures. These were limited to 20 Gbps aggregrate throughput, but still cost  from ~US$120 to $150  or so. Now, you can buy 40 Gbps USB4 enclosures for ~US$70 to $120. The surrounding specs and verbiage claims real-world throughputs from 25000 to 3000 Mbps. I’ll have to check that for myself, but I have seen speeds in that range in CrystalDiskMark for my 20 Gbps Acasis and Konyead units on some laptops (e.g. Lenovo ThinkPad P16 Mobile Workstation and Yoga P9i models).

It’s still pretty darned expensive to take advantage of USB4 for external storage access. But it’s pretty darned fast, and keeps getting faster. I’m hoping to write a more in-depth examination for AskWoody in the near future. Stay tuned!

Facebooklinkedin
Facebooklinkedin

Stellar OST Tool Worth Grabbing


Microsoft Outlook, in both its local and cloud forms, is an interesting beast. For those with Microsoft 365 or similar subscriptions, that goes double. For such instances, Outlook uses OST (Online Storage Table) files, which maintain fluid, shared snapshots of Outlook “stuff” (e.g. messages, events, contacts, and so forth). Such files live mostly in the cloud on an Exchange server. Outlook also uses Personal Storage Tables (stored in PST files locally on a PC) as well. But while Outlook allows users to export and import from other files,  OST files won’t support this activity: PST is your best bet.

Here’s what STELLAR OST CONVERTER looks like, once you complete the initial conversion step.

Why Is Stellar OST Tool Worth Grabbing?

Simply put: the STELLAR CONVERTER FOR OST provides a quick and easy way to convert OST to PST files (local to the PC) with just a few mouse clicks. Indeed it can even recover “orphaned” OST files — those no longer readily available inside Outlook itself — by scanning folders where OST items live. It then happily converts everything it finds to PST.

Stellar OST Tool Worth Grabbing.outlook-import-export

Outlook’s export/import capabilities embrace PST files, but NOT OST files.

As the preceding graphic shows, Outlook exports its contents to PST. A similar dialog for import shows those same options. OST, I’ll observe, is conspicuously absent. Thus, this tool provides a great way to create backup PST collections to match Outlook accounts and related file holdings. These can get quite large: mine is currently around 3GB in size (I’ve seen them as big as 14GB). Conversion takes awhile: about 15 minutes in all (7.5 to scan and enumerate, 7.5 to save) . That said, PST files are browsable repositories, and can restore entire Outlook data collections if necessary.

Exploring This Stellar Tool…

In graphic captioned “initial conversion step” above, you see the STELLAR CONVERTER FOR OST, showing the contents of the Consulting/AskWoody folder. As you can see, it captures all of my recent message traffic, and can show individual message contents in the reading pane at far right. The left-hand pane shows the folder hierarchy; the center pane shows message info. Note: deleted messages appear in red in their parent folders (as well as in Trash).

In fact, the STELLAR CONVERTER FOR OST offers several noteworthy additional capabilities:

  • Handles large OST files: It took about 15 minutes, but STELLAR CONVERTER FOR OST handled my huge collection of Outlook data. That included messages, contacts and calendar data . The time to scan is roughly equal to the time to save what’s been scanned.

By some quirk of fate, the subject of the current message pops up as STELLAR CONVERTER FOR OST save handles Outlook message store.

Once saved, the converted PST file weighs in at just under 3.0 GB (3,072MB).

  • Handles encrypted OST files: STELLAR CONVERTER FOR OST can read and decrypt encrypted OST files, and save them in PST format. When mailbox or server synchronization issues impede server-based decryption, STELLAR CONVERTER FOR OST delivers them in readable PST form.
  • Global purview for Outlook data files: STELLAR CONVERTER FOR OST finds and lists all OST files. That includes those from IMAP plus Exchange or Microsoft 365 message profiles. Users can easily select and scan OST files to extract specific items. STELLAR CONVERTER FOR OST also offers a powerful “Find” (search) function. It even shows orphaned messages in a Lost & Found folder, like this:

The Lost&Found folder in STELLAR CONVERTER FOR OST contains orphaned Outlook items — mostly Calendar stuff.

  • Complete OST coverage: SSTELLAR CONVERTER FOR OST extracts everything from OST files. Beyond email messages, it handles attachments, contacts, calendars, tasks, notes, journals, and more. It even handles OST to PST conversion with no need for Exchange profiles.

But Wait: Still More Recovery…

Beyond these specifics, STELLAR CONVERTER FOR OST is useful for recovering from OST synchronization failures. These can occur when

  • the client view of what’s current and correct diverges from the server’s view
  • when mailbox issues (loss, damage, corruption) present themselves
  • clients wish to recover deleted items no longer present in the Trash folder. You can see such deleted items in red in the preceding screencap (assume they’re more useful than canceled appointments, please).

OST conversion provides a PST upon which to base a new, shared view of Outlook contents and to re-establish proper agreement.

Vitally, STELLAR CONVERTER FOR OST offers recovery should the server behind Hosted Microsoft Exchange service be damaged or hacked. That is, this program can provide PST files from which to rebuild and restore mailbox data to Office 365 or Microsoft 365 servers. This same capability also enables quick migration from Hosted Exchange to O365 or M365 with minimal effort, and no risk of data loss. Good stuff!

STELLAR CONVERTER FOR OST Costs & Cons

STELLAR CONVERTER FOR OST comes in 3 versions: Corporate, Technician and Tookit, with respective licensing fees of US$79, US$149 and US$199. See their “Buy Now” page for a complete comparative features matrix. The TLDR version is that higher-priced versions offer more and better repairs: Technician adds batch file conversion, more advanced PST handling, exports to live Exchange and O365, plus Contacts in CSV format to the mix; Toolkit does all that, plus corrupt PST repairs, total mailbox restores, more format options, PST merge, password recovery, and a whole lot more. Of course, you’d expect to spend more for higher-end program versions, but they do come at higher costs.

For years, I’ve relied on Outlook to maintain a journal of all the emails I send and receive. It’s an astonishingly detailed and accurate record of my professional and financial life. STELLAR CONVERTER FOR OST provides me with the confidence that I can access and rely on my “email trail” to document and manage a busy working schedule, an upcoming calendar, and a sizable list of professional colleagues and contacts.

The more you rely on email to help run, document and prove up your activities, assignments responsibilities, and professional network, the more you need STELLAR CONVERTER FOR OST. It’s definitely worth having, if only as a way to insure yourself against loss of or damage to vital working assets.

[Note: I produced this item after Stellar contacted me to ask me to write and post the piece. I am invoicing them for a modest fee as well. That said, the opinions herein are my own, and I stand by my recommendation of this product.]

Facebooklinkedin
Facebooklinkedin

Go 24H2 Outside Insider Program

i just learned something interesting. MS has added an ISO for Windows 11 Insider Preview (Release Preview Channel) – Build 26100.560 to its Preview Downloads page. As long as you access the page using an MSA that’s in the program, you can download, install and run 24H2 without future forced Insider updates. Long story short: if you want to get a head start on the next version, you can go 24H2 outside Insider Program. Neat-o (and thanks to Paul Thurrott for pointing this out).

How-to: Go 24H2 Outside Insider Program

Once you grab the ISO, mount it and run its top-level setup.exe to fire off an update or clean install. I’m doing mine in a VM because I don’t have a spare physical PC on which I’d like to run another copy of 24H2. And alas, my current one is enrolled in the Release Review channel of the Insider Program. FWIW, the download took about 15 minutes (it self-reported at 5.2 GB). The whole process took 40 minutes, give or take.

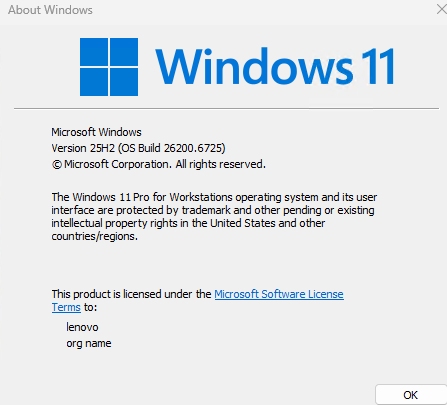
After all is said and 24H2 is running, I show winver and the Insider Program status. Because the latter starts with “Join the Windows Insider Program,” it shows that this is a 24H2 image. Ostensibly, it’s only available to Insider Program members in the Release Preview channel. But here ’tis outside that tender embrace. Thanks again, Mr. Thurrott!

Go 24H2 Outside Insider Program.visual-proof

Winver shows 24H2;Settings > WIP says “Join up!” QED.

Thurrott says this image will happily collect WU items as they’re issued going forward. I believe him. This seems like a stellar way to jump into 24H2 production mode a bit early. IDKYCDT Good stuff!

Facebooklinkedin
Facebooklinkedin

PowerToys Throws One-Time 24H2 RunDLL Error

When I logged into my newly-upgraded Windows 11 24H2 laptop this morning, I couldn’t help but notice something new. It’s reproduced as the lead-in graphic: it shows a missing app as the focus of a scheduled task. Upon digging into Task Scheduler, I learned that PowerToys throws one-time 24H2 RunDLL error as shown. But after ending the task, then rebooting, it doesn’t come up again. Weird!

Fixing PowerToys Throws One-Time 24H2 RunDLL Error

I right-clicked on the PowerToys entry, then right-clicked the PcaWallpaperAppDetect Task in the “All Running Tasks” pane overlaid at center right. Now, I can’t make it come back, so I can only show you where it was (I swear!). You can, however, find discussion and examples at Microsoft Answers, where I also posted info about the very fix I’ve just explained.

PowerToys Throws One-Time 24H2 RunDLL Error.Task Scheduler

I right-clicked the PcaWallpaperAppDetect task, then select “End task” from the pop-up.[Click image for full-size view.]

I was a little surprised by the outcome of my exercise. I’d expected the task to return after a reboot. But it did not, as you can see from the preceding screencap, captured after I rebooted the only 24H2 Preview PC I’ve currently got running. Go figure!

Given MS Answers Action, Going Thru Channels

Because numerous other folks are reporting the same RunDLL error online, I’m letting @ClintRutkas know about this. He’s the leader of the PowerToys dev team. That teamshas shown itself extraordinarily responsive to such reports in the past. My best guess is that they’ll fix it pronto!

Facebooklinkedin
Facebooklinkedin

Digging Into Massive DISM Delay

If I needed proof that “no good deed goes unpunished,” I got that yesterday. I was revising a story for Tom’s Hardware about fixing an IRQL BSOD. By way of example I ran a pair of DISM commands and the system file checker (shown at the end of this post). The second DISM command took a LONG time to complete and hung up at 62.3% complete. Then, when I jumped to another PC it did the same thing again. That’s why I’m digging into massive DISM delay this morning.

What Digging Into Massive DISM Delay Tells Me

A quick online search tells me I’m not alone. Indeed, there’s a Reddit thread entitled “DISM Restore health stuck on 62.3%.” It  confirms what I’d observed on my own PC — namely, that the delay is NOT a hang, and the command will complete . . . eventually.

Next, I ran down the logs that get written when DISM /RestoreHealth is underway. First, I found a 10-minute gap between one timestamp and the next in the dism.log file. Then I used the same timestamp when that delay hit to look at CBS.log. Sure enough, the repair was mapping Windows Enterprise to the Professional Edition. This was followed by at least 3,371 files opened and examined (some lines open 1, others 2).

Based on a screen’s worth of entries summed and averaged it comes out to 3371 * 1.42 =  ~4829 files in all. Obviously, that can take some time. The end of this activity explains what’s going on: “Repr: CBS Store Check completes.” Then a bunch of missing manifests or catalogs come in, with a large number of update downloads after that. Poof! 10 minutes is gone.

When DISM Gets Going, It’s Busy, Busy, Busy

So even though DISM /CheckHealth found nothing amiss, DISM /Restorehealth found itself with a lot of work to do. And that’s where the “missing 10 minutes” went. Seemed like forever, but it’s apparently a well-worn routine — if the Reddit post is any indication.

And boy howdy, isn’t that exactly how things sometimes go here in Windows-World? And I suppose I should be glad that all the current public Windows 11 release PCs experience the same thing. At least, it’s consistent . . .

Facebooklinkedin
Facebooklinkedin

RenamePC + Date&Time Move Into Settings

I’ve been paying a lot more attention to Microsoft’s sometimes slow and scattered migration of functions and features from Control Panel to Settings lately. Why? Because I’m in the midst of a series of stories on Control Panel, Settings and Consoles in Windows 11 for AskWoody.com. That’s why I picked up quickly on Canary Build 26217.5000. In that release,  renamePC and date&time move into Settings.

You can see the new “Rename your PC” window in the lead-in graphic. It echoes the current Windows 11 theme. It also shows rounded corners and other modern UI hallmarks.

What RenamePC + Date&Time Move Into Settings Means

More functionality keeps making its way from the older Control Panel interface into the newer, dynamic Settings environment. Indeed, the Sync capability is now fully integrated into Settings > Time & language > Date & time:

It’s no longer necessary to jump from Settings into Control Panel to sync a PC’s clock with some standard time server. Mine is time.windows.com. (Look near the bottom of the preceding screencap.)

MS: When Will You Make an End?

Like the Pope to Michelangelo in working on the Sistine Chapel ceiling frescoes, the question more or less begs itself. Because of all the separate development groups involved across the whole OS, I’m afraid the answer is “Nobody knows!” No doubt the old rejoinder “When it’s finished” applies as well to transitioning from Control Panel to Settings as it did to the 1965 Hollywood epic that’s the source of this cheesy dialog. Hopefully it, too, leaves a legacy for the ages…

Facebooklinkedin
Facebooklinkedin

IPRI Spawns Desktop Oddities

OK, then.  I had to try it again after Windows 11 Insider Preview, Beta Channel, went to Build 22635.3566. DISM … /analyzecomponentstore was showing what’s become a “typical” 13 reclaimable packages that really weren’t there. (Note: I blogged about this back on April 4 for an earlier such build.) Last time, an in-place repair install (IPRI) fixed the issue. So I tried again, but observed that IPRI spawns desktop oddities even as it fixes the bogus reclaimables issue. That required some cleanup. Sigh: let me explain…

What IPRI Spawns Desktop Oddities Means

After the initial reboot following the IPRI, the taskbar and its icons failed to appear at the bottom of the display. That meant I had to open Task Manager (Ctrl+Alt+Esc did the trick), click on Run task, then type explorer.exe into the input box. That set my desktop mostly back to rights, with icons on taskbar in their usual places and positions.

But there was one more thing: icon spacing on my desktop was totally bizarre. I only allow 7 items on my desktop as a matter of routine, mostly repair stuff and default stuff — e.g. Recycle Bin and the two desktop.ini items that show up because of my folder settings choices. But icons were spaced about 2″ apart horizontally and vertically. Ultimately, I resorted to WinAero Tweaker to establish minimum horizontal and vertical spacing between icons (32 pixels’ worth, as it happens). And BTW, I had to reboot to get those settings to “take.”

All’s Well That Ends Well

I can’t remember even niggling issues at the desktop in the wake of an IPRI before this matter of the bogus reclaimables started showing up in the Beta Channel releases about two months ago. But since then, I’ve sometimes had to choose between cleaning those bogus items out and a working desktop. Because the former doesn’t really seem to cause any problems, while the latter is definitely a productivity buster, it’s not a hard choice to make.

But gosh, I’m still glad when I can clean up a mess AND get to a working desktop. I’d love to know what’s causing this to occur, and why the number of bogus reclaimables has so far been “Lucky 13.” But such minor mysteries are part of the allure when one lives in Windows-World. Cheers!

IPRI Spawns Desktop Oddities.nobogus

Number of reclaimable packages: 0! And a working desktop, too… [Double-click image to display in own window.]

Facebooklinkedin
Facebooklinkedin

Dev Home Now Creates VMs

A new release of the Dev Home (Preview) toolbox hit the streets on Tuesday, April 23 (v0.13). I updated but didn’t really pay much attention. Then, this morning I learned something noteworthy from WindowsLatest — namely, that you can now use Dev Home (DH) to set up and manage Windows VMs including Hyper-V instances. Because I’m working on a “How-to” story right now on such VMs, this definitely caught my eye. And indeed, on a test PC, I see strong evidence that Dev Home now creates VMs. Not too much effort involved, either…

If Dev Home Now Creates VMs, Then What?

It took me a while to get where I needed to go with setting the right environment toggles. Eventually, I settled on the first three (Environments Creation, Environments Management, and Environments Configuration) and turned all three on. Then, I had to close and re-open Dev Home to gain the ability to actually use the “Create environment” button.  It’s hiding in the upper right corner of the lead-in image; you can see it up there if you check.

At that point you can give your environment a name (I called it DHWin11 to indicate I was using Dev Home to build a new test Windows 11 VM in Hyper-V). Then you pick the reference image from which it gets built. I chose the Windows 11 Development Environment option that Dev Home supplied. I’m sure I could have navigated to another ISO of my choosing.

Take a While, But Gets Things Right…

It took over 15 minutes for the setup, download, and install processes to get far enough along to do something. But gosh, I was able to get into the Hyper-V window to fire things off, then get to the desktop with no hiccups or gotchas along the way inside RDP. Things don’t work that well using Hyper-V Manager.

I found myself running a 22H2 Windows 11 instance labeled “Windows 11 Enterprise Evaluation” for Build 22621.3447. I know from prior experience this is a 30-day eval or thereabouts. Indeed, Copilot tells me it expires on June 19, 2024. But gosh, this makes standing up and using a plain-vanilla Hyper-V VM as easy as it’s ever been in my personal experience.

Now, I need to do it again, and use an image of my own choosing. That should be interesting! Stay tuned, I’ll write about this soon. Meanwhile, you can see that VM running on my P16 test PC as shown in an RDP window for the whole shebang.

Wow! That was almost TOO EASY. I must say, I’m impressed. Need more time and exploration to really formulate a more useful opinion, though. First look is a doozy, though.

Facebooklinkedin
Facebooklinkedin

Bring Up Start Menu Inside Start11v2

Here’s something I hadn’t noticed, nor yet learned how to fix. Seems that there’s no entry in the UI for Start11v2 in “Windows Pro style” for the built-in Windows 11 Start menu. But there’s a trick to bring up Start menu inside Start11v2. That method lurks behind the lead-in graphic which shows all of the available styles and the one I currently have selected — namely “Windows Pro style.”

The Trick to Bring Up Start Menu Inside Start11v2

This trick depends on features available in the Windows 7 style that are missing from Windows Pro (and other more modern styles):

1. Switch to Windows 7 style view
2. Open the Start menu
3. Find the entry that reads “Windows Menu”
4. Right-click that item and select “Pin to start”
5. Inside Start11v2 UI, switch back to Windows Pro style

Now, you can see the “Windows Menu” entry at the lower left of the default app icon grid inside Start11v2.  If you hold down the CTRL key, you can drag that item and put it wherever you like.

Bring Up Start Menu Inside Start11v2.Windows Menu

I used that technique to move it to the upper-left corner position where I can see it more quickly and easily.

Bring Up Start Menu Inside Start11v2.oldmenuulWhy Use the Built-in Start Menu, Anyway?

Some things in Windows 11 don’t work unless you can access the built-in Start menu rather than a third-party version (e.g. Stardock’s various versions, StartAllBack, Open Shell Menu, and so forth).

In this case I wanted to see if a new feature providing access to MS account info directly from the start menu in Beta Build 22635.3500 was present or absent. It’s apparently on a gradual rollout. And, in keeping with my unbroken track record so far, that feature is not yet available on this PC. Go figure!

Facebooklinkedin
Facebooklinkedin