Category Archives: Windows 10

Samsung NVMe Drive Failing

In a recent story here, I mentioned a possible mismatch between some components. On the one hand: an old Samsung MZVPV512HDGL OEM NVMe drive. On the other hand: a brand-new PCIe x4 USB 3.2/Thunderbolt NVMe enclosure. Upon swapping in a newer ADATA drive my issues with the enclosure vanished. So I mounted the other drive in an older Sabrent NVMe enclosure. Now I’m getting indications of the Samsung NVMe drive failing. A strong indicator shows up as the lead-in graphic above.

What Says: Samsung NVMe Drive Failing?

The inability to perform write tests using HD Tune is a pretty big tell. Interestingly, though: chkdsk and CrystalDiskInfo both report the drive as healthy. My best guess is that write failures are occurring, and that HD Tune won’t “write past” such things, while the other tools rely on SMART data and surface analysis and aren’t seeing active errors.

My plan is to retire the drive as soon as the replacement part shows up. That’s been en route via Amazon for too long now, so I just cancelled that order and placed a new one. Hopefully it will be here tomorrow, including a 1TB Sabrent Rocket 4 Plus with internal read/write speeds of up to 6+/4+ Gbps. Of course, that’s not gonna happen in a USB 3.2/Thunderbolt enclosure. But I am darn curious to see how fast the bus can go when the drive is fast enough to get out of the way.

Stay Tuned: More to Come!

According to what I read online, I may be able to get read/write speeds in excess of 2 Gbps via Thunderbolt 3 from the NVMe enclosure. So far, the best I’ve seen from my older Sabrent (USB 3.2 only) enclosures is on the order of 1.1 Gbps. So it should be pretty easy to tell if the new drive/enclosure speeds things up.

Facebooklinkedin
Facebooklinkedin

Flaky Video Driver Forces Fix Revisits

My production desktop’s dual monitor setup gets a little wonky from time to time. For some odd reason, the right-hand (primary) monitor will start blinking on and off. It’s annoying, but not overwhelming. When it happens, an apparently flaky video driver forces fix revisits. Basically, I keep trying stuff until something works. By no coincidence, that’s a decent operational definition for troubleshooting.

Items Checked When Flaky Video Driver Forces Fix Revisits

It usually goes something like this:

1. Use the Winkey-Ctrl-Shift-B key combo to reset the graphics driver. It does work, sometimes…
2. Check GeForce Experience to see if a newer driver is available; if so, install it.
3. If using the Nvidia gaming driver, switch to Studio driver, or vice-versa.
4. Uninstall, then reinstall the Nvidia driver. I also recommend using the freeware DDU tool to remove all traces of the old before installing the new.
5. Visit the Nvidia Driver Downloads page, and start trying older drivers, going back one version at a time… The recent entries in that list for my GeForce RTX 3070 Ti appear as the lead-in graphic for this story.

Today’s Fix Occurred Mid-way in Sequence

I got to Step 4 today before the blinking stopped. That’s a bit further than I usually have to go, but that’s Windows for you. I’m just glad I can concentrate on what’s showing on both displays, rather than how one or the other is (mis)behaving.

Some Windows errors or gotchas can be set aside and ignored for a while. Others — especially when they interfere with normal system operation — demand immediate attention. While today’s gotcha was one of the latter, it was familiar. Thus, I knew what to do, and how to do it, with minimum need for diagnosis and root cause analysis.

I just marched through the foregoing list and found my solution in under 10 minutes. I can only wish that all problems were so easily fixed. And that’s the way things are unfolding today, here in Windows World. Stay tuned: there’ll be more!

Note Added August 13

Yesterday, I installed a new NVIDIA Studio Driver (version 516.94). The problem has not re-appeared since I applied my uninstall/reinstall “fix” earlier this week. That jumps me up from Step 4 (original fix) to Step 2 (current fix). And so it goes…

Facebooklinkedin
Facebooklinkedin

Thunderbolt 3 SSD Enclosure Raises Odd Issues

This is the part of playing with Windows that I love best. I’m researching different speeds for backup drives, ranging from a USB-C HDD drive caddy into the SSD realm. My objective is to see how fast an external USB-C drive can go, and to see if Thunderbolt support makes any difference.  I added a cheapo (US$29) NVMe enclosure to my line-up. But alas, that Thunderbolt 3 SSD enclosure raises odd issues. Let me explain…

Why Thunderbolt 3 SSD Enclosure Raises Odd Issues

As far as I can tell, I went too far back in time with the first M.2 NVMe I tried out in the cheapo new NVMe enclosure. My initial attempt featured a 2016 vintage OEM Samsung MZVPV512HDGL SSD. It kept blowing up during write testing in CrystalDiskMark, and it wouldn’t make a Macrium Reflect backup.

So I cannibalized a newer ADATA XPG 256GB SSD (vintage 2020) from my Sabrent-enclosed Ventoy drive and tried that instead. It worked just fine, and got aggregate read/write speeds from Reflect of 5.7/3.0 Gbps when backing up my Lenovo X12 Hybrid Tablet. It includes a USB 3.2 version of USB-C with Thunderbolt 3 support. Total backup time on that system was 6:16 with 76.5 GB on the C: drive and under 1.5 GB on the other partitions. Figure 78 GB overall, that produces a physical time (no compression) of roughly 200 Mbps of ongoing read/write activity. By comparison an mSATA drive (vintage 2013) takes just under16 (15:56) minutes to complete the same backup. That’s more than 60% faster!

It’s All About the Speed

My best guess is that the older drive wasn’t sufficiently compatible with the PCIe x3/x4 requirements inside the NVMe enclosure. Once I switched over to something newer (and definitely PCIe x3 compliant), everything worked fine. I’ve got a brand-new PCIe x4 SSD coming today or tomorrow, and am hopeful the faster media will also produce faster transfer rates for backup, too. We’ll see!

Facebooklinkedin
Facebooklinkedin

Weird Full-Screen RDP Effect

I still use Windows 10 on my production desktop, but I run half-a-dozen instances of Windows 11 right now. Lately, I’ve noticed that with screen size expanded to fit the left-hand monitor — but not maximized — I get a weird full-screen RDP effect. I lose the start menu at the bottom of the screen. As I said: weird!

What Is the Weird Full-Screen RDP Effect?

The lead-in graphic for this story shows what I’m talking about from the Start Menu perspective. Up top, we see a Windows 10 Start Menu that surprisingly shows up at the bottom of a “full-screen” Windows 11 RDP window. When I hit the maximize  button at upper right, the lower (and normal) Windows 11 start menu appears. (Note: I selected “left” alignment in the Task Manager options to make it show up there for purposes of comparison and contrast).

Needless to say, when I don’t notice this and click on the full-screen Windows 10 menu, it doesn’t do anything to the Windows 11 RDP window above. This is disconcerting, to say the least. At worst, I start thinking I’ve got problems and start unnecessary troubleshooting actions. Sigh.

Why/How Did This Weirdness Present?

For some reason, this happened to me the last time I updated the Nvidia driver on my production PC. It’s now running version 516.93, installed last week. After the install completed, all the open windows moved to the right-hand (primary) monitor. That’s normal. But what’s different is that maximized RDP windows changed “auto-magically” to full-screen (but not maximized) layouts. That led me to the source of confusion when I dragged those full-screen windows to the secondary (left-hand) monitor.

Again: Weird! But by looking very closely at what I was seeing, I eventually figured out what was going on. Now I make sure to click the maximize button when using RDP. That way, I see the maximized RDP session controls at the top of the screen (see below) and know that the start menu at bottom is the start menu I want to work within that window.

Weird Full-Screen RDP Effect.controls

And that, dear readers, is how things sometimes go in Windows-world. As JRRT put it “All that glitters is not gold; not all those who wander are lost.” I wandered a bit, but ultimately figured out what was weird and why.

Facebooklinkedin
Facebooklinkedin

Updating Dolby Audio X2

On some of my Lenovo systems, one specific file often shows up in the Software Update Monitor (SUMo) in need of a newer version. It’s named dolbydax2desktopui.exe . According to Lenovo, it’s part of the Dolby Audio X2 system (DAX2) and comes preloaded on some of its PCs. Updating this Dolby Audio X2 file has been problematic, because a file source and update method have been unclear. No longer!

Updating Dolby Audio X2 Is Easy, If You Know How…

Most software updates require … well … an update of some kind to be applied. Not so for this particular file. One simply needs to overwrite the older version with a newer one in its default path:

C:\Program Files\Dolby\Dolby DAX2\DAX2_APP\

Of course, this raises an interesting question — namely, where might one find current versions of this file? I finally found them at a website named pconlife.com, which describes itself as “aimed at recovering the .dll or .exe file lost by Windows OS for computer users.” In general it seeks to help users replace lost, missing or damaged Windows files. For me, it’s shown itself to be a safe and reliable source of current versions of the afore-named DAX2 file. (Note: VirusTotal gives this file a 0/68 finding on its comparative checks).

Now, when SUMo tells me I need to update this file, I know where to go to get its specified version. I also know how to “update” that file. Choosing “Copy and Replace” in Explorer when seeking to over-write its predecessor does the trick nicely, thanks very much!

Yet Again, Persistence Pays Off

Learning how to keep Windows apps and components current is mostly a matter of routine. But for some things — this DAX2 item is a good example — one has to figure out how to do that, and where to get new versions as they appear. It’s easier when the vendor or maker provides an update package (and easier still when applying that package can be automated). But with enough investigation and elbow grease, these problems can be cracked over time. I’m glad to have this one finally made routine as well.

Facebooklinkedin
Facebooklinkedin

Store Reinstall Solves Stuck Terminal

Interesting! As is my usual practice, I just installed KB5015882, the upcoming CU preview. It targets production Windows 11, and takes it to Build 22000.832. After that update and restart, I noticed two things. First, this PC was still running the old Windows Terminal version. Second, Windows Store offered me an upgrade for same, but it got stuck during the process. After forcibly closing Store, and returning to the same page, a Store reinstall solves stuck Terminal once and for all. Deets follow, and a general approach to app repair.

Praise Be! Store Reinstall Solves Stuck Terminal

To begin with, when I ran Windows Terminal, I noticed it was still running an old version (no access to Settings, nor various supported command line environments). When I visited the Store, and searched on “Windows Terminal” its app page hung while trying to upgrade that very tool. So I terminated the whole shebang by clicking the close button at upper right.

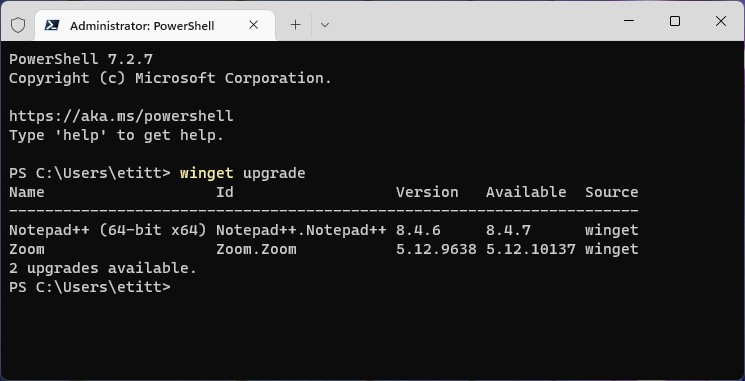
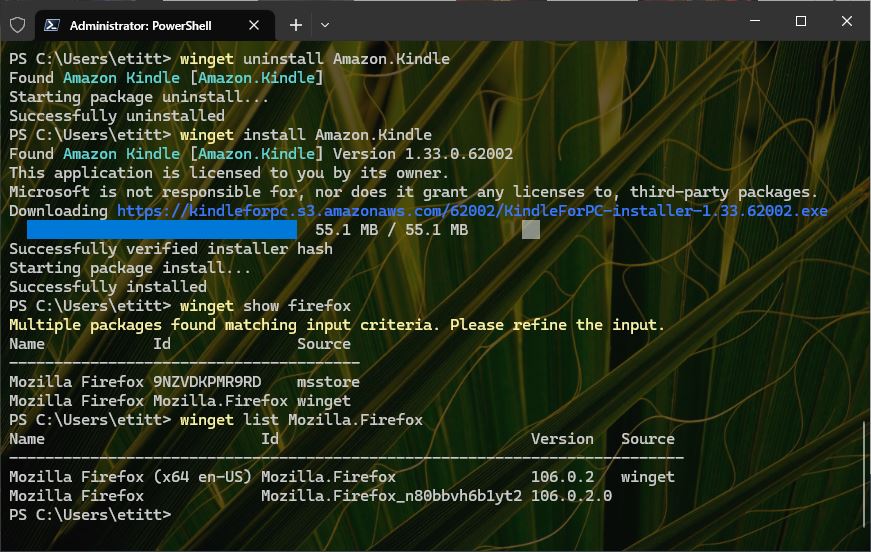
Just for grins, I ran winget upgrade --all. It did not upgrade my Windows Terminal install, though it found and updated numerous other items successfully. Go figure!

Then, I opened the Microsoft Store again. I repeated my search on “Windows Terminal.” Lo and behold, it offered an Install button this time. When I clicked that option, it downloaded and installed the latest version. As you can see from the lead-in graphic above, the result was a current version of Windows Terminal, which runs PowerShell version 7.2.5 by default. Fixed!

When Windows Apps Get Wonky…

When apps start going sideways, I go through a drill to clean them up. This drill consists of the following steps:

    1. Visit the Store, look up the app and see what it offers. Apply any resulting upgrades or installs. If this doesn’t work, go on to
    2. Use PowerShell and Winget to find the name of the package for the app in question. Here,  winget list terminal reports that name is Microsoft.WindowsTerminal.
    3. You can use winget to uninstall, then reinstall the package as follows:
      winget uninstall Microsoft.WindowsTerminal. Then,
      winget install Microsoft.WindowsTerminal
      will install the current version.

Most of the time — as in this instance — if the Store offers options, they will usually suffice to fix app issues. Steps 2 and 3 are only needed when the app itself is somehow damaged or corrupt.

Put this in your bag of Windows 10 and 11 tricks. It could come in handy someday!

Facebooklinkedin
Facebooklinkedin

KB5015684 Provides Quick Windows 10 22H2 Upgrade

Here’s an interesting item. Turns out that MS has made KB5015684 available through its update servers. Thanks to the team at DeskModder.de you can find x86, x64 and ARM64 versions of either .CAB or .MSU files. All have links of the form https://catalog.s.download.windowsupdate.com/c/upgr/2022/07/windows10.0-kb5015684-xxx.cab or .msu. They must be legit, right? Hence my claim that KB501864 provides quick Windows 10 22H2 upgrade.

I just ran it on my production Windows 10 PC, and it went through without hitch or glitch. Completed in under 2 minutes, including download, install and reboot time, too. May be worth a try for those with Windows 10 PCs not expected to elevate to Windows 11 soon (or ever). So far, I see no discernable changes in look, feel, or behavior — just a new Build number 19045 (vs. 19044). Same minor extension as before, in fact: 1826.

What KB501864 Provides Quick Windows 10 22H2 Upgrade Really Means

Two things:
1. MS is getting close enough to a 22H2 public release for a preview to go out.
2. The code for the 22H2 release is stable enough to start it through the Windows Insider program.
Note: I didn’t have to join the Insider program to install this update, which appears as a “Quality Update” in Update History. The Windows Insider Program page on this PC, post-update, does NOT show itself as “joined-up” either. So one need not be concerned that applying the update automagically changes the PC’s status to that of an Insider machine. That’s a relief!

I ran the .MSU x64 version of the upgrade, simply because a self-installing update file is a little easier to apply than CAB files can sometimes be. You can find all links in the original Deskmodder.de article (6 files in all). It might be a good idea to apply this upgrade to test machines with some caution, if you’re concerned about possible unwanted side effects. That didn’t stop (or hurt) me on this PC, though…

If you’re interested, have at it. Cheers!

Facebooklinkedin
Facebooklinkedin

Choose Reflect Backup Drives Carefully

I’m a HUGE fan of Macrium Reflect. Available in both free and for-a-fee forms, I’m convinced it’s the best Windows image backup tool available today. Disclosure: I run both free and fee-based versions, and own a Home 4-Pack license that I upgrade as new versions are released. I was reminded to choose Reflect backup drives carefully yesterday, when I targeted an older USB 3 drive with mSATA SSD devices under its hood. Let me explain…

Why Say: Choose Reflect Backup Drives Carefully?

Because the read and write speeds of the underlying device and the speed of the channel (USB 3.1 in my case here) matter. In fact, they strongly affect the time it takes to complete a whole-image backup. In targeting an mSATA device that backup took nearly 40 minutes to complete.

I’m making the same backup right now, and targeting a PCIe x3 NVMe SSD in a Sabrent USB-C enclosure right now. As you can see from the lead-in graphic, Macrium Reflect currently guesstimates it will take 19 minutes to complete. That’s just over 50% faster than the mSATA number, or about 20 minutes overall.

If such a task is running in the background, and can complete whenever it’s done, that doesn’t matter much. But if, as in my case, I was waiting on completion to do something else, it matters a lot.

And There’s More…

While watching the NVMe and mSATA image backups proceed, I noticed another difference. The transfer rate for the two backups not only differed but so did their variability. The NVMe device kept getting faster as it proceeded. It ranged from a low of 1.1 Gbps to a high of 1.8 Gbps. The mSATA device started out at around 600 Mbps, It dropped as low as 220 Mbps, and as high as 1.0 Gbps during the course of the backup process.

Upon completion, Reflect also shared other stats worth noting. The overall read rate for the mSATA device was reported at 1.6 Gbps, while its write rate came in at a less stellar 550 Mbps. On the NVMe device, the overall read rate was 6.6 Gbps, and the write rate 1.9 Gbps. That’s a BIG difference, and explains the title for this story. Yes, these numbers appear inflated because they take compression into account. But those are the numbers that Reflect reports, and they do underscore the importance of device read/write speeds.

Note: Actual time for the NVMe backup was 19:31, while actual time for the mSATA backup was 39:52.

Facebooklinkedin
Facebooklinkedin

Windows Terminal PowerShell Selection

I have to laugh. Yesterday, I noticed version 5 of PowerShell  running inside Windows Terminal. So I naturally wondered: “How do I upgrade this?” Turns out, in fact, that no upgrade is needed. It all comes down to the current Windows Terminal PowerShell selection. I’ll explain shortly, but first: look at the window in the lead-in graphic.

Managing Windows Terminal PowerShell Selection

By default, version 5.1.xxx… appears when you open Windows Terminal. But it’s easy to get to a newer PowerShell version. No upgrading is necessary: you need only know how to do this. If you click on the down-caret at the far right of the title bar, a menu appears, like this:

Windows Terminal PowerShell Selection.choose shell

The down-caret menu lets you choose among shells you can run in a Windows Terminal tab. [Click image for full-sized view.]

The trick — if you can call it that — is to choose the right version of PowerShell (and corresponding default) to run. The top item in the menu corresponds to version 5.1.xxx. The fourth item down brings up the latest 7.x PowerShell version (specifically, 7.2.5). If you click Settings, you can also choose this version as the “Default Profile” which makes the new version (rather than the 5.1.xxx version) appear whenever you open Windows Terminal, or click the “Plus” sign to open a new default Terminal tab.

As with many other things in Windows World, foreknowledge and understanding are key to doing things right. In my case, I had no need to update PowerShell. I only needed to pick the right version to run inside Windows Terminal. Now I know how. If you didn’t know how already, this should make things equally simple for you. Cheers!

Facebooklinkedin
Facebooklinkedin

Change Dev Channel Task Manager Default View

Here’s a nice little addition that’s popped up in the Dev Channel version of Task Manager. If you visit its Settings page, you will see a “Default Start Page” pull-down menu there. This makes it easy to change Dev Channel Task Manager default view. My preference is Details, as shown here:

Change Dev Channel Task Manager Default View.details

Because it’s my go-to view, I set “Details” as the default in Task Manager.

Why Change Dev Channel Task Manager Default View?

For convenience, mostly. It’s not a huge deal in terms of added functionality. But anything that saves a mouse click is helpful, when it comes to getting down to work, eh? In general, MS seems to be moving to a move open, less cluttered layout for Task Manager in the Dev Channel version. It takes a little getting used to, but I like it.

My eyeballs are still better trained to make sense of the old-fashioned Task Manager that’s still visible in Windows 10 and other Windows 11 versions (for me that mostly means production version, Build 22000.778). The contrasting yellow shades for data cells are still more recognizable to me.

But, as with all things Windows, changes spur us on to learn and appreciate new things. That’s how I’m going to play the evolution of Task Manager. We’ll probably have side-by-side versions for Windows 10 and 11 for some time anyway, what with Windows 10 EOL not until October 2025.

But Wait, There’s More…

Turns out you can change the default tab for older Task Manager versions, too. The menu fiddling is a bit different though, as shown in the next screencap:

A different sequence of menu picks changes the default view in old Task Manager iterations.

As you can see in the preceding screenshot, click Options → Set default tab → and then any of the items shown (Processes, Performance, App history, Startup, Users, Details, Services) to make your selection. Good stuff!

[Note] Here’s a shout-out to Mauro Huculak at Windows Central, whose July 8 story clued me into this new wrinkle on an old favorite Windows tool. Thanks, Mauro!

Facebooklinkedin
Facebooklinkedin