Category Archives: Cool Tools

Fixing Windows 10 WinKey-X

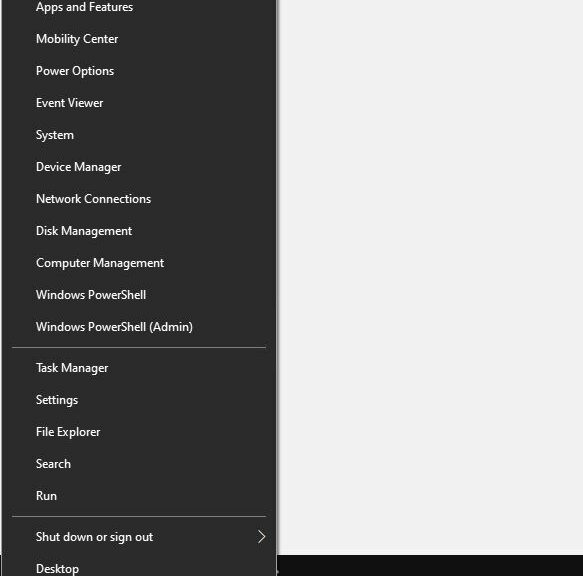
I don’t remember anymore how I shot myself in the foot this particular time. All I know is that I somehow removed all traces of PowerShell from the WinKey+X menu on my Windows10 production PC. The lead-in graphic shows that menu from my ancient Surface Pro 3, also still running Windows 10. Recently, I’ve found myself fixing Windows 10 Winkey-X because I want it to show Windows Terminal.

After Some Fumbles, I’m Fixing Windows 10 WinKey-X

If you search on “customizing WinKey+X menu” you’ll find lots of information and advice available. Initially, I was beguiled by Sergey Tkachenko’s WinX Editor. I should’ve known better: it hasn’t been updated since 2017.

A key ingredient in modifying the WinKey+X menu, as it turns out, turns on using the latest version of Rafael Rivera’s hashlnk.exe program. Basically, it creates hash values and associated them with menu shortcuts, so the OS treats the entries in the following path correctly:

%LocalAppdata%\Microsoft\Windows\WinX

The sub-folder “Group3” is where my specific shortcut had to go. But it didn’t work without using the latest (2.0) version of hashlnk. And because WinX Editor doesn’t use that version, it doesn’t work, either.

TenForums to the Rescue

As with many other topics in the Windows world, I found my fix in the TenForums Tutorials. This particular one is called Add Custom Shortcuts to Win+X Quick Link Menu in Windows 10. I followed its guidance, step-by-step, and got an admin version of Windows Terminal installed in my WinKey+X menu without undue difficulty.

As is often the case in fixing Windows issues, it took much longer to find the right solution than it did to implement it. I think we’re talking about an hour-plus of fumbling around and failed attempts before I turned to my unusually reliable and intelligible TenForums resource. Sigh. That’s the way things go around here sometimes….

Here’s what my Winkey+X menu looks like now, with my desired entry up top.

Fixing Windows 10 Winkey+X.i7skyfixed

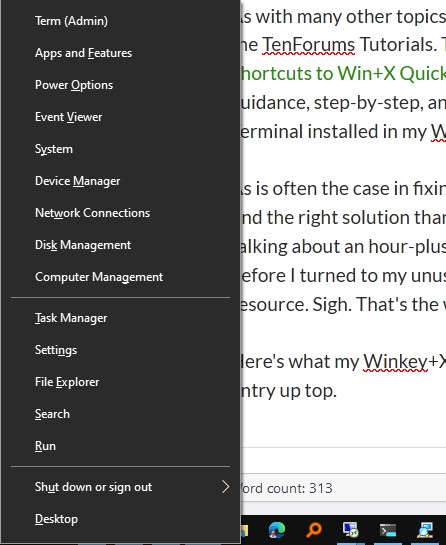
After going through the motions I get a Windows Terminal entry with admin privileges (reads “Term (Admin)”).

I have long been a proponent of Ten Forums and ElevenForum tutorials. This doesn’t change that stance at all. In fact, it strengthens it!

Facebooklinkedin
Facebooklinkedin

ThinkPad Universal Thunderbolt4 Dock

It must be because I asked Lenovo for gear to test Thunderbolt4 and USB4. Last week another unexpected and unnanounced device showed up at the door. This time, it was a brand-new ThinkPad Universal Thunderbolt4 Dock. From what I’ve seen so far it has a lot going for it — especially price (relatively speaking, that is).

Why Is TB4/USB4 Gear So Costly?

Before I dig into the details on the mostly excellent ThinkPad Universal Thunderbolt4 dock, I must rant a bit. I’ve got 3 TB4 docks here at the house right now. The Lenovo unit is the cheapest by US$70-plus (that’s a good thing). But all of them cost over US$300, and two of them are at or over the US$400 mark. That stings!

I’ve been looking at a lot of NVMe enclosures that support USB4 lately, too (they work with TB4 controllers, BTW). These puppies cost even more. That means US$80 – 100 more than the cost of decent-to-high quality USB3.1 NVMe enclosures. I’m talking US$30-50 versus US$130-160. That’s a big difference!

One usually pays a premium to climb onto the bleeding edge of technology. And right now, TB4/USB4 is as fast as external devices get. Given a PC that supports these interfaces, I still don’t understand why climbing aboard this latest technology wave incurs such a hefty buy-in. Sigh.

More About ThinkPad Universal Thunderbolt4 Dock

Now that I’ve set the stage for describing and exploring this device, more of what I have to say should make sense. Indeed, this Lenovo dock is a relative bargain among all the TB4 docks I’ve tested so far. That is, with an MSRP of US$322, it costs US$77 less than the Belkin Pro Thunderbolt 4 dock. It enjoys the same price differential when compared to the CalDigit TS4 dock but that device keeps selling out, and is only immediately obtained on eBay for US$500-600!

Thus, the Lenovo Device has a definite price advantage in this very narrow product niche. See this Amazon Search for a fairly good list of the whole product range right now. From what I can tell, Lenovo offers the best price currently available for these kinds of devices.

Here’s a short list of ThinkPad Universal TB4 Dock features and functions (see product page for complete specs):

  • Handles up to 4 external monitors, up to 8K total resolution (1x8K display @ 30Hz or 4x4K display @ 60 Hz via 2xfull-size DP 1.4, 1xfull-size HDMI 2.1, 1xUSB-C)
  • 2 40Gbps Thunderbolt4 ports (one for computer in, one for other uses)
  • 4xUSB-A 3.1 ports and 1xUSB-C (may be used for video, as already indicated)
  • 135W external power brick, up to 100W available for charging
  • RJ-45 GbE (Intel I225-LMvP circuitry)
  • Audio mini-jack for headphones or external audio hookup
  • Universal computer lock port for attaching locked cable
  • Dimensions 220x80x30 mm (8.66×3.15×1.18″)

The Lenovo dock even downloads and handles its own Windows drivers with reasonable aplomb and dispatch. I found it loaded up its own USB Audio driver (under Sound, video and game controllers). It also updated the local Thunderbolt controller driver to a newer version after hook-up.

Stacking Up the Hubs

My testing so far puts all 3 docks — Lenovo, CalDigit, and Belkin — into the same overall performance range for USB4 and Thunderbolt 4 devices. That said, the CalDigit device offers 18 ports including GbE and 2.5 GbE RJ-45 networking hook-ups and SD flash device slots. If you can find one and need that extra functionality, that may make it worth the extra cost. Likewise, the Belkin device also supports a full-size SD slot and dual USB-A 2.0 slots, which may or may not make a different.

By comparison, I’d give the Lenovo device a “Best Buy” rating right now. If you don’t need SD support or lots of (different) USB-A ports, it can handle what you need. I have no difficulty using it as a docking station for a Lenovo X12 hybrid laptop with external mouse, keyboard, and two or three external storage devices. It also works well with HDMI or DP to drive an external Dell U2717 monitor.


Facebooklinkedin
Facebooklinkedin

P360 Ultra Gets Second NVMe

A couple of days ago, I praised the interior design of the Lenovo P360 Ultra SFF PC (link). I just had to remove the GPU to access the second NVMe slot on an Asrock B500 Extreme4 motherboard last week. Let’s just say it wasn’t incredibly easy (and some expletives were involved). That really made me appreciate an install that required less than two minutes all the way around. But now that the P360 Ultra gets second NVMe, I want to report on the results.

When P360 Ultra Gets Second NVMe, Speed Abounds

What you see as the lead graphic for this story is a pair of CrystalDiskMark results. To the left, the internal C: furnished with the PC (a Samsung 1TB OEM drive: MSVL21T0HCLR). To the right, the internal D: I installed (WD Black SN850).

First, let’s look at those results. The Samsung drive enjoys an 18% edge on the sequential read (queue depth 32, single thread) and a  33% gain on random read (queue depth 1, single thread). The WD Black comes out ahead on all other readings.

That’s not surprising, given that the WD Black SN850 is a newer, more capable drive. But those results also speak to the notion that one should definitely populate open NVMe slots if speedy storage is helpful to the workloads a PC must handle.

P360 Ultra Gets Second NVMe.external

Same WD Black drive in a USB4 external NVMe enclosure: much slower.

Internal vs. External NVMe

The preceding screengrab shows CrystalDiskMark results for the same drive, but housed in an external NVMe enclosure. It happens to be a USB4 enclosure, and represents as much speed as I’ve been able to get from an external NVMe drive. It’s significantly slower across the board, but still not bad.

If I drop the same drive down to a USB 3.1 enclosure, it runs at standard UASP speeds (at or under 1000 in the top 4 cells). Interestingly the bottom four cells don’t change much for either USB4 or USB3.1. Backup speeds don’t change that much, either. That’s why I’m not convinced the USB4 enclosure is worth a $100 premium (it improves backup speeds by 30 seconds, give or take).

One More Thing…

If you’re buying an NVMe drive for an external enclosure, there’s no need to spend big on a fast, capable storage device. It won’t be able to run full out because the USB link (either 3 or 4) can’t keep up with top-end NVMe speeds. As the preceding CrystalDiskMark chart shows, you can’t come near the 6-7 GBps or so performance that top-end NVMes deliver these days.

On the other hand, if you’re going to put that device into an M.2 slot INSIDE the PC or laptop, that’s a whole ‘nother story. Then, you should buy as fast as you can stand to pay for — assuming, that is, that the PC or laptop can make full use of those capabilities.

Facebooklinkedin
Facebooklinkedin

Advanced IP Scanner Worth Using

For years now, I’ve been a huge fan of Nir Sofer’s software tools. Along the way, I’ve often used his NetBIOS Scanner (NetBScanner). It shows me which IP addresses Windows PCs occupy. Two weeks ago, I noticed PatchMyPC supports a tool named Advanced IP Scanner. I’ve now tried it out. I can say I totally find Advanced IP Scanner worth using. It appears as this story’s lead graphic, in fact.

Advanced IP Scanner Worth Using.NetBScanner-output

This NetBScanner output shows only Windows and other devices with NetBIOS names; Advanced IP Scanner (top) shows EVERYTHING IP.

If Advanced IP Scanner Worth Using, What About NetBScanner?

Once I started using the former, I immediately saw the limitations of the latter. Simply put, NetBScanner shows only 8 entries; Advanced IP scanner shows 18. It even includes devices that lack NetBIOS names but participate in the LAN (e.g. my ASUS WAP, my thermostats, and my TV). Better still, it shows the IP addresses that some of my PCs (laptops, mostly) use for Wi-Fi and GbE, along with which one is live at present and which one is unused (e.g. X380).

There’s more: as I was troubleshooting my PING and RDP issues earlier this week, I learned to make use of the right-click tools it offers for devices whose IP addresses it shows. You can access its maker’s own Radmin utility to jump directly into its version of remote administration of anything showing.

To me, though, the right-click Tools menu is both interesting and helpful. Shown above this paragraph, it lets you run a variety of commands in a cmd.exe window against the highlighted item. I used it to run PING tests point-to-point on my LAN and eventually got everything working. It also turns out to be a handy way to launch RDP as well.

Remember: Cools Tools Rule

I’ve come to like this free, informative and easy-to-use utility enough to add it to my top tier Windows tools collection. I call these “Cool Tools.” For me, they are essential items in my administration and troubleshooting toolbox. If you try Advanced IP Scanner out, I predict you’ll want to add it to your lineup, too.

Facebooklinkedin
Facebooklinkedin

WD Black SN850 SSD Heatshield Bites Me

It’s sometimes said: “It’s the little things that get you.” Boy, was that true for my latest SSD purchase. Alas, as shown in the lead-in photo, I accidentally ordered a version with heatshield. It’s pretty impressive. Formed of solid aluminum, it’s least 5mm tall. It upped the cost by US$30, too. Even so, the WD Black SN850 SSD heatshield bites me — or my deployment plans — right in the hindquarters.

How WD Black SN850 SSD Heatshield Bites Me

Why is this a problem? Well, I’d planned on emplacing the SSD in an NVMe enclosure. Such enclosures, however, only accommodate circuit boards, not massive (and thick) heatshields.

WD Black SN850 SSD Heatshield Bites Me.barebones

What I needed, in fact, was the barebones version (image above). Costs US$99.50, and fits an NVMe enclosure just fine. I guess that’s what I get for giving into techno-lust. Amazon’s one-click ordering gave no time for thought. Sigh. I blame the government…

We Don’t Need No Stinkin’ Heatshield…

A little poking around online showed me that I was not the only buyer so surprised. Another party confirmed the heatshield would come off (but only destructively). Caution was my watchword.

Armed with a pair of needle-nose pliers, I carefully bent the heatshield away from the PCB. Next stop: Disk Management, for new drive setup. Worked! Happily, here are the results in File Explorer from my cheapo new NVMe enclosure.

Live and learn, I hope. Going forward, I’ll read my product details more carefully. Gosh, perhaps I can avoid the same mistake in future. We’ll see!

Facebooklinkedin
Facebooklinkedin

Docking Discrete GPU Laptops Trick

Inquiring minds want to understand how to get the best graphics performance when using a multi-purpose, high-bandwidth connection. Yes, I’m talking about a Thunderbolt 4 dock (like the CalDigit TS4 or the Belkin Pro Thunderbolt 4). Turns out there’s BIOS tweak involved: it’s my “docking discrete GPU laptops trick.”

OK, What Is the Docking Discrete GPU Laptops Trick?

By default, most dual-GPU laptops run in dual or hybrid graphics mode. That is, they use the built-in GPU unless a specific application requires or prioritizes the discrete GPU. When running on battery, in fact, they only use the built-in GPU unless forced to use the discrete GPU instead, to extend runtime.

My trick comes in at the BIOS level. Thus, for example, the Lenovo P16 Mobile Workstation, has a BIOS setting under Config →  Graphics Device. It takes possible values of Hybrid Graphics (the default) or Discrete Graphics (the alternate). If you switch from the default to the alternate, the laptop always uses the discrete GPU to drive display outputs.

When using a dock, one is perforce plugged in for power (either separately, or through the dock itself, which has its own heavy-duty external power supply/brick). That means it’s safe to use the more power-hungry (but also, more capable) discrete GPU to drive two or more displays.

For Thunderbolt 4, docks are limited to a single 8K display or dual 4K displays (usually via DisplayPort, aka DP, and/or USB-C). So far, I have found this connection to work indistinguishably from my production desktop. It’s got an Nvidia RTX 3070 Ti with dual DP Dell UltraSharp 2717 2K monitors attached. The docks drive the same outputs equally well.

Uh-Oh: Must I Raise My Display Ante?

Right now, I can’t really drive the graphics end of things to the level where it would stress Thunderbolt 4. I’m wondering if that means I need to buy up, and replace my 2017 vintage monitors with something like the Dell UltraSharp U2723QE. At US$600 and up, two of those would sting the bank account a bit (its stunning display serves as the lead-in graphic for this story). But it may be time for a display refresh here at Chez Tittel, so to speak.

Let me check with “The Boss” (wife, Dina) and get back to you on that…

Facebooklinkedin
Facebooklinkedin

Flash Drive Goes Incredibly Slowly

Here’ s an interesting item. Last week, when trying to troubleshoot the graphics driver on the Lenovo P360 Ultra SFF PC, I ran into an interesting follow-on issue. I decided to copy the “old driver” file to a flash drive to take it upstairs where the unit lives (networking issues temporarily kept me from using RDP, as is my more typical practice). And gosh, I couldn’t help but notice my Mushkin Atom flash drive goes incredibly slowly when copying that 649K file.  The deets, courtesy of File Explorer, provide the lead-in graphic for this story.

If Flash Drive Goes Incredibly Slowly, Then What?

Just for grins, I plugged in an older USB3 mSATA device and copied the target file again. Despite its antique vintage (2014 or thereabouts) it beat the snot out of the flash drive. As you can see in the next screencap, it achieved a data rate of 236 MB/sec. That’s a whale of a lot faster than the paltry 12.5 MB/sec shown in the lead-in graphic.

Flash Drive Goes Incredibly Slowly.copy-speed

The SSD-based USB device is more than 18 times faster than the flash-based device. Wow!

What does this say? It says that older mSATA SSDs are worth keeping as a much speedier alternative to flash drives. Back when I bought the Sabrent enclosures in which my 3 mSATA drives are housed — I have one each 256, 512 and 1,024 MB devices — I paid US$60 or thereabouts to buy them. Now, you can pick them up at Amazon for US$14.

Flash Drive Goes Incredibly Slowly.msata-device

For US$14, you can move files around a whole lot faster!

To me, that’s money incredibly well spent, given the half-dozen or so mSATA drives I still have kicking around here. If you’ve got one or more sitting idle, this would be a smart buy for you, too.

Note Added 2 Hrs Later: Cheaper Than Flash!

You can buy a 256GB mSATA SSD for under US$30 right now. That makes the total price around US$45 for enclosure and drive. That’s about 3X what you’ll pay for a 128 GB flash drive, and less than some “faster” 256 GB flash drives cost. To me, this argues even more strongly that this is a good way to boost your USB storage arsenal without breaking the bank.

Facebooklinkedin
Facebooklinkedin

Thinking About Windows 10/11 SSDs

I’m still busy benchmarking away on the two Thunderbolt4/USB4 PCs that Lenovo has recently sent my way. But as I’ve been doing so, I’ve been thinking about Windows 10/11 SSDs in general. On that path, I’ve realized certain principles that I’d like to share with you, dear readers.

I’m spurred in part to these statements from a sponsored (and pretty contrived) story from MSPowerUser entitled “Is NVMe a Good Choice for Gamers?” My instant response, without reading the story — which actually focuses on storage media beyond the boot/system drive — was “Yes, as much as you can afford.” Spoiler alert: that’s what the story says, too.

Where Thinking About Windows 10/11 SSDs Leads….

Here are some storage media principles that flow from making the most of a new PC investment.

  1. The more you spend on a PC, the more worthwhile it is to also spend more on NVMe storage.
  2. Right now, PCIe Gen4 drives run about 2X the speed of PCIe Gen3 drives. They don’t cost quite twice as much. Simple economics says: buy the fastest NVMe technology your PC will support.
  3. Buy as much NVMe storage as you can afford (or force yourself to spend). For pre-built PCs and laptops, you may want to buy NVMe on the aftermarket, rather than get the drives pre-installed. Markup on NVMe drives can be painful. Hint: I use Tom’s Hardware to keep up with price/performance info on NVMe SSDs and other PC components (it’s also the source for the lead-in graphic for this story, which still prominently displays the now-passe Intel Optane as an SSD option. Caveat emptor!).
  4. Corollary to the preceding point: fill every M.2 slot you can in your build. For both my recent Lenovo loaners — the P360 Ultra and the P16 Mobile Workstation — that means populating both slots with up to 4TB each. Right now, the Kingston KC3000 looks like a 4TB best buy of sorts.

Thinking Further (and Outside the Box)

More thoughts in this vein, with an eye toward external drives and multi-tiered storage (archives and extra backups):

  1. If you’re going to put an NVMe SSD in an external enclosure, you will be OK for the time being in a USB 3.2 rather than a USB 4 enclosure. Right now, the newer enclosures cost more than twice as much but don’t deliver anywhere near 2x the speed (except on synthetic benchmarks — I used C: imaging times as a more reliable indicator). Over time this will no doubt change, and I’ll keep an eye on that, too.
  2. I don’t consider spinners (conventional mechanical hard disk drives, or HDDs) any more, except for archival and inactive storage. If I need something for work or play, it goes on an SSD. If I might need something, someday (or to restore same) then it’s ok on an HDD.

I used to restrain spending on NVMe SSDs because of its high price differential. I’m now inclined to believe that restraint is a false economy and forces less productivity as a result. That’s why I’m rethinking my philosophy. I haven’t quite yet gotten to Les Blanc’s famous dictum (“Spend It All”) but I am coming around to “Spend As Much as You Can”…

Remember This Fundamental Assumption, Tho…

My reasoning aims at high-end PCs where users run data-, graphics-, and/or compute-intensive workloads. It does not apply, therefore, to home, hobbyist, and low-end office users. For them typical productivity apps  (e.g. MS Office or equivalent), email, web browsing and so forth predominate. They wouldn’t need, nor benefit much from, buying lots of fast NVMe storage. That said, a 1 TB fast-as-possible NVMe for the boot/system drive is the baseline. Other storage options will balance themselves against budget to dictate other choices and PC builds for such users.

In different terms, if you’re not maxing out your PC running data analytics, 3D models and other high-end graphics rendering, or AI or machine learning stuff, this advice is most likely overkill. Too, too costly. But for this user community, more spent on NVMe (and GPUs and memory as well) will repay itself with increased productivity. ‘Nuff said.

Facebooklinkedin
Facebooklinkedin

Lenovo P16 Gen1 Gets Unboxed

Just over a month ago, I reached out to my contacts at Lenovo. I’d been wanting to lay hands on some newer PCs so I could dig into Thunderbolt 4 and USB 4 to understand its workings. A couple of weeks ago, I received a P360 Ultra SFF PC equipped with 2 each TB4/USB4 ports. Last Friday, unannounced and unexpected, another so-endowed laptop arrived at my door. Here, I’ll report on my initial findings as this Lenovo P16 Gen1 gets unboxed and set up. It’s a doozy!

Details: Lenovo P16 Gen1 Gets Unboxed

I’ll provide a recitation of facts and figures for this powerful portable workstation PC. In fact, it’s the most expensive personal computer I’ve ever worked on. Indeed, its website price, as configured, is a staggering US$9,719! It’s a big heavy sucker, too: 30.23mm x 364mm x 266mm / 1.2″ x 14.3″ x 10.5″, and 6.6 lbs/3.0 kg.

Here’s a selective list of what’s inside this beast of a Widows 11 Pro laptop. (Find all details on its product page under “Tech Specs”):

CPU: i9-12950HX (16 cores, 24 threads)
RAM: 128 GB (4 x 32GB  4800 MHz DDR5)
GPU (built-in): Intel UHD 770
GPU (discrete): Nvidia RTX A5500 (16 GB VRAM)
Display: 16.0″ WQUXGA (3840×2400) OLED touchscreen
SSD: 2 TB Kioxia KXG7APNV2T04 (PCIe 4.0 Gen4 NVMe)
Biometrics: Fingerprint reader and Hello IR Camera

As cool and impressive as all this stuff is — and it is all that for sure — the real reason I’m using this monster appears in the next image, enumerating the unit’s various ports:

My real reason for using this laptop is item 10, boxed in red.
[Click image for full-sized view.]

I’m jazzed, of course, by the panoply of features and stuff on this giant luggable PC. But I’m most interested in working with its two rear USB-C ports, both of which support Thunderbolt4 and USB4. And indeed, I’ve confirmed that both work as claimed. That’s not always the easiest or most obvious thing, as I’ll explain next.

Getting to TB4/USB4

As I’m learning, it takes some diligence to get either or both of these fast bus technologies to work. The PC port has to support these technologies, as does the target device, and the cable between the two. This is not always the easiest thing in the word to ensure or arrange. But as the following screenshot shows, I’ve gotten both working on the ThinkPad P16 Gen1 Mobile Workstation:

Intel TB Control Center: Above, the CalDigit TS4 dock; Below: an NVMe drive inside the Konyead USB4 enclosure.
[Click image for full-sized view.]

Both TB4 and USB4 remain cutting edge connection types. Everything about them is expensive right now. The CalDigit TS4 dock goes for over US$350 when you can find one for sale. The Konyead M.2 USB4 enclosure costs US$130, which is about what I paid for the Sabrent 1TB Rocket 4 Plus I put inside.

And then, one MUST use TB4/USB4 cables which aren’t cheap either (I got mine with the CalDigit) but they routinely go for US$20-40 for 1 M. Cables are not always well-labeled. It’s a good idea to go for those explicitly specced out for 40Gpbs data and marked as such. I’ve had lots of interesting issues from using lower-spec cables. Mostly, USB4/TB4 simply doesn’t work as promised and the device drops to UASP/USB 3.1/2 levels of performance.

Tomorrow, I’ll follow up and explain what all that means… Stay tuned!

Facebooklinkedin
Facebooklinkedin

Backblaze Data Confirms SSD Trumps HDD Reliability

It’s always made sense on an intuitive basis. Hard Disk Drives (HDDs) include spinning platters, moving arms with read/write heads, motors to power things, and gears to control action. SDDs are made entirely of circuitry: no moving parts. Thus, it’s compelling to assert that SDDs should be more reliable, and less prone to failure than HDDS. And indeed, the latest 2022 Drive State report from online backup and storage provider Backblaze weighs in on this topic. As I read it, that Backblaze data confirms SSD trumps HDD reliability.

The lead-in graphic shows 4 years’ worth of SSD data vs. 8 years for HDDs for boot drivers in their thousands of datacenter based servers. Whereas there’s a dramatic upward knee in the curve for HDDS between years 4 and 5 (from 1.83% to 3.55%), failures actually dipped for SDDs during that interval (from 1.05% to 0.95%). Interesting!

How Backblaze Data Confirms SSD Trumps HDD Reliability

The afore-linked report explains that boot drives function in multiple roles on the company’s plethora of storage servers. They store log and temprorary files; they maintain storage holdings based on each day’s storage activities and volume. The disparity in the number of years for which data is available comes from later adoption of SDDs as boot drives at BackBlaze. That practice started in Q4 2018. Today, all new servers boot from SSDs; older servers whose HDD boot drives fail get SSD replacements.

The numbers of SSDs keep going up, too. The end-of-year 2021 SSD report encompassed 2,200 SSDs. By June 30, 2022, that count grew to 2,558. Failure rates for such devices show much lower numbers than for HDD (see the tables labeled Backblaze SSD Quarterly Failure Rates in the latest report for more detail). Models included come from the following vendors: Crucial, Dell, Micron, Seagate and WDC.

Note: the report itself says:

For any given drive model in this cohort of SSDs, we like to see at least 100 drives and 10,000 drive-days in a given quarter as a minimum before we begin to consider the calculated AFR to be “reasonable”.

The real news, of course, is that quarterly, annualized and lifetime failure rates for SSDs are significantly lower than for HDDs, based on Backblaze’s own long-running data collection. Thus their conclusion comes with the weight of evidence “…we can reasonably claim that SSDs are more reliable than HDDs, at least when used as boot drives in our environment.”

Good stuff! As for me, I like SSDs not just because they’re less prone to failure. They’re also FAST, if more expensive per storage unit than spinners.


Facebooklinkedin
Facebooklinkedin